Invoice Browser
- Thomas Sherman (Deactivated)
- Shivam (Deactivated)
The Invoice Browser displays all your existing invoices and is where you go to create new invoices. In addition to browsing your invoices you can make bulk modifications to invoices like issue, void, mark paid or upload to the web. For easy to read introductions on common invoice actions please try our invoicing how-to guide.
The Topic of the Day: Invoicing webinar is a great resource to learn all about creating invoices on Projector Management Portal.
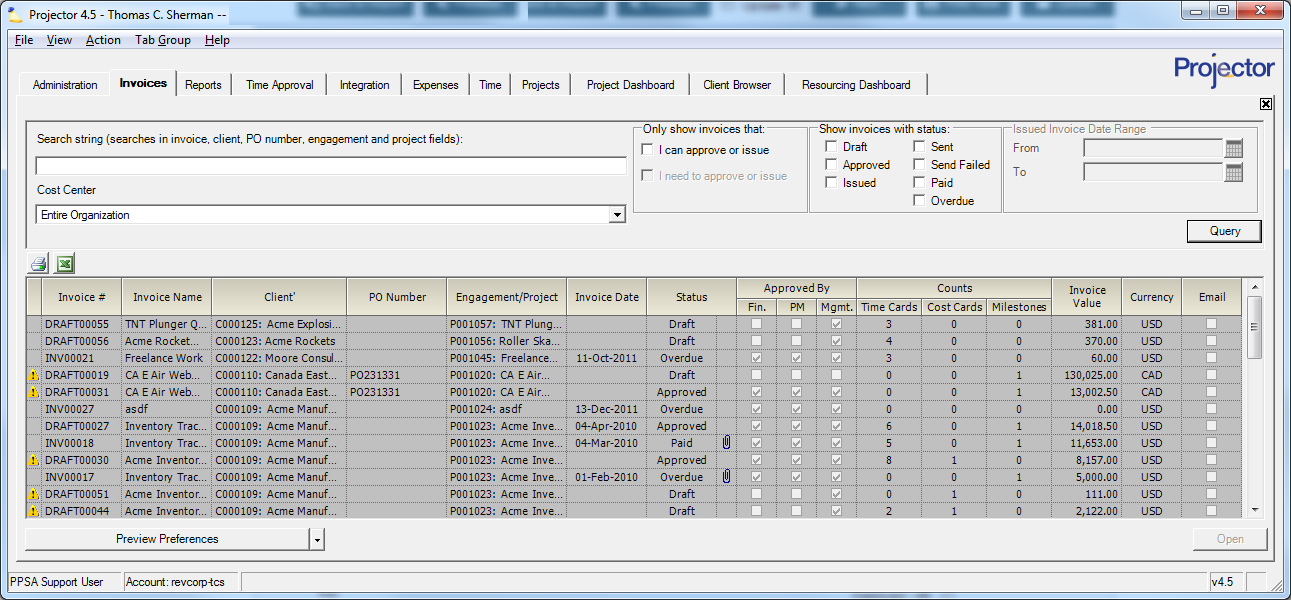 (click to enlarge)The invoice browser is reached by choosing View | Invoicing.
Permissions and Settings
To create an invoice you must have:
- The cost center permission Create and Approve Invoices
- Be a project manager and have the system setting PMs Can Create Invoices enabled
To issue an invoice you must have:
- The cost center permission Create and Approve Invoices for all engagements on the invoice
- The installation setting PM Can Issue Invoices enabled and the PM is the PM for all projects on the invoice
To void an invoice there must be an accounting period open for AR that is on or after the invoice's invoice date. In the event that the invoice's original AR period is now closed, it will hit the first open AR period after that. Note that the invoice date is different from the issue date. You can specify whatever issue date you like. In addition you will need the same permissions as someone who can issue an invoice.
Searching for Invoices
Invoices are only shown after you have run a search query See the table below for important information about which fields are searched.
Control | Description |
|---|---|
Search string | Quickly find invoices by typing in a search query. This returns results from the invoice, client, engagement, purchase order and project fields.
|
Cost Center | Open the drop-down menu to choose from the tree of cost centers created for your organization. |
Only show invoices that |
|
Show invoices with status | Each invoice can have exactly one of seven status'. They are Draft, Approved, Issued, Sent, Send Failed, Paid, and Overdue. An invoice typically follows this exact order during its lifecycle. Please see the Invoice Status section below for more details. |
Date Range | All issued invoices have dates. Draft and Approved invoices will only have a date if you have set one.
|
Search Results
Each invoice returned from a search is described by the following columns.
Results | Description |
|---|---|
Invoice # | The invoice number is usually assigned automatically. Each time an invoice is issued, it uses an incrementally larger number. For example, INV00111, INV00112, INV00113. You can optionally enter your own invoice numbers manually. Duplicate invoice numbers are allowed, but not necessarily recommended, especially if you have an accounting integration. Invoices with the same number can cause confusion. Rather, try appending -R1 or -R2 to the original invoice number to indicate which re-issue this is. For more information on invoice numbering see Number Customization. |
Invoice Name | A default name is created when an invoice is generated. They can be renamed using the Invoice Editor. |
Client | The client expected to pay the invoice |
PO Number | PO numbers can be manually entered through the Invoice Editor or inherited from Engagement or the Client |
Engagement/Project | The engagement or project code depending on whether this is an engagement level or project level invoice. If this invoice spans multiple engagements then (Multiple Engagements) is displayed. The level of invoicing is determined by the client. |
Invoice Date | The date of the Invoice. This date is used to determine the accounting period that the invoice transaction will be placed in when it is queued for transmission to the accounting system. This date is also used as the start date for payment terms, such as net 30. For draft invoices this value may be blank, but all issued invoices must have a date. |
Status | The current status of the invoice: Draft, Approved, or Issued. See the Invoice Status section below for more information. If the column contains the paperclip icon ( |
Approved By | Indicates which approvals have been given to the invoice, based on a checked or unchecked status in the areas of Finance, PM, Mgmt. |
Counts | The current number of time cards, cost cards and milestones on this invoice |
Invoice Value | The amount that the client is expected to pay. This column is not sortable because invoices can be in different currencies. |
Currency | The currency the client is billed in |
Invoice Status
An invoice is always in one of the following status'. An invoice typically flows from Draft -> Approved -> Issued -> Sent -> Paid.
Status | Description |
|---|---|
Draft | A draft invoice is available for editing. Time cards, cost cards and milestones can be added or removed. Adjustments and transfers made. |
Approved | Once a draft invoice has been approved it becomes approved. At this point adjustments can still be made, but they could trigger the invoice to go back into draft mode until the adjustments are reapproved. |
Issued | Approved invoices can then be issued. See the issuing invoices section below for more information. Once issued, an invoice is locked from any further changes. It can now be transmitted to the client and the accounts receivable system. |
Sent | An email has been sent to the client |
Send Failed | Projector encountered an error trying to send the email. See the Invoice Editor MP - Distribution Tab for the error details. |
Paid | An issued invoice can be marked paid. This is informational only and will not generate AR or GL transactions. |
Overdue | The invoice has not yet been marked paid, but is beyond the invoice payment terms. |
If you issue an invoice, but later on discover that modifications are still needed, you can void it. See the voiding an invoice section below for more information. Once voided the invoice returns to the approved status. Additional adjustments or other changes can be made to the invoice or it may be deleted. Deleting an invoice simply deletes any pending adjustments and makes time and cost cards available for inclusion on other invoices.
Creating Invoices
New
An invoice consists of time, expenses and milestones. You may create a new invoice by clicking Create Invoices from the multi-select dropdown list. Read our Create Invoice / Credit Memo how-to for an introduction to creating invoices.
Blank
Blank invoices contain no time cards and no cost cards. They are often used for pre-billing retainers and issuing credit memos to clients. From the multi-select dropdown click Create Blank Invoices or Credit Memos.
Credit Memos
Credit memos are a means through which you can credit moneys back to a customer. They are often used to refund specific time or cost card, or to issue a generic credit. From the multi-select dropdown and click Create Blank Invoices or Credit Memos. Read our When to Use a Credit Memo How-To for an introduction to creating credit memos.
Opening Invoices for Editing
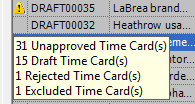
Double click on an invoice to open the Invoice Editor MP. You may see an alert icon (  ) in the first column of the invoice browser. This indicates that there are time or cost cards not on this invoice, but could be. You should make sure that you are not forgetting to include these cards by mistake.
Hover your mouse over the alert icon to see a tool tip with a roll up of the missing cards.
When you open the invoice one or both of the following warning messages are displayed.
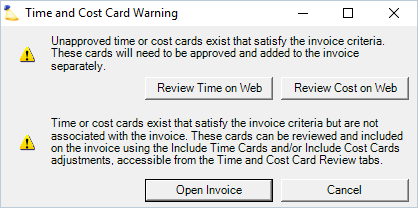
The first message – Unapproved time or cost cards exist that satisfy the invoice criteria. These cards will need to be approved and added to the invoice separately. – indicates that there is a time or cost card out there that is in a draft state. If it were to be submitted and approved it could be included on this invoice. This may happen if a resource forgets to submit their time or expense report. Click on Review Time on Web or Review Cost on Web to see the cards in question. You can then review and approve them if they need to be included on this invoice.
The second message - Time or cost cards exist that satisfy the invoice criteria but are not associated with the invoice. These cards can be reviewed and included on the invoice using the Include Time Cards and or Include Cost Card adjustments, accessible from the Time and Cost Card Review tabs. -
Issuing
Issue an invoice from this screen by right clicking the invoice and choosing Issue. You can also issue an invoice from the Invoice Editor MP by clicking Save and Issue. An invoice cannot be issued until all of its adjustments have been approved. Once issued it is locked down. No further modifications can be made. To make additional adjustments the invoice will first need to be voided. See the voiding invoices section below. For users integrated with an accounting system, on issue the transactions are transmitted to the accounts receivable system.
Try reading our Issue Invoice / Credit Memo how-to.
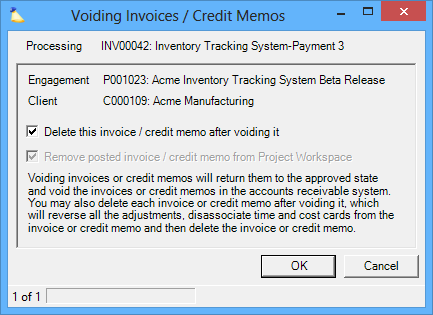
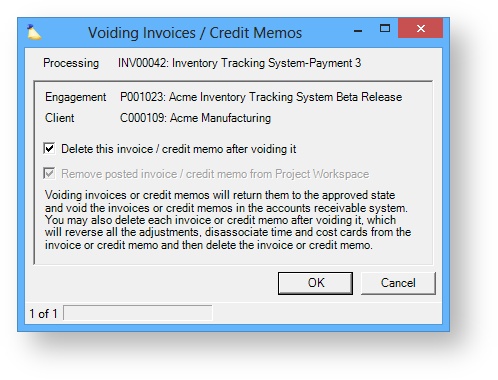
Voiding
The only way to alter or modify an issued invoice is to void it. Voiding moves the invoice from the Issued status back to Approved status, where it may be edited or deleted. Void an invoice by right clicking it and choosing Void. You may recall that when making changes to an invoice, for example write-downs, the changes are not considered 'real' by Projector until the invoice is actually issued. Voiding reverses out these adjustments and creates a transaction for the accounting system that reverses out the effect of the issue transaction.
Voiding can be preferable to deleting because it maintains the invoice history. For example, say you have DRAFT0005. You write down a few time cards and issue it. Later you realize you need to make some additional changes. So you void the invoice. All your original changes are preserved. If you had deleted the invoice you would need to recreate all your changes.
Voiding also allows you to search on the invoices name at any point in its history. For example, the following workflow is typical
- An invoice is created as DRAFT0005
- The invoice is issued as INV0003
- The invoice is voided for some changes
- The invoice is reissued as INV0003-A
Searching for any of the invoice names (DRAFT0005, INV0003, INV0003-A) will all return the same invoice. Now if a client asked a question about a voided invoice number, you will be able to figure out where it came from. If you had deleted the invoice, you would have no idea what it referenced other than what was on the hard copy.
Deleting
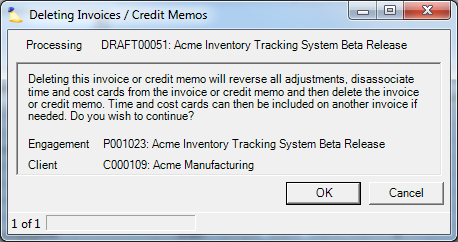
You may only delete an invoice that is in Draft or Approved status. Invoices that have been Issued must first be voided before they can be deleted. To delete, right click the invoice and choose Delete. You will be prompted by the following confirmation dialog prior to deletion.
Emailing
Email an invoice to your client by right clicking and on it and choosing Send E-mails. Only invoices that have the E-mail and checkbox ticked on the Invoice Editor MP - Distribution Tab have this option available. The following dialog is displayed.
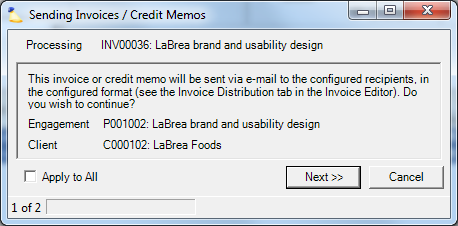
If you have selected only one invoice to email, click OK to send it. If you have selected multiple invoices then click Next to email the current invoice or Apply to all and Next to email all the invoices.
Batch Processing of Invoices
You may multi-select invoices and perform the following actions on multiple invoices at the same time:
- Issuing invoices
- Voiding invoices
- Posting/recalling invoices from respective project workspaces
- Mark invoices as paid
- E-mail Issued Invoices
To multi-select invoices, use your keyboard's ctrl or shift keys. Hold down the ctrl key and click on each invoice you want to print. You can also use the shift key to select ranges of invoices.
Viewing Receipts
For each expense item on an invoice there might be attached receipts. Display the receipts by right-clicking the invoice and choosing the View Receipts option. This will open a new web page displaying invoice and client information along with an area showing all receipts and notes. From this popup you can print the receipts.
Previewing and Saving
Preview an invoice in PDF format by right clicking the invoice and choosing Preview. From here you can choose to open the PDF immediately or save it to disk. If you have chosen multiple invoices to preview at one time then only saving is an option.
Marking as Paid or Unpaid
You may mark an invoice as Paid or Unpaid by right clicking the invoice and choosing either Mark as Paid or Mark as Unpaid.
Posting Invoices to the Web
Projector provides the ability for you to upload invoices to the Project Web. You may upload additional versions of the invoice, add support documents such as statement of work and receipts, and include relevant links as references. These operations are further described in the Workspace Invoices docs.
Multi-Project Invoices
When you upload an invoice there will be one copy attached to every project on the invoice. This is because invoices can be multi-project if they are done at the Client, PO, or Engagement level.
Uploading an Invoice
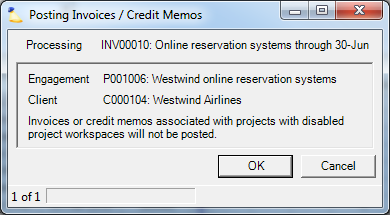
To upload a copy of the invoice to the project workspace, right click the invoice and choose Upload Invoice.
The following confirmation dialog is displayed. Click the OK button to upload the invoice. You may press the Cancel button at any time to stop the upload for all invoices.
After uploading, a paperclip (  ) will appear in the Status column of the browser.
Removing an Uploaded Invoice
If an invoice that has been uploaded to a Project Workspace needs to be removed (either due to a new invoice, a voided invoice, or a decision to not let the client view the invoice), you can remove the invoice from the Project Workspace. In doing so, the invoice will not be changed, but will just no longer be accessible in the Project Workspace. Note that removing an invoice does not only remove the invoice itself from the Project Workspace, but it also entirely removes that invoice's folder. In turn, all support documents uploaded to that folder, such as receipts and contracts, will also be deleted. It is recommended that you use caution in removing invoices. If your intent is only to remove the invoice itself from the Project Workspace, and not the support documents, you may simply delete the invoice (only) from view without deleting the entire folder. This operation and many more are further described in the /wiki/spaces/docworkspace/pages/10331054.
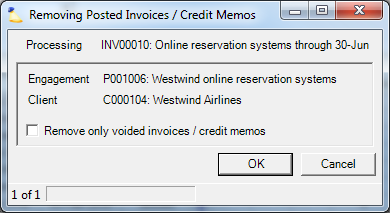
To remove an invoice right click the invoice and choose Remove Posted Invoice.
The following confirmation dialog is shown. Check the Remove only voided invoices / credit memos checkbox as necessary. Press OK to remove the invoices or press Cancel button to stop the removal for all invoices.