Expense Entry
- Thomas Sherman (Deactivated)
- Shivam (Deactivated)
Expense entry is where you enter expenses against a project These costs could be paid by you, paid by a company credit card, or paid from a cash advance. Each cost you enter is called a cost card in Projector. You then submit the cards for approval by your organization. The typical workflow for cost entry is:
- Select the week when the costs were incurred
- Find the project the expense goes against
- Select the type of cost (airfare, meals, etc)
- Enter the amount of the cost
- Enter additional details like location or exchange rate
- Optionally attach receipts
- Submit the cost for approval
Single-currency tutorial
Multi-currency tutorial
Permissions and Settings
The following permissions are for Projector Administrators, Engagement Managers, or Project Managers. If you are only here for expense entry, then these settings are probably not very interesting to you.
To access expense entry you must either be
- A resource (enter expenses for yourself)
- A user with the cost center permission View Resource/Disbursed Expense Reports (enter expenses for groups of other people)
- Be the cost entry delegate on a resource's profile (enter cost on behalf of a specific person. Often used by administrative staff to enter expenses for C-level executives)
An expense report's currency is determined by the company assigned to the resource's cost center at the time of the ER's creation.
You can enter expenses for other people in your organization if you have the cost center permission Maintain Expenses.
Expenses can only be entered for projects that are open for expense entry. A project is considered open if the Open for Cost checkbox is ticked on the Project Info Tab.
Some projects limit expense entry to those assigned to the project. This is controlled by the Only allow booked resources to report expenses to project checkbox on the Project Info Tab.
Once an expense report is completely approved to pay, you can no longer add new cost cards.
If you are using Projector's accounting module, then the period must also be open for cost.
To upload receipt documents the document storage module must be enabled.
A large number of additional expense entry related settings can be found on the System Settings Editor Cost Tab.
Location can be required on a cost card. A list of locations and whether they can be used for expense entry are found in the Location and Holiday Editor.
When entering expenses, we remember the last cost card's details and duplicate them. For example, if you create a cost card for location Germany and set the currency to Euros, when you create your next time card we'll default to those same settings. This stickiness lasts until you leave expense entry or refresh the expense entry page. "Sticky" fields include Paid By, Location, and Currency.
Mileage reimbursement rates are driven by the resource's location. You can also set a location on a where a cost was incurred, but it does not impact mileage rates.
Mileage distance units can be miles or kilometers. The unit chosen is determined by your resource's location.
Projector does not allow the upload of Portfolio PDF files. A portfolio is multiple PDF files combined into a single document. We disallow them because the PDF rendering engine cannot handle this file format.
Page Header
The header contains top level actions for the page and displays notifications. From here you will specify the week, add projects, save, submit, and view warnings or alerts.

Expenses for
Enter the expense report name here.

Expense Report Details
Details about this expense report are shown just under the name.

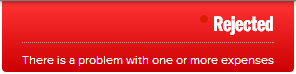
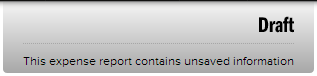
Expense Report Status
The upper right contains a status window about the current invoice. The color indicates whether the report is approved, rejected, or draft/submitted.


 0
0
Navigating Weeks
By default a new expense report defaults to the current week. Click on Add a Week to add additional weeks. Each additional week is added to the list. The current week is highlighted in gray.

Save
The Save button is available whenever a change has been made to the current expense report. In addition, navigating away from the current week by using the calendar will automatically save any pending changes. Saved changes are not submitted.

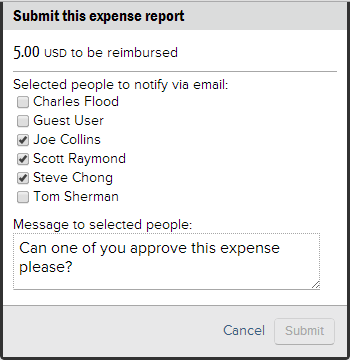
Submit
The Submit button checks in all cost cards so that they can go through your organization's approval process. Even after submitting you can still edit the cards as long as they are not approved. Once approved you can no longer edit the a card. An approved card has the symbol  .
.

When you submit an expense report, you'll be prompted to notify potential approvers. Tick the checkbox next to each person that you would like an email sent to.
Week Header
The week across the top shows the total of all cost cards on that day. If any cost cards are rejected then the day and hours display in red.

The Net Due area shows the amount you can be reimbursed for this week. Cash advances and company paid expenses are not included in this amount.
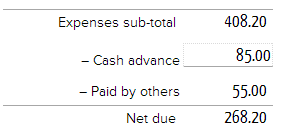
Subtotals
The subtotals section shows the gross amount of your expenses, the amount covered by a cash advance, the amount covered by company paid credit cards, and the net amount you will be reimbursed.
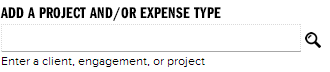
Add Project / Expense Type
The search field is how you will add projects and expense types to your expense report screen.
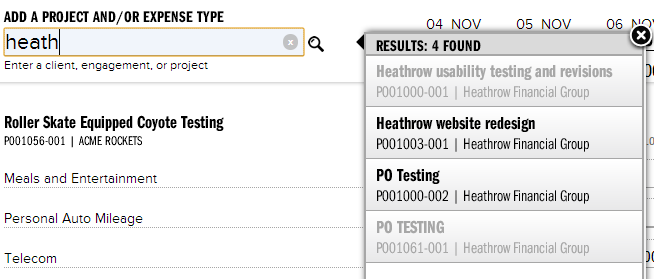
Clicking in the search field displays a list of your most recently used projects. In addition you can search by typing in a client, engagement or project name.
- Clicking in the search field displays a list of projects you've used recently.
- Typing a character initiates a search after a brief pause. Pressing Enter immediately initiates the search.
- Unavailable projects are shown grayed out. Hovering over the unavailable project presents a tooltip for the reason why.
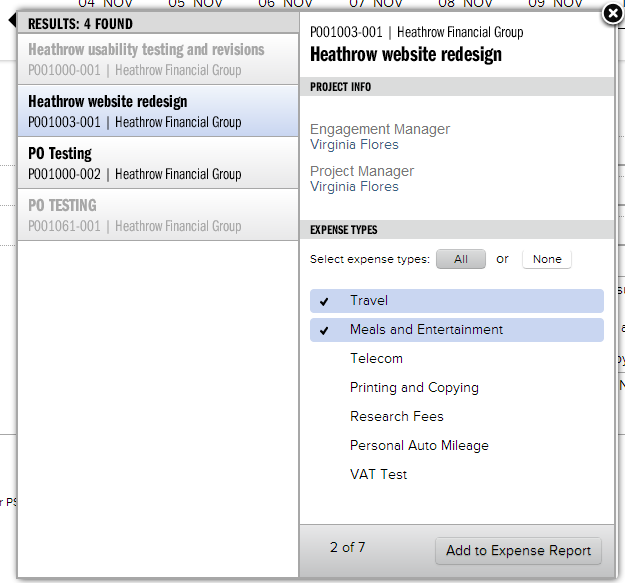
Click on a project to view its details.
Finally select the expense types you need to enter costs against. You can select multiple types if you wish. I the expense type is grayed out then it has already been added to your expense report.
Cost Entry Grid
The cost entry grid is where you type in your expenses. The grid is grouped by project, with a row for each expense type. In the example below you can see one project with three expense types underneath it. If you have multiple expenses for a single day, then a green bubble indicates the number of cost cards (  ) . To enter an expense, click in a cell for the appropriate day of the week and expense type.

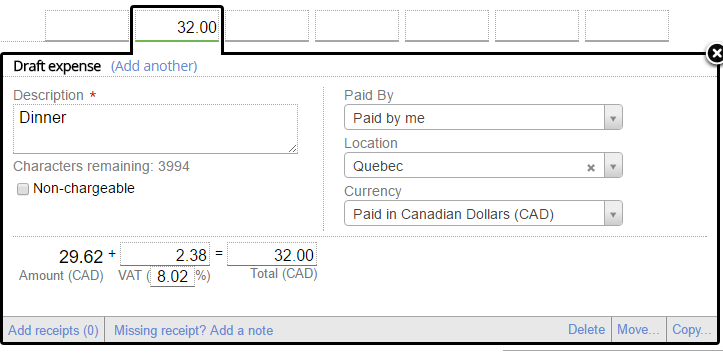
A popover appears for you to enter your expenses for that day.

Control | Description |
|---|---|
Amount | Enter the amount of the expense |
Description | Enter up to 4,000 characters |
Optional Fields | Your installation may be set up with optional fields. In the screenshot above there is a custom field called Expense With. These are configured using the User Defined Fields Editor. Character limit on text UDFs is 255 characters. |
Location | Enter the location of the expense. If your installation has only one location or no locations then you will not see this field. The location you choose plus the expense type chosen sets the default VAT %. For example, meals in Quebec incur VAT at 8.02%. Locations are maintained on the Location and Holiday Editor. Set default VAT % from the Expense Type Editor. |
Paid By | Who paid for the expense. Defaults to Paid by me. If this expense was paid via cash advance, then you should still choose Paid by me. This list can also include company credit cards. Company credit cards are managed in the Vendor Editor. You can only see vendors that are in the same company as the resource. |
Currency | The currency of the expense. If the incurred currency differs from the default, then choose the correct currency from the dropdown list (all international currencies as defined by ISO 4217 standard). If an exchange rate for that currency is already defined then it will automatically populate. Or, if your installation has enabled the use of XE.com those fx rates will be used to convert the incurred cost and the exchange rate will be populated by XE. You may override the exchange rate if you believe it is appropriate to do so. |
Add another expense | Click on this button to add another cost card to the same day. The green |
Add receipts | Click Browse to find an expense on your computer. Or drag and drop an expense into the receipts area. See the adding receipts section of this help document for more information. |
Add a note | Sometimes you might not have a receipt. In this case you should add a note instead. |
Delete | Delete the current cost card. Approved cost cards cannot be deleted. You will need to ask your manager to unapprove the cost card before deletion is possible. |
Move | This pops up a calendar control. Select the day that you want to move the cost card to. |
Copy | This pops up a calendar control. Select the day that you want to copy the cost card to. |
FX Rates
If you incur an expense in a foreign currency, then FX rates are used to convert the value to your home currency.
The cell at the top of the cost card is what you will receive in your native currency.
The cell at the bottom left of the cost card is your receipt value.
When you enter only one of the amount fields, we attempt to guess the other value based on your installation's FX settings. If the FX guess is wrong, correct the amounts. If you know your FX rate and want to lock it in, simply click the lock icon (![]() ).
).

VAT
If your resource is part of a VAT enabled company then you will see a VAT field. Notify your administrator if you think you should have access to the VAT field.
The default VAT percentage is determined by the Location you choose plus the Expense Type. For example, in Quebec meals have an 8.02% VAT rate. If the VAT rate Projector picks is incorrect, change the VAT amount to the correct value. The rate will be automatically updated.
Receipts
If your installation has receipts enabled, then you can attach receipts to either the entire expense report or to individual cost cards. The differentiation is important because what functions are available depends on what type of receipt you attach.
Whole ER Receipt
To attach an expense report to the entire report, click the Show button in the page footer.

The following popup appears.
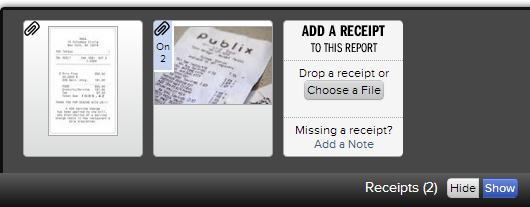
Click the Choose a File button and browse for one on your computer. Or you can drag and drop a file into the Add a Receipt area (drag and drop is not supported by IE9).
Cost Card Receipt
Receipts can also be attached to individual cost cards if your installation allows it. Click on a cost card then click Add Receipts. A menu slides out to the left with all the receipts attached to this cost card. You can drag and drop the receipt from this cost card to another one. This increments the On # field shown in the screenshot below. This is useful for receipts that cover multiple expense types. For example, you might have a receipt that contains a hotel room, lunch at the hotel, and an expense that cannot be charged to the client from the hotel bar. You would enter three separate expenses, and associate the same receipt with each one.
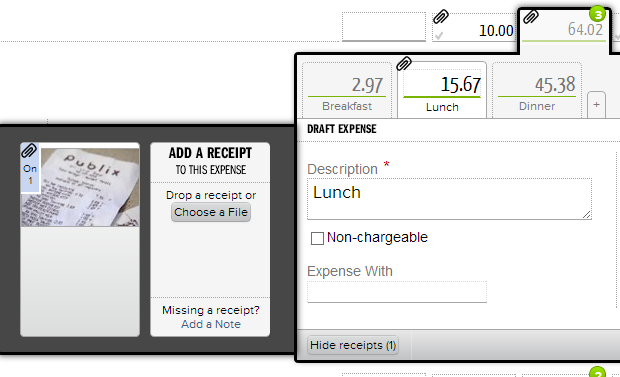
Once a receipt is attached to an individual cost card, a paperclip icon appears on its cell.

Supported Attachment Types
You can upload pretty much any file type, but only some file types can be previewed in our website. Unsupported file types are things like .exe files or things that may get blocked by our firewall, like SQL code. Previews only show the first page of multi-page PDFs. To view the entire PDF you should download it to your system again using the Actions section, discussed next. Previews are supported for:
- PDF (except Portfolio PDFs)
- BMP
- GIF
- JPG
- JPEG
- JPE
- PNG
Receipt Actions
If you hover over a receipt, a Note and Action menu is shown.

A note is a message directly related to the receipt. This is useful for whole expense report receipts that are not associated with individual cost cards. Use the note to provide some information about which cost card it is for. You can also add notes to individual cost card receipts, but it is less common.
The action menu provides the following functions.
Action | Description |
|---|---|
Show info | If the receipt is on an individual cost card, show the associated date, expense type and amount of the cost card. |
Remove receipt | Removes the receipt. Click Save to finalize this change. |
Move to report | If the receipt is associated with an individual cost card, associate it with the entire expense report instead. |
View/Download | The receipt file is opened or downloaded - the action is dependent upon your browser and its settings. |
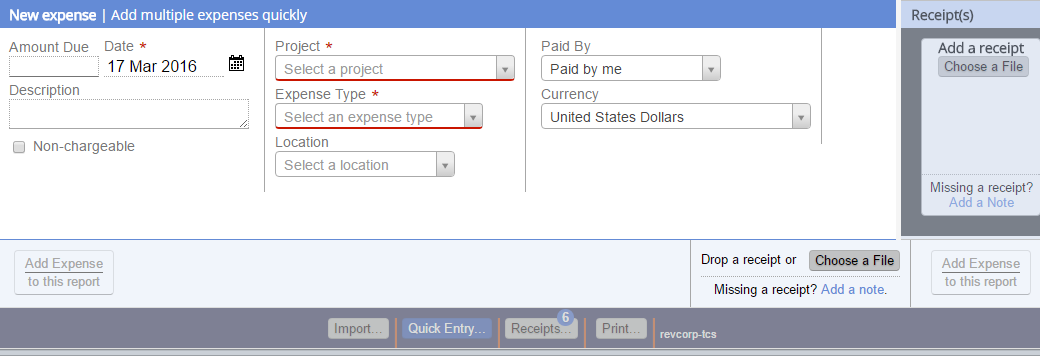
Quick Entry
Some users prefer to enter there expenses through a simple static interface rather than through the cost card grid. This may be especially true if you are entering expenses from a large date range and you don't want to navigate from week-to-week. In this case we offer an interface called Quick Entry. The simple interface lets you quickly tab through all fields, enter your data, and press enter to create the cost card.
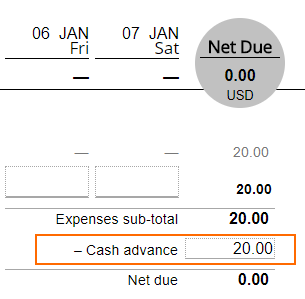
Cash Advances
If you received a cash advance then enter it in the Cash Advance box. You will be reimbursed the net of your incurred expenses and advanced monies.
You cannot enter a greater cash advance than the incurred amounts on your expense report. For example, if you have $100 of expenses, cash advance values between 0 and 100 are allowed.
Expense Import
Projector can bulk import your expenses. See Expense Import to learn how.
Printing
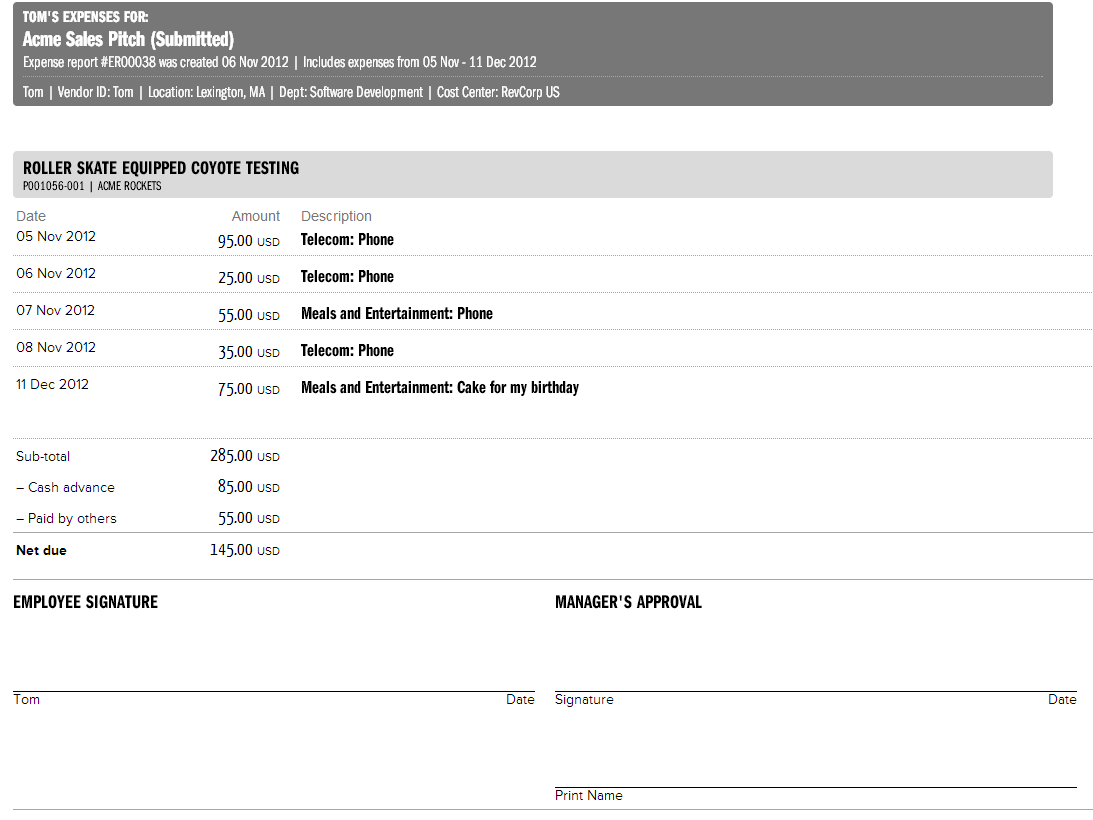
On the page footer click the button View to see a printable version of your expense report.
The printable version contains all of your expenses, your reimbursement total, and fields for employee and manager approvals. Click on the thumbnail below to expand.
Payment Received
Expense reports that have been approved for reimbursement to you are marked Approved to Pay. Underneath are checkboxes for each amount that was sent to you. Tick the checkbox when you have received the money. This checkbox is for informational purposes only.
