Enter Time
- Thomas Sherman (Deactivated)
- Chris McFarlane (Deactivated)
- Micah Algie
Time entry is where you enter time against a project. Each block of time you enter is called a time card in Projector. The entered time can then be processed by your organization, whether that be for approval, rejection or charging to a client. The typical workflow for time entry is:
- Select the week when the time was worked
- Find the project the time goes against
- Select the type of work performed
- Enter the amount of time worked
- Enter additional details like location or a description
- Submit the time for approval
Time entry is accessible at this link: https://app4.projectorpsa.com/timesheet and through our Slack<>Projector integration.
Tutorial on entering time
Adding Projects and Task to your Timesheet
Permissions and Settings
The following permissions can only be modified by Administrators, Engagement Managers, or Project Managers. If you are only here for time entry, then these settings are probably not very interesting to you.
To access time entry in Projector Web you must have at least one of these permissions:
- Have a resource profile and user profile (enter time for yourself)
- Have the cost center permission Maintain Time (view and enter time for groups of users)
- Have the cost center permission View Resource Time (view timesheets only)
- Be the time entry delegate on a resource's profile (enter time on behalf of a specific person)
Location can be required on a time card. A list of locations and whether they can be used for time entry are found in the Location and Holiday Editor.
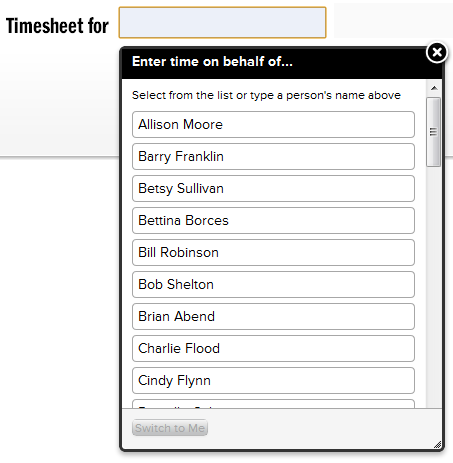
You can enter time for other people in your organization if you have the cost center permission Maintain Time or you are the time entry delegate for a resource.
Time can only be entered for projects that are open for time entry. A project is open if the Open for Time checkbox is ticked on the Project Info Tab.
Some projects limit time entry to those assigned to the project. This is controlled by the Allow Resources radio boxes found on the Project Info Tab.
If you are using Projector's accounting module, then the period must also be open for time.
A large number of time entry related settings can be found on the System Settings Editor Time Tab.
If you are on IE or Safari we allow a maximum of 100 time entry rows. When you exceed 100, we collapse the rows for performance reasons. If you need access to more rows, you can use Chrome or Firefox which ups the cap to 450.
When entering time, some fields are "sticky." Meaning, when you set a value we remember it for the next time card you create. Stickiness lasts until you leave time entry or refresh the time entry page. The following fields are sticky:
- Location
- Rate Type
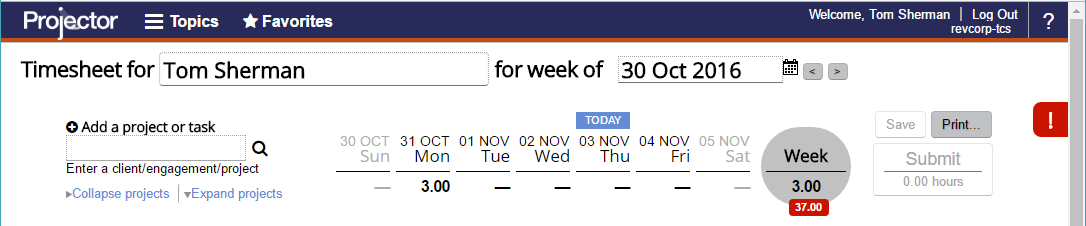
Page Header
The header contains top level actions for the page and displays notifications. From here you will specify the week, add projects for time entry, print save or submit, and view warnings or alerts.
Timesheet For
The top left Timesheet for shows who time is being entered for.

If you have the cost center permission Maintain Time then click on this field to impersonate another user.
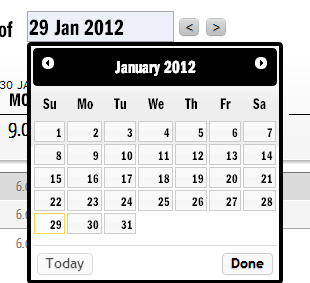
Calendar
Click on the calendar control to choose the week you worked. You can use the left and right arrows to move between weeks. When you switch between weeks Projector will automatically save any changes that you have made.
Default Projects
By default your project list contains
- projects or tasks that you are scheduled on for that week
- projects you added by searching for them
If you are descheduled from a project it is automatically removed from your timesheet. Projects you add by searching remain on your timesheet until you trash them (see Trash section of this page for more details).
The behavior of how added or removed tasks are memorized on time sheets can be modified in Account Settings.
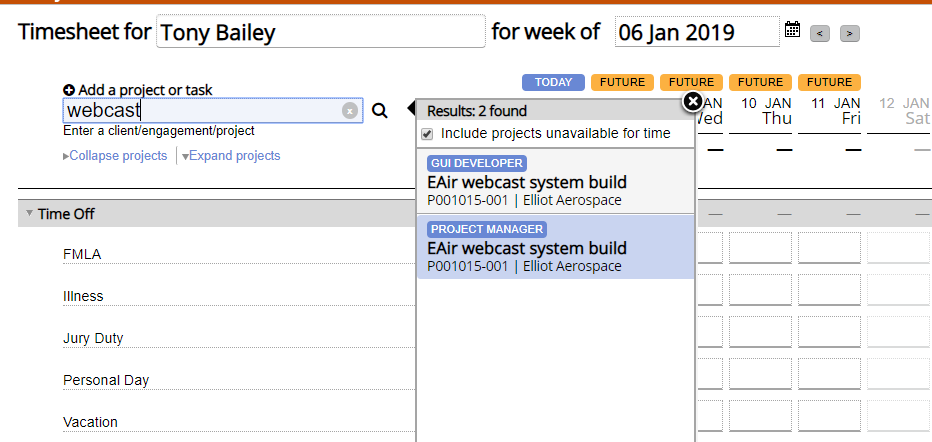
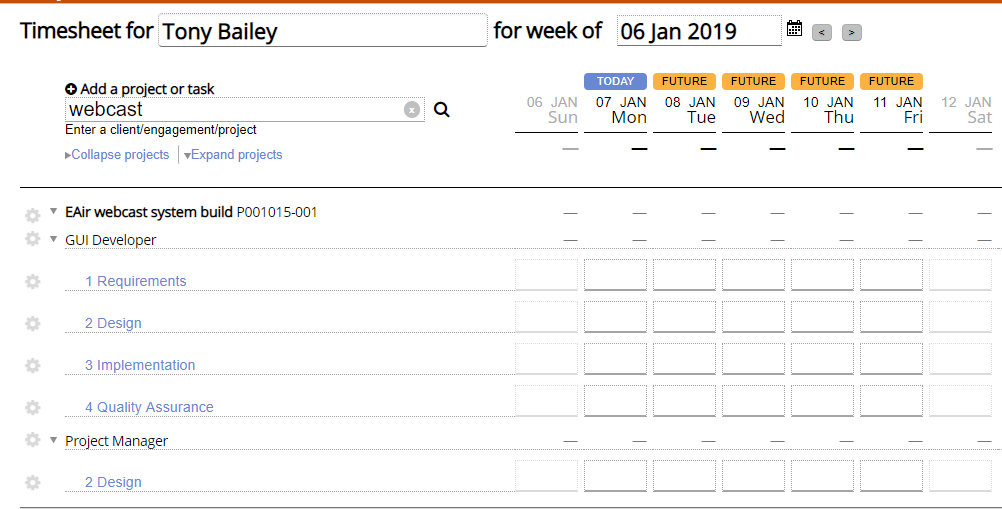
Add a Project or Task
Clicking in the Add project or Task field will display a list of most recently used projects. In addition you can type in a client, engagement or project name to search all projects.
- Clicking in the search field displays a list of projects you've used recently.
- Typing a character initiates a search after a brief pause. Pressing Enter immediately initiates the search.
- Unavailable projects are shown grayed out. Hovering over the unavailable project presents a tooltip for the reason why.
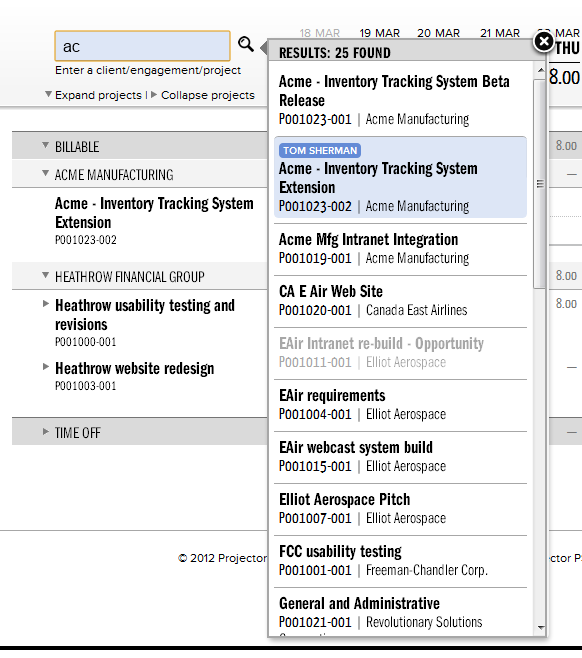
By clicking on a project in the results list additional information about that project is displayed.
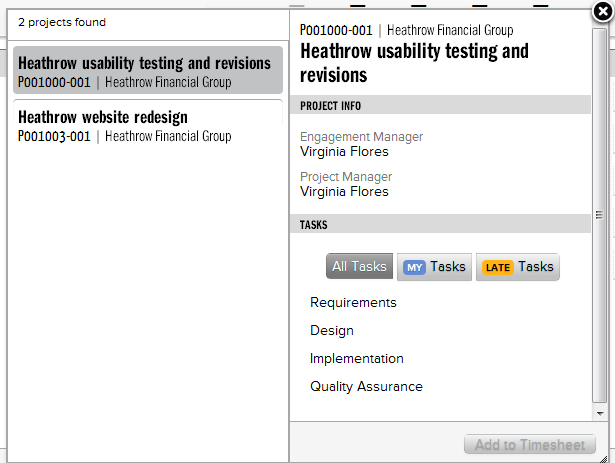
If you are assigned to more than one role on a particular project, then you'll see tasks for both roles.
Each task available for time entry is shown. Select all tasks for which you wish to enter time and choose the Add to Timesheet button.
If the desired project has only one task or task type available you will not see the individual task/task type displayed. Click on the "Add to Timesheet" button in order to enter time against the project and task.
For users of Projector's Detailed Task Management (DTM) features, tasks will be badged with  if you are specifically assigned to the task or the
  if the task is past due. Optionally you can filter on these tags using the buttons below.

In addition, you can hide tasks that are not available for time entry by ticking the checkbox Include tasks unavailable for time entry. A task is unavailable for time entry if on the Project Task Planning Tab the Open for Time column is unticked.
Expand / Collapse All
Just under the search field are two links called Expand projects and Collapse projects. These toggle the display of tasks under projects. Internet Explorer 8 users do not have access to the Expand All link because of IE8's inherently slower script performance. See the end of this article for more information on IE8's limitations.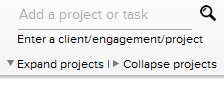
Week Header
In the center of the header is the current week. As you enter hours against projects or time off they are rolled up into this heading. This allows you to quickly see how many hours you entered for each day of the week. In addition a circle shows your total for the entire week.

Legend and Badges
You will also notice a number of icons and badges that are displayed for days of the week. These badges give you a quick idea of the status of your timesheet and time cards.
| The indicated number of hours are missing for either the day or the week. Your installation owner may expect that you enter a certain number of hours per day or per week. If time is missing for the day then this badge will be on the day. If it is missing for the week then it will be displayed under the week total. |
| There are more than twenty four hours entered for this day. Unless you are working at 110% you cannot work more hours than there are in a day! |
| Time is entered for the future |
 | This is today |
| There are several reasons we may show this badge:
When closed, you cannot submit time. |
| For DTM projects, this task has been assigned to you specifically. |
| For DTM projects you will see this badge next to the task if the due date is today or earlier. |
| For DTM projects you will see this badge on the date that the task is due. See the Detailed Task Management section below for more information. |
| Submitted time (can be edited) |
| Approved time (cannot be edited) |
| To-go hours overridden. DTM projects only. Reflects that the remaining hours have been manually overridden by the resource. |
| Task is complete. DTM projects only. |
| There is rejected time today. Click on the corresponding cell to see why it was rejected. |
 | There are multiple time cards entered on a single day/task. |


Save
The Save button is available whenever a change has been made to the current timesheet. In addition, navigating away from the current week by using the calendar or alerts area will automatically save any pending changes. Saved changes are not submitted. In general this means they cannot be approved.

Submit
The Submit button will show a running total of all unsubmitted time cards. Once submitted the time cards will go through your organizations approval process. However, even after submitting you can still edit the time cards as long as they are not approved. Once approved you can no longer edit the time cards. An approved time card has the symbol  .
.

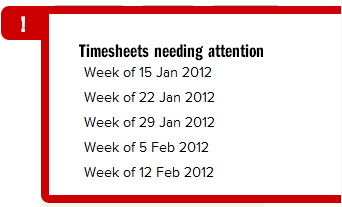
Alerts
On the upper right of your screens you may see a red exclamation point. Clicking on the exclamation point reveals a list of weeks that require attention. A week needs your attention if it contains missing, draft, or rejected time.
- Missing time - disappears after eight weeks if you ignore it. Or you can dismiss it sooner by hovering over the week and clicking the trashcan icon (
 ).
). - Draft time - Submit or delete the time
- Rejected time - Clicking the time card should reveal the reason it was rejected. Make corrections and resubmit. Or if error is due to something you do not have control over (like closed periods), ask your administrator for help. Last option would be to simply delete the card.
Time Entry Grid
The time entry grid is where you enter hours against projects. This time is logged and tracked by Projector.
By default the grid is organized by Project, role and then task.
However, you can further group tasks, by Engagement Type, Client, Engagement Name and Engagement Billability depending upon your Account Settings.
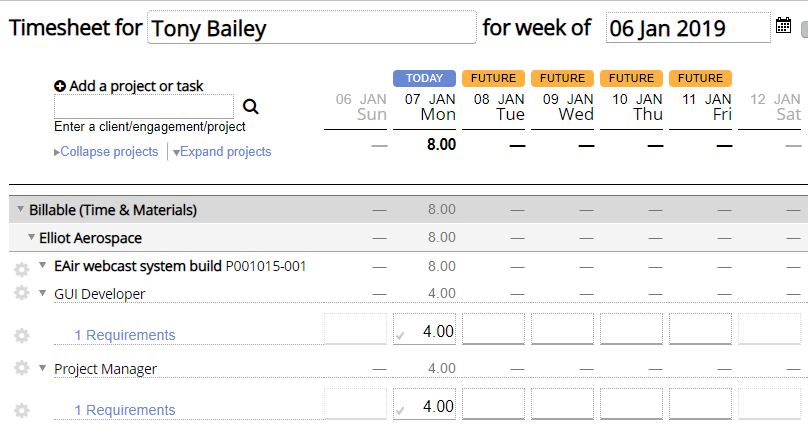
Customize View
By default Projector organizes the grid into Billable/Non-billable and subgrouped by Client. You can see in the screenshot that all your billable projects are grouped at the top and your non-billable projects in the middle. Each of these headings can be clicked to collapse it.
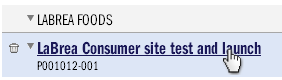
Trash
To remove a project or task from your time entry screen click the ![]() icon for that row. For the current week, any Draft or Submitted time is marked for deletion. For all other weeks, the project is removed unless there are time cards (any state) or you are scheduled to work. You need to click Save to confirm the deletion of the hours.
icon for that row. For the current week, any Draft or Submitted time is marked for deletion. For all other weeks, the project is removed unless there are time cards (any state) or you are scheduled to work. You need to click Save to confirm the deletion of the hours.
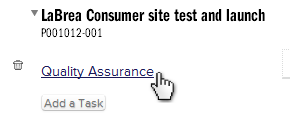
Add a Task
Hover over a project row and click the  button to add a new task. If the project has not yet been added then use the Project Search feature described above instead.
Project Info Dialog
Click on a project to bring up the Project info dialog.
This dialog contains the following project specific information.
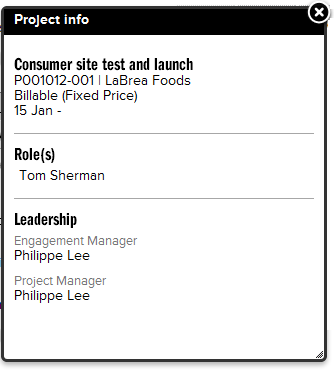
Metadata |
|---|
Project Name |
Project Code |
Client |
Engagement Type |
Start and End Dates |
Your Roles |
Engagement Manager |
Project Manager |
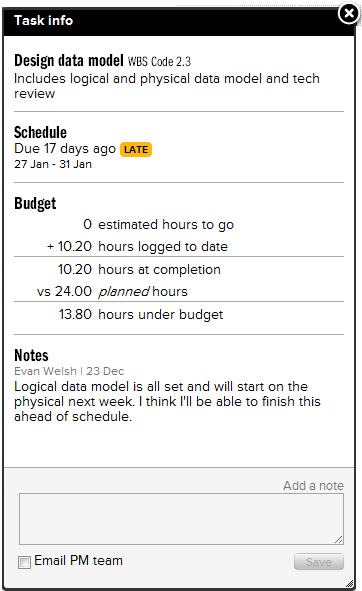
Task Info Dialog
Clicking on a task
The Task info popup shows up to four sections described below.
Section | Description |
|---|---|
Task Information | Displays the task name and WBS code. For DTM users the task description is also shown. |
Schedule | The date range during which this task is expected to be completed. For DTM projects the start and end dates are shown as well as a Late flag when the task is overdue. |
Budget | For DTM tasks the budget tab shows your current progress vs. what the project coordinator's expectations were. The first two lines show the estimated amount of time left and the number of hours you have entered as of this week. This is then compared to the planned hours to see how well you are performing to budget. |
Notes | Notes for regular time entry are only visible to you. Notes for DTM projects will be added to the task details form. |
To Date
These columns present a roll up for the current row. On projects you will see the number of hours you have entered to date. For time off you will see an accumulation for the current year. You will only see To Date values if enabled in your installation.
Entering Time
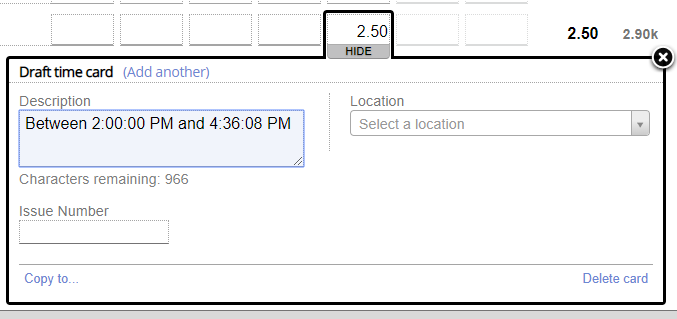
Click on an empty cell to enter time. The following popup will display where you can enter a description, location and rate. The location is typically where the work was done. The rate is the billing rate for this time card. Some typical choices customers offer are regular, overtime or not chargeable. Text limit on description is 4,000 characters. For user defined fields it is 255 characters.
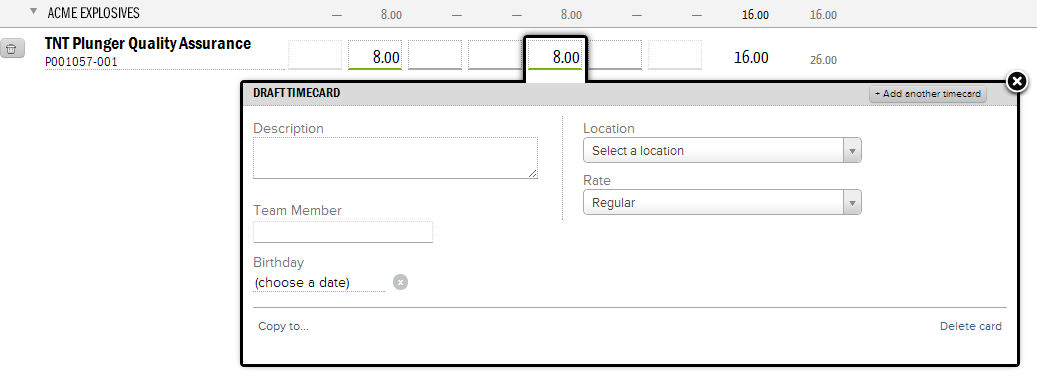
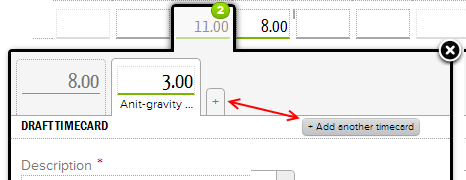
You can break up your time submissions for a day by clicking the  button or the + icon. In this way you can enter separate hours for preparing a presentation vs. giving the presentation on the same day. A green number icon appears to show you the number of time cards entered on that single day.
Status Colors
In time entry you may see a cell underlined with green, red or gray lines. 


Color | Notes |
|---|---|
Green | Draft time. This is time that has not yet been submitted for approval. Click the submit button to begin the approval process. |
Gray | Time has been submitted for approval or has already been approved. |
Red | Time has been rejected. Click on the cell to see additional details. |
Copy To and Move To
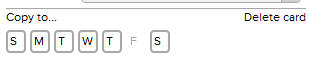
There are two ways to copy time in from one day to another. The first is to use the Copy to... link on the More dialog. This opens up a menu showing the current week. Each day you click will have the time card automatically copied to it. The copied time card will include the description as well as location and rate choices.
The second method is to use the drag handles shown in red below. Click and drag to drop the current time card into another cell. For approved time cards the time card is copied into the new cell. For draft or submitted time cards the hours are actually moved.
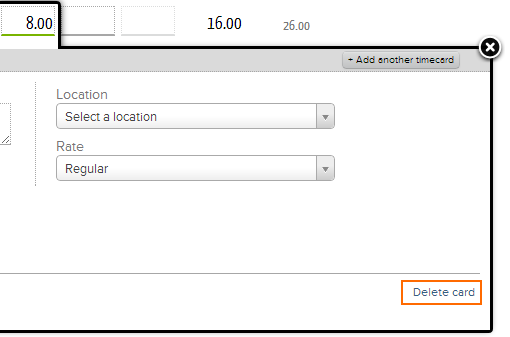
Delete Card
Click on Details... and then Delete Card
Detailed Task Management
Users of detailed task management will see additional information in their time entry screens.
Due Date and Late
A blue line appears over all days on which you are expected to work on a task. On the date the task is due you will see a  badge. Tasks due today or before today are marked with a badge.

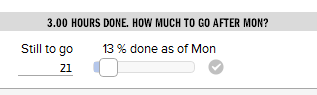
To Go and Percent Done
DTM tasks provide the ability to give feedback on your progress. Tasks that assigned to you feature the badge. Tasks that past their due date have the badge. Projector automatically calculates your progress as you enter time. For example, if you enter 8 hours against a 16 hour task you are 1/2, or 50% complete. The percent complete slider is time-phased. So if you go backwards in time entry you will see the task progressively becoming 'less complete.' This is normal. The slider should always represent how done you are at that exact point in time. Do not override the completeness of a task in historical weeks to "correct it."

If the task is not going as planned then you can manually override the number of hours or percent to completion. To do this click the Details button and set the amount of remaining work. You can create multiple overrides as you progress. For example, the project may start out slower than expected so you set an override to reflect this. Later on progress is actually faster than predicted and you set a second override to show that you have gained ground. Once you set an override it is not possible to return to Projector's automatic calculations. This encourages truth in time reporting. You should be entering time according to what your actual estimates and predictions are, not what the project manager originally budgeted.
If a task is assigned to multiple resources, the Still to go and % done are for yourself ONLY.
When the percent complete for a task is overridden, a small gray tick icon ![]() is shown in the corner of the time entry cell.
is shown in the corner of the time entry cell. ![]() . To clear the tick mark follow these steps:
. To clear the tick mark follow these steps:
- Click details on the time card
- Highlight the 'Still to go' value
- Press Delete then Tab on your keyboard
- The tickmark should clear
If you have completed a task then check the  icon. If the task is assigned to multiple resources then this marks it complete for everyone.
Page Footer
Summary View
The summary view hides all projects and tasks with no time for the week. Use this to quickly cull a large list down to just what you have been working with.
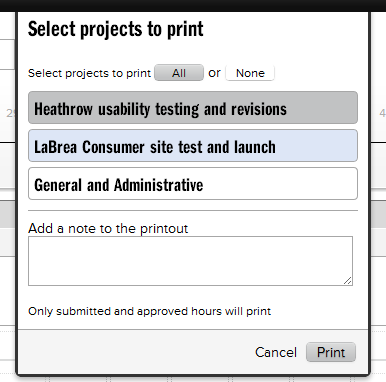
The Print button only prints submitted or approved time cards.

After pressing print the following dialog is presented. Here you choose which projects you would like to print out.
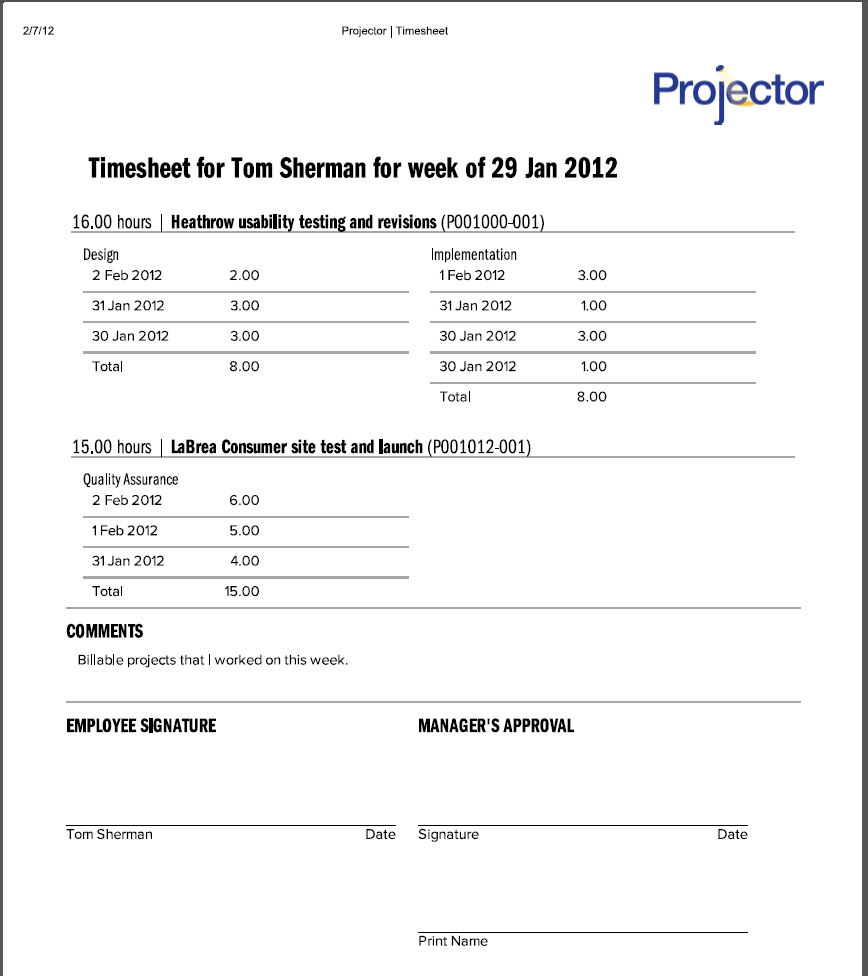
The final printout comes preformatted with spaces for employee and manager approval.
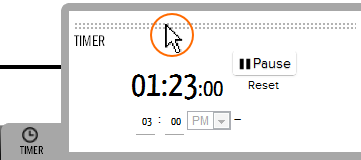
Timer
The timer function is like a stopwatch. It keeps track of how long you worked. The elapsed time can then be dragged and dropped into a cell using the dotted line drag handle. You cannot drag and drop into the time off fields.
Clicking start begins the timer. You can pause and restart the timer whenever you like. The timer continues counting even when you navigate between time entry weeks. If you log off or close your browser then the time will be lost. Click reset to return all settings to their defaults and start over.
If you forgot to start the timer before beginning to work on a task then enter a Start Time. The clock will automatically add the difference between now and the start time.
Rounding
Time has to be reported in certain increments per your system settings. The timer rounds up or down to the nearest time reporting increment. If the timer is less than half your increment it rounds down to zero.
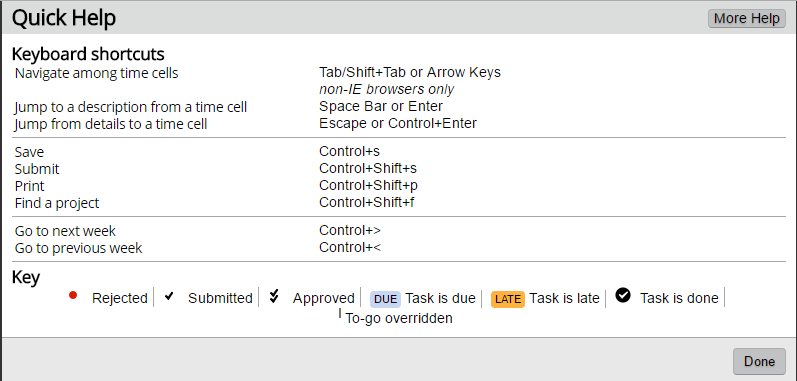
Legend and Keyboard Shortcuts
Click on "?" to view the time entry legend and a list of keyboard shortcuts.
- Tab or Shift Tab - navigate between cells
- Arrows Keys - navigate between cells (similar to tab)
- Spacebar - jump into details
- Ctrl + S - save
- Ctrl + Shift + S - submit
- Ctrl + Shift + P - print
- Ctrl + Shift + f - find a project
- Ctrll + > - Go to next week
- Ctrll + < - Go to previous week