Department and Title Editor
Departments and Titles are used to group like resources together. Each resource belongs to exactly one department and title. Projector then uses this information to determine billing rates, determine compensation rates, fulfill scheduling requests, and report grouping. Here are some simple examples of each function in action:
- Billing Rates - Consultants in the Technical department bill at $200 an hour
- Compensation Rates - Artists in the Creative department earn an average of $50 an hour
- Scheduling - My project needs a Software Developer for 40 hours next week
- Reporting - How much revenue did the Support department generate last month?
When setting up your departments and titles, you must keep these four factors in mind. You want to choose something granular enough that you get useful reporting out of it, but not so granular that it is difficult to maintain. How you choose to group your departments and titles does need to follow your internal department structure or need to follow the structure you see outlined in this help page. You might choose to group resources by skillsets, seniority, billing rates, or some combination of your own.
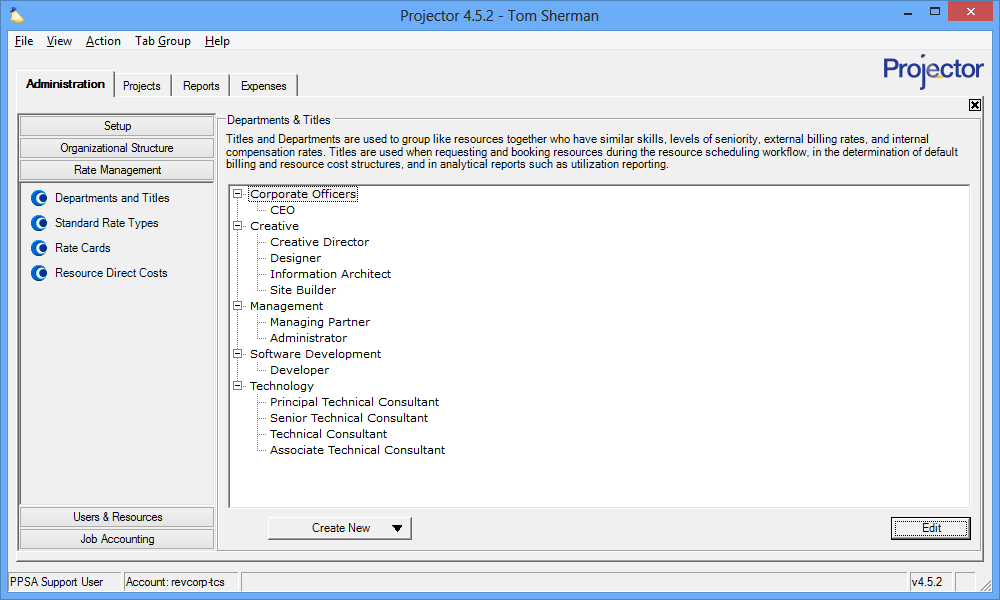
This form is reached from the Administration tab | Rate Management Subsection | Departments & Titles.
Permissions and Settings
To make changes on this tab you must have the global permission Rate/RDC Card and Dept/Title Administration set to Update. Changes made to names affect both new and historical data.
Departments and Titles are applied to resources through the Resource Editor.
Resources can be requested and booked based on their department or title.
Department and Title determine a resources external billing rates and internal cost rates.
Manage Departments and Titles
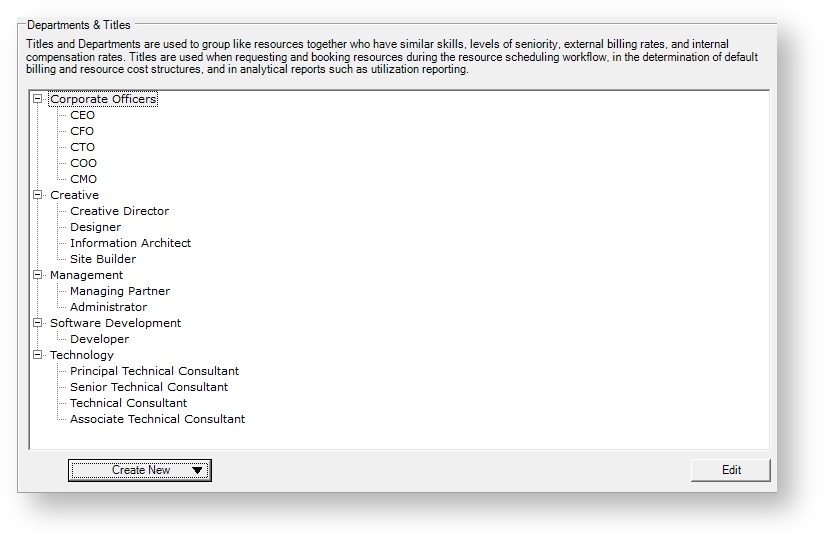
Departments and titles are displayed in a tree format, with titles alphabetically listed under each department.
Manage Departments
Manage your departments.
Add Department
Click the Create New dropdown button and choose Department.
Edit Department
Right click a department and choose Edit Department.
Delete Department
You cannot delete a department until all titles are removed from underneath it. Once all titles are removed, right click a department and choose Delete Department. If the Delete option is still grayed out then it is currently assigned to a resource or used in a resource request.
Manage Titles
Titles must be placed under a department. If you do not have a department, create one first.
Add Title
Click the Create New dropdown button and choose Title.
Edit Title
Double click on any title.
Move Title
To move a title to a different department, just drag and drop it.
Clone Title
Right click any existing title and choose Clone Title. This has little useful purpose and you probably won't use it.
Delete Title
Right click a title and choose Delete Title. If the Delete option is grayed out then it is currently in use. It may be assigned to a resource or in use on a current resource request. If you cannot delete a title, inactivate it instead.
Inactivate Title
Edit the title and tick the Inactive checkbox. Inactive titles are displayed in light gray text. They can be reactivated by editing the title and unticking the checkbox.
Department Editor
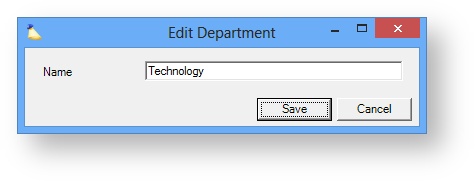
The department editor is not very exciting. You can only change the department's name.
Title Editor
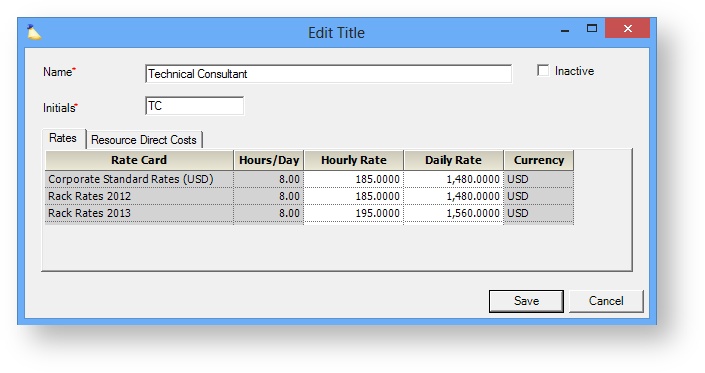
The title editor displays the title's name, initials, activity status, and has two subtabs to show you billing rates and compensation rates. Each setting is explained in the table below.
General Settings
General settings are at the top of the form.
| Field | Description |
|---|---|
| Name | Enter the name of title you would like to create, such as "Senior Programmer," "Web Designer," etc. You may not use the same title twice within one department. |
| Initials | These aren't really used in Projector any more, so you can probably ignore it. The field auto-populates based on the first letter from each word of the title. For example, Senior Project Manager becomes SPM. Projector warns you if another title has the same initials or if a resource has the same initials. But as title initials aren't really used you can probably safely ignore it. |
| Inactive | Tick this checkbox if this title should no longer be used. Resources cannot have their title changed to an inactive one and new resources cannot be assigned an inactive title. Resources that already have this title, will continue to have it. You may want to edit their resource profiles and transfer them to a new title if necessary. If there are active resource requests or bookings based on an inactive title, it will still be shown in the UI, but grayed out. |
Rates Tab
The rates tab shows your billing rates for this department/title combination. There is one row for each Rate Card defined through the Rate Card Editor.
| Column | Description |
|---|---|
| Rate Card | The rate card name |
| Hours / Day | Hours per day is used to calculate the ratio between the Hourly and Daily rate columns. If you have an eight hour day and enter 100, the daily rate is 800. You can edit the Hours / Day value through the Rate Card Editor. |
| Hourly Rate | Enter this title's hourly rate. The daily rate will be automatically calculated. |
| Daily Rate | Enter this title's daily rate. The hourly rate will be automatically calculated. |
| Currency | The currency is driven by the rate card. See the Rate Card Editor for more information. |
Resource Direct Costs Tab
The rates tab shows your compensation rates for this department/title combination. There is one row for each RDC Card defined through the Resource Direct Costs Rate Card Editor.
| Column | Description |
|---|---|
| Rate Card | The RDC card name |
| Hourly Cost | Most people choose a blended rate that represents the average of those in the department/title. |
| Currency | The currency is driven by the rate card. See the Resource Direct Costs Rate Card Editor for more information. |
Billing Rates
Here is a quick example of billing rates being driven by department and title. Projector offers much more sophisticated billing mechanisms, the following is just an example.
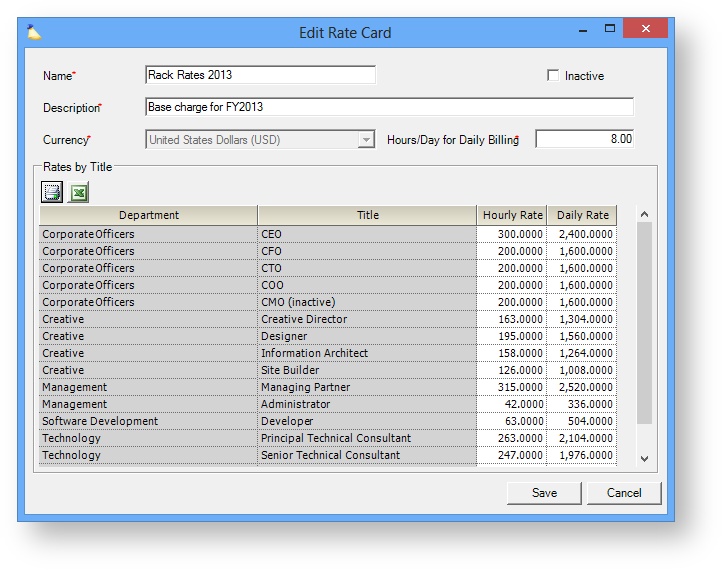
In the screenshot below you can see my rate card for 2013. Every title has its own Hourly Rate.
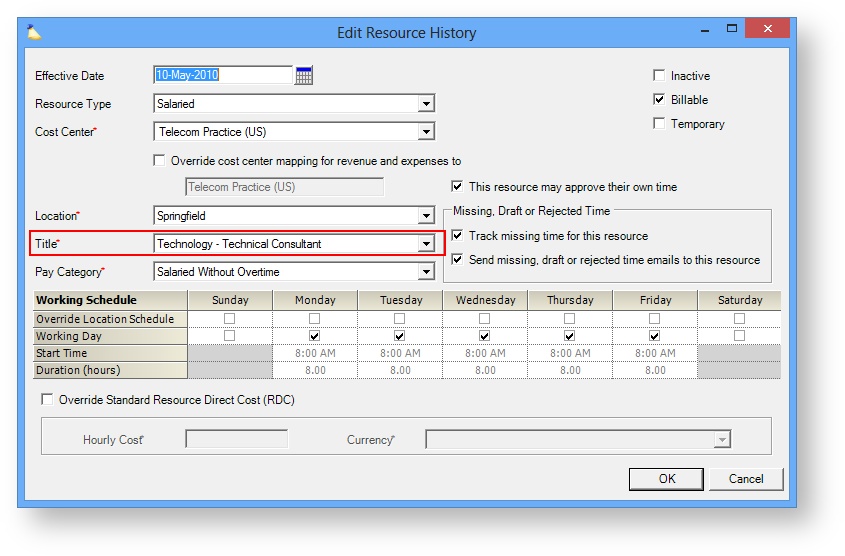
I then assign titles to my resources.
When that resource works on a project, their rates are used to determine billing.
Compensation Rates
Here is a quick example of compensation rates being driven by department and title. In Projector we call compensation Resource Direct Cost, or RDC. Oftentimes this is an average of what you pay individuals with this title.
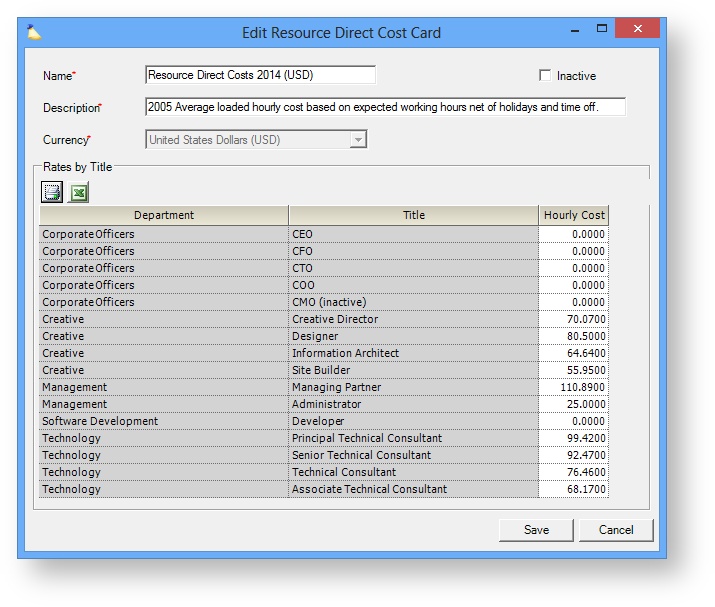
Below you can see a screenshot of my 2014 compensation rates.
I then assign titles to my resources. For each hour a resource works, Projector will log an internal cost according to their RDC card.
Scheduling
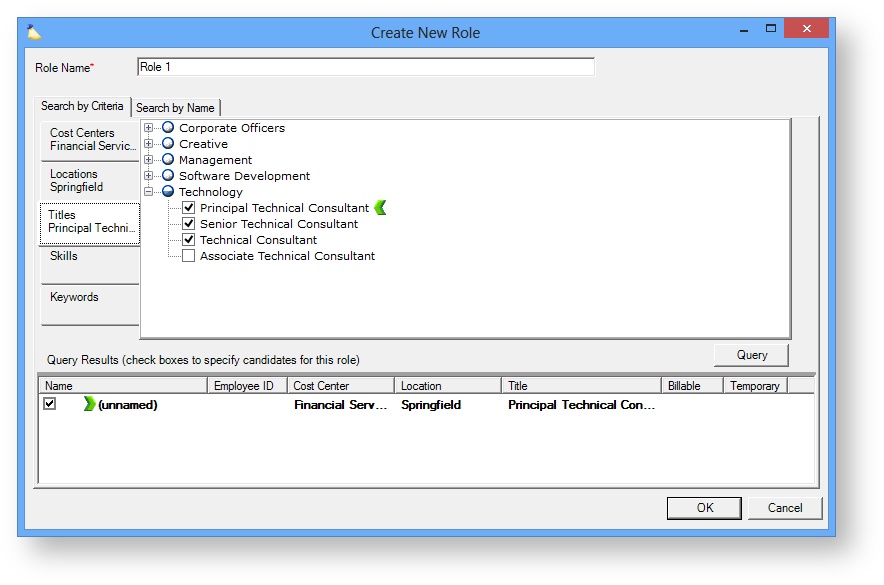
Here is quick example of scheduling being driven by department and title. When your scheduler is looking for someone to fulfill demand for labor, they can make that request by title. In the screenshot below you can see that I am asking for either a Principal, Senior, or Technical Consultant. The green chevron indicates that I would prefer a Principal Technical Consultant.
Reporting
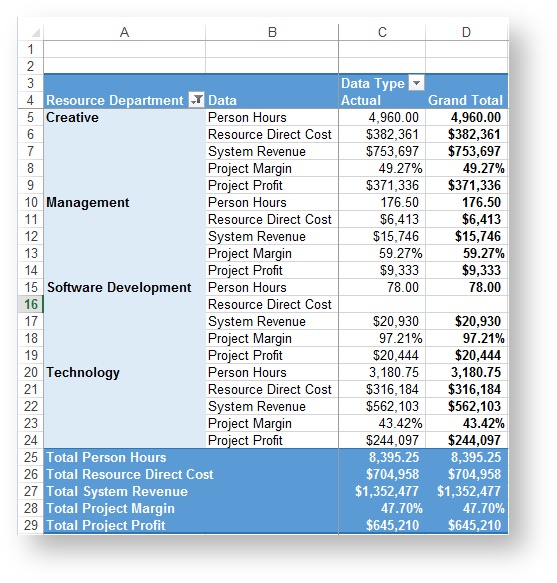
Here is quick example of reports being driven by department and title. In the screenshot below I have run a report to show me each department along with the amount of revenue it generated, the amount it cost to pay that department, and what their project margins were.
