Single Sign On (SSO) Implementation Guide
- Thomas Sherman (Deactivated)
- Stephan Golux
- Stephen Shenefield (Deactivated)
Single Sign On (SSO) is a technology that allows your users to sign into Projector as well as other websites that implement SSO (Office365, Google Apps, Dropbox, etc). The advantage of SSO is that users only need to manage a single set of credentials for all the sites.
This help page explains how to configure SSO for Projector. If SSO is already configured and you are looking to sign in, please see Single Sign On (SSO) User Guide.
We would be remiss if we didn't also mention that Projector supports a technology called Delegated Authentication. Delegated Authentication is different from SSO. It allows Projector to query a web service with a user's credentials to see if they are valid. An installation can be configured for both DA and SSO, although it would be a bit unusual.
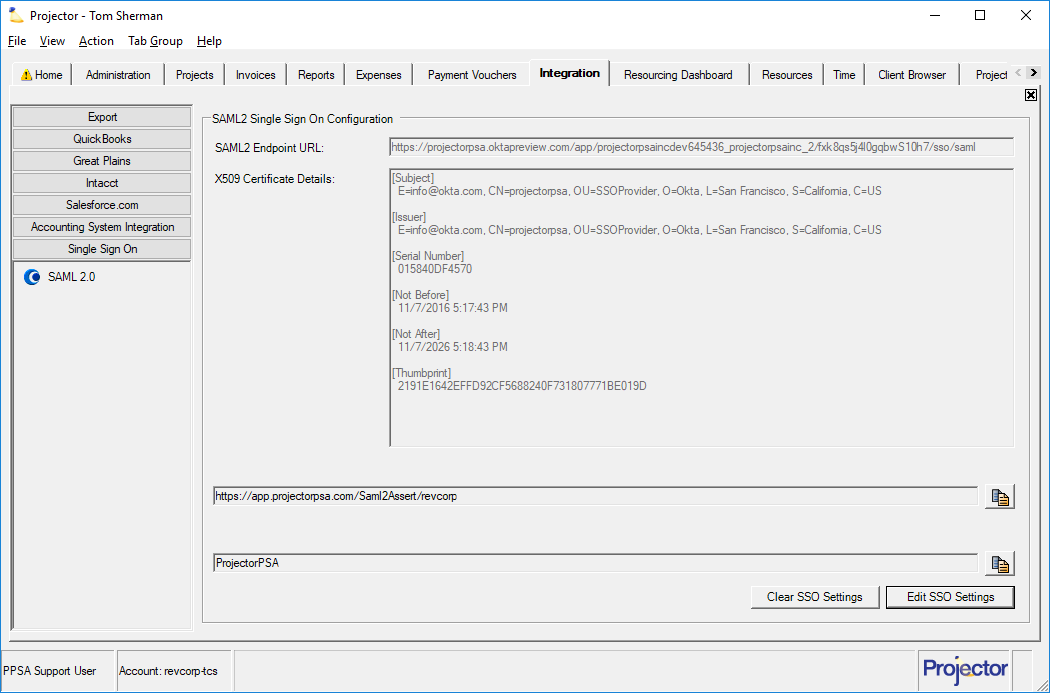
To manage your SSO configuration go to Integration tab | Single Sign On subsection | SAML 2.0 blue dot.
Permissions and Settings
Projector's SSO implementation uses a protocol called SAML 2.0. Any identity provider that supports SAML 2.0 should be compatible with Projector. We have help pages on configuring some identity providers.
To manage the SSO configuration you need the global permission System Settings set to Update.
To manage SSO settings for a user requires the global permission Users & Permissions set to Update.
Single Log Out -> Projector's SSO implementation does not support Single Log Out (SLO). If you log out of your identity provider it will not affect your Projector session. If you log out of Projector it will not affect your identity provider session.
Automatic Provisioning -> SAML supports the ability to automatically provision new users. However, Projector does not support this feature since our user paradigm contains many fields which could not be automatically populated. For instance location, cost center, and salary type. Users will first need to be provisioned in Projector manually before their SSO account will work.
Configure SSO
On your integration tab you will find values for your Assertion Consumer Service (ACS) URL and our Entity Provider ID. You need to create an application with your SSO Provider and enter these values.
Get ACS URL and Entity/Issuer ID

Get a Security Certificate and Endpoint URL
Your SSO provider will give you an x.509 security certificate and an endpoint URL. The certificate ensures the communication over SSO is private.
If your SSO provider gives you a metadata link you can copy the certificate and endpoint URL out of it.
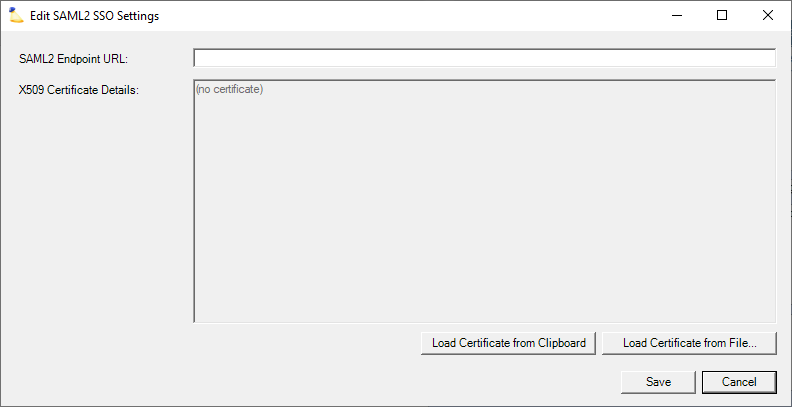
<X509Data>
<X509Certificate>Copy this to the clipboard and then import into Projector</X509Certificate>
</X509Data>
</KeyInfo>
</KeyDescriptor>
<SingleSignOnService Binding="urn:oasis:names:tc:SAML:2.0:bindings:HTTP-Redirect" Location="Enter this URL into Projector"/>
- Enter your endpoint URL
- Copy your certificate to your clipboard using Load Certificate from Clipboard or use Load Certificate from File to upload one
Configure Users
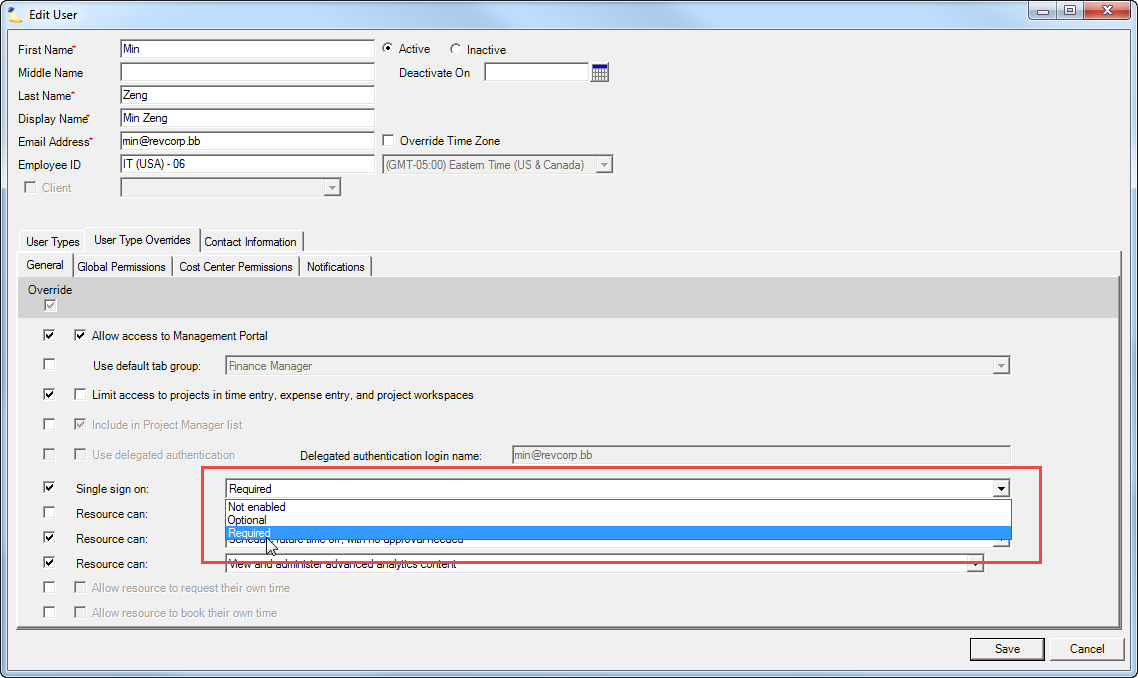
Once SSO is properly configured between Projector and your Service Provider, you can start configuring your users to use SSO. To start, we would recommend editing a single user and from the Overrides Tab | General Subtab enabling SSO. Once a single user has been verified to work properly, you can start turning the feature on in bulk from the User Type editor.
Projector offers three options for SSO login:
- Not enabled - users are expected to enter their Projector Credentials
- Optional - user is prompted to use SSO by default, but can enter a password and use their Projector Credentials instead
- Required - to access Projector Web a user must use SSO
Configure a Single User
Steps to enable SSO on a single user.
- From Management Portal go to the Administration tab | Users & Resources subsection | Users blue dot
- Query for a user and double click to open the user editor
- From the User Type Overrides | General subtab tick the checkbox Single Sign on:
- Choose Optional or Required
- Visit https://app.projectorpsa.com/ and attempt to log in as the user
Configure Many Users
Once you have verified a single user is working, you can start enabling SSO in bulk.
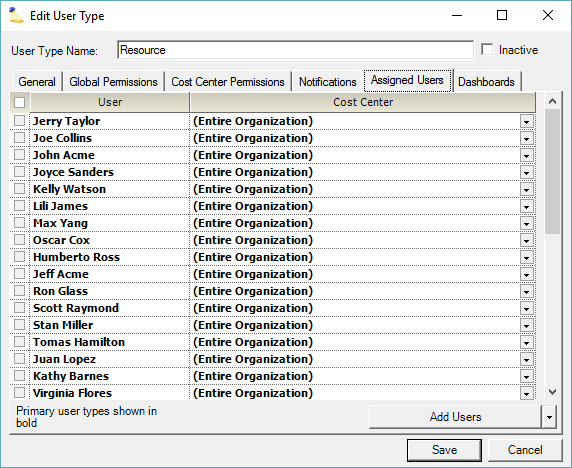
- From Management Portal go to the Administration tab | Users & Resources subsection | User Types blue dot
- Edit a user type
- View the Assigned Users tab. Anyone whose name is in bold will be affected by this change
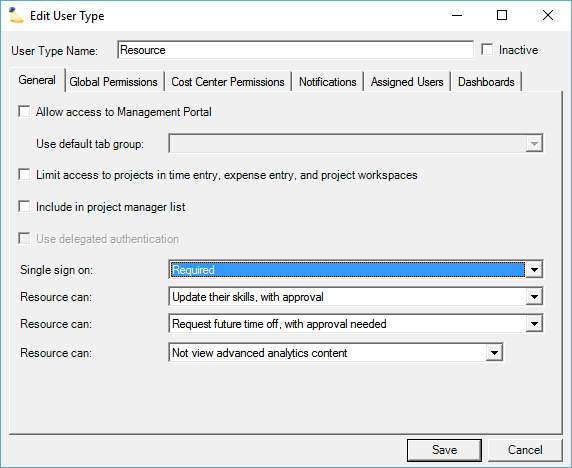
- On the General tab choose Optional or Required from the Single Sign On dropdown
- Visit https://app.projectorpsa.com/ and attempt to log in as a user
Test Configuration
You'll want to confirm the following login scenarios. Remember to log out of Projector AND the IdP before each test. See the Single Sign On (SSO) User Guide for screenshots and a more detailed walk-through of these scenarios.
- Service provider initiated
- Go to https://app.projectorpsa.com
- Enter the username
- Leave password blank
- Enter account code if required
- Click the Log in button. You should be redirected to your IdP to login. Afterwards you'll be redirected back to Projector and be signed in.
- Identity Provider initiated
- Access the IdP's website and log in
- Click the login link for Projector (IdP specific). You'll be immediately logged in.
Troubleshooting
See Single Sign On (SSO) Troubleshooting