How to add non-billable time to billable projects
Before we get started, first understand that non-billable time can be tracked and modeled several different ways in Projector. You'll need to decide which way is best for your organization. Some examples:
- Two engagements - one for billable time, another for non-billable
- One engagement with two projects - one project is used for billable time, another project for non-billable time
- One engagement with one project - one project has both billable and non-billable time submitted to it
Once you've decided how to model your engagements/projects you can look through the options below to model your non-billable time.
In addition, it is useful to understand how Projector models non-billable time. Basically, whenever a time card is set to zero for client billing, Projector categorizes it as non-billable. It doesn't matter if the time was originally supposed to be billable, as long as the end result is no charge to the client, it is categorized as non-billable. You'll see this reflected in profitability, reporting, and invoicing.
Rate Types
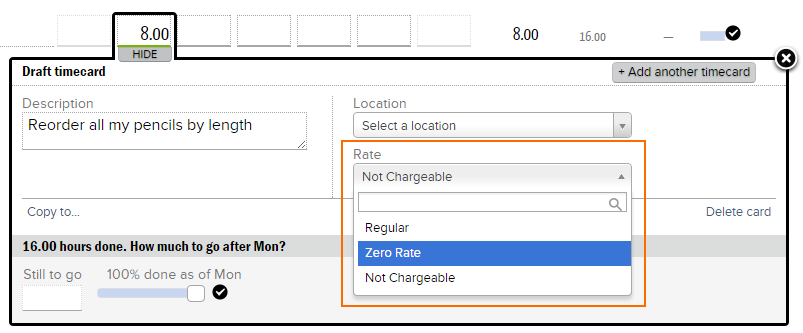
Rate types are presented to users when they are entering their time. This is the most common way we see non-billable time modeled in Projector. In the screenshot below you can see that I have the options of Regular, Zero Rate, and Not Chargeable. These are Projector defaults and should be available in most installations. For normal, billable time you choose "Regular." If you don't want the client charged then one of the other two rates can be chosen, "Zero Rate" or "Not Chargeable."
Zero Rate vs. Not Chargeable?
Ummm... aren't zero rate and not chargeable the same thing?! Close, but not quite the same.
- Not chargeable - could have been charged to the client, but was not
- Zero Rate - not intended to be charged to the client at all
The difference between the two? The contract rate for not chargeable is greater than zero. The contract rate for zero rate is zero. Not familiar with contract rates and how they are used? See Explain the different types of revenue in Projector.
In the example above I showed how work on an individual task can be categorized in one of three ways for client billing. To set this up yourself, you would open the project in question and go to the rates tab. Here, specify the different rates you want made available to tasks.
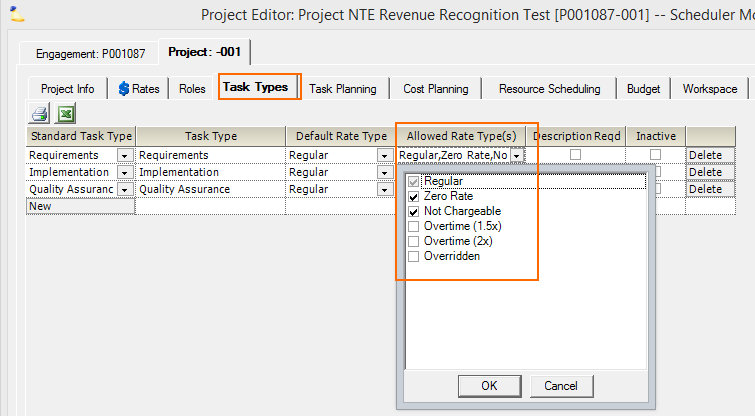
Then on the task types tab tick off each rate type that is available to each task type.
Another way to model this is to have separate billable and non-billable task types. It would look, and be modeled, as follows:
Add the appropriate rates you want tracked:
Then name your task types billable/non-billable and assign just one appropriate rate type.
When your resources enter their time, it will look like this:
Roles
The next way to model non-billable time is through role rate overrides. In the screenshot below you can see I've made two roles for the same resource. One role billable and the other non-billable. This is done from the Project Roles Tab. The downside to this method is that you'll need to create a separate role for every resource that needs to enter non-billable time. It is best used when only a few resources need to enter non-billable time.
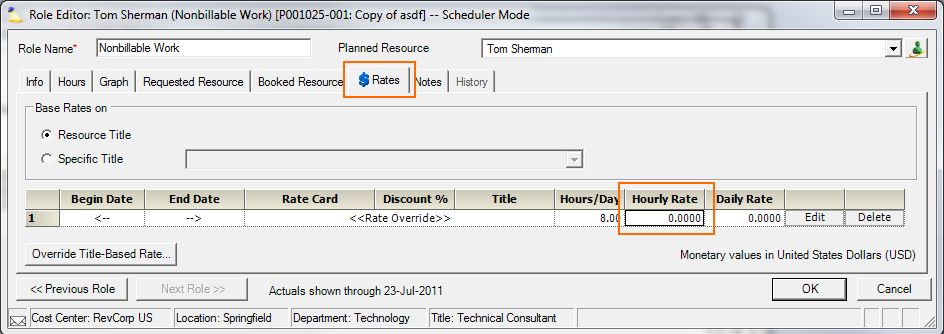
Next you edit the non-billable role and override the rate to zero.
When entering their time, it would look like this.
Preinvoicing or Invoicing Adjustments
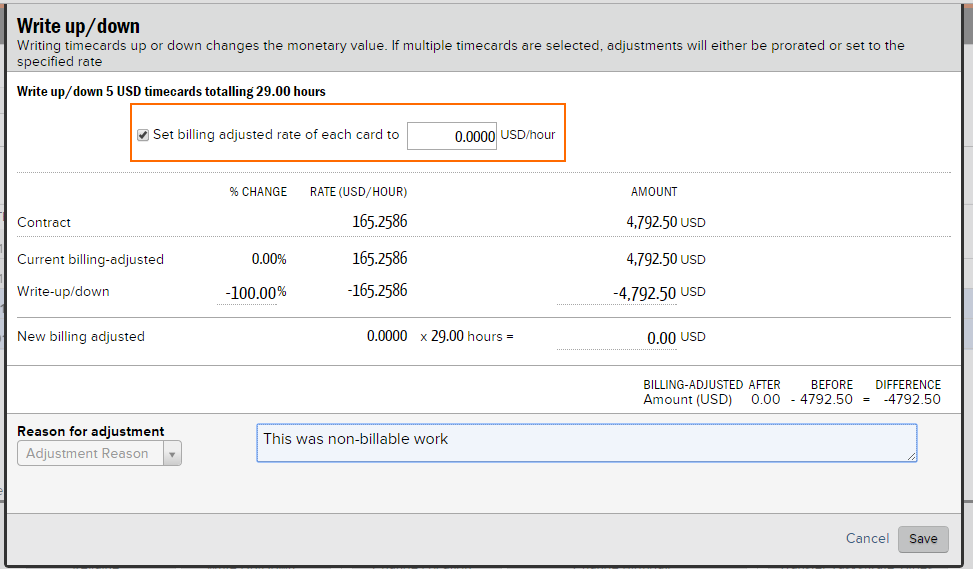
With pre-invoicing and invoicing adjustments, you are turning billable time into non-billable time after it has been approved. The downside to this method is that it is a manual process and requires that you remember to adjust the time after it has been approved. To adjust the time, visit the Manage Time section of Projector Web. Find the time cards that need adjusting and write them down to $0 an hour.


