How are rates applied to time cards?
Non-Billable Engagement Types
Rates on non-billable engagements are always zero.
New to Rates?
Are you new to rates and rate management? Then check out our How To's and other FAQ's.
Additional Resources
Topic of the Day: Rate Management Webinar provides an overview of the rate structures in Projector.
Title and Department
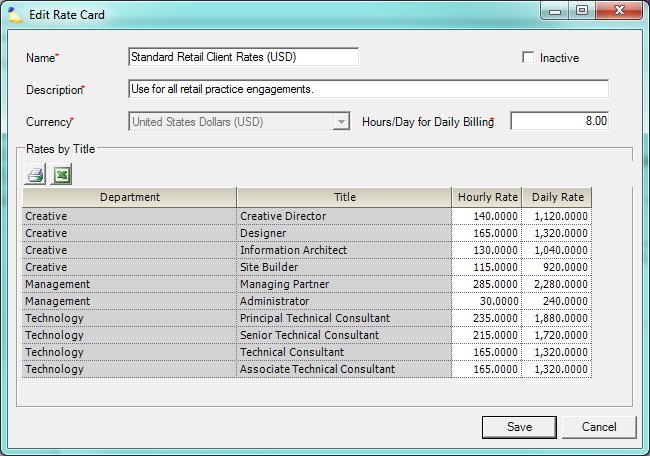
By default a time card's rate is determined by the resource's title. Title's and rates are defined under the Rate Management Heading. You can see in this screenshot an example of a department, title, and the rate that will be applied when time is submitted.
So what title did the resource have when they submitted time? Look at the resource history tab to find out the active title for the time card date.
Project Rates Tab
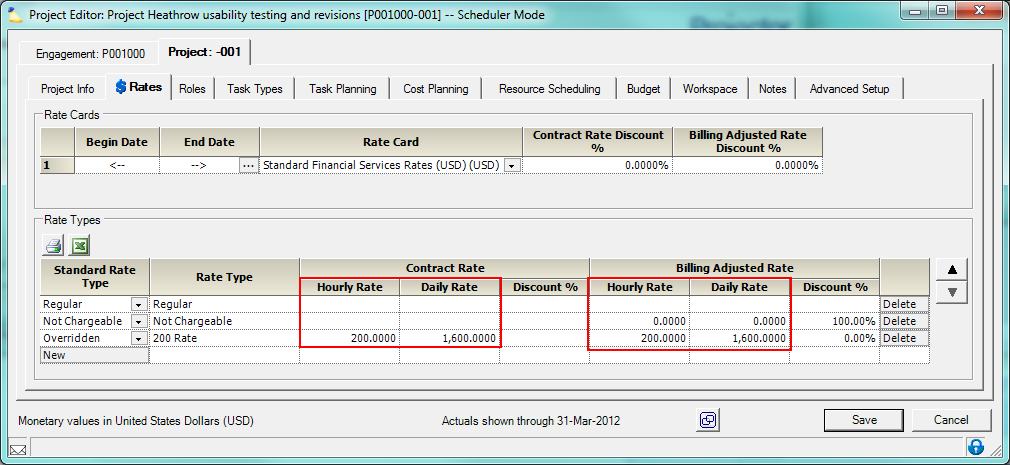
You can define multiple rate cards. Perhaps you have rates for 2012, 2013, etc. How do you find which rate card was used when the resource submitted their time? That's easy, just look at the Rates tab of the project editor. For the selected date range, the specified rate card is used.
But where did that default rate card come from? There are two places, first the cost center and then the client.
Cost Center
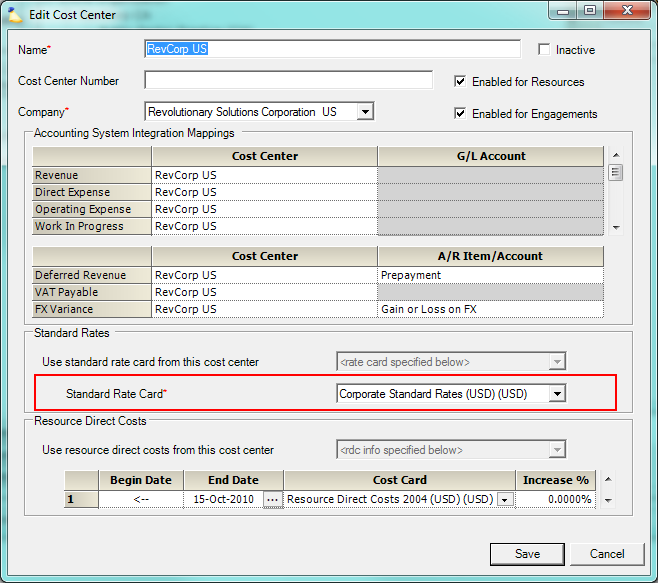
Look at the project's engagement. Which cost center is it under? Each cost center has a default set of rates. You can see in the screenshot below where we specified the rate card.
Client
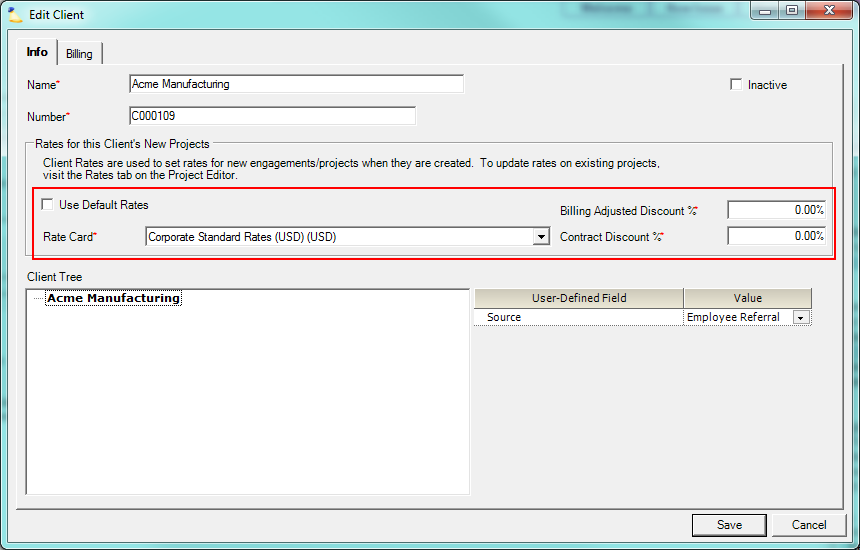
In addition, there is an option to override the default cost center rates on a per client basis. You can see this in the below screenshot.
Roles
Often what a resource can be billed at depends on the project they are working on. You can edit any role and specify the rate to be used on a single project.
In addition, you may want to invoice a role under a different billing title. For example, billing a junior developer as a senior developer. By creating a title based override, a resource can mimic another resource's title. Not only will the resource have the higher title, they bill at the higher rate associated with it too.
Rate Types
Finally we have rate types. A resource chooses a rate type when entering their time. In the screenshot below, the 200 rate overrides any other setting. The resource's title does not matter, nor does the default rate card. If an explicit rate is not set, like in Regular and Not Chargeable pictured below, then the resource's rate is modified. So for example, in the Not Chargeable row - entering time (no matter what the rate) results in a zero billing rate.
Finding the Rate
Sometimes you have a specific time card and you would like to know how it ended up with the rate it has. There are two ways to do this. A top down approach or a bottom up approach. The top down approach is best when you are looking to see how rates are applied to a time card in general. The bottom up approach is best if you want to find out why a specific time card has a certain rate.
The following help documents may also assist you.
Time Card History Viewer - use the time browser to view a time cards project, rate, rate type and adjustment history. This form can be reached from either the Time Browser or the Invoice Editor MP - Time Card Review Tab.
Project Rates Tab - view the default rate card and rate types associated with a project
Role Rates Tab - view the rates a role used
Top Down Approach
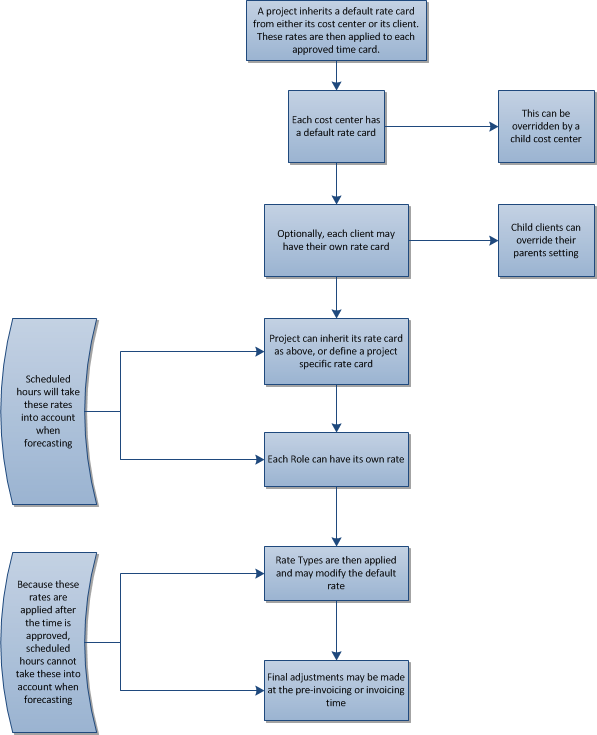
You would like a general idea of how rates will be applied to time cards. Click on the image below to enlarge. Follow the flowchart to see how rates are applied to a time card.
Bottom Up Approach
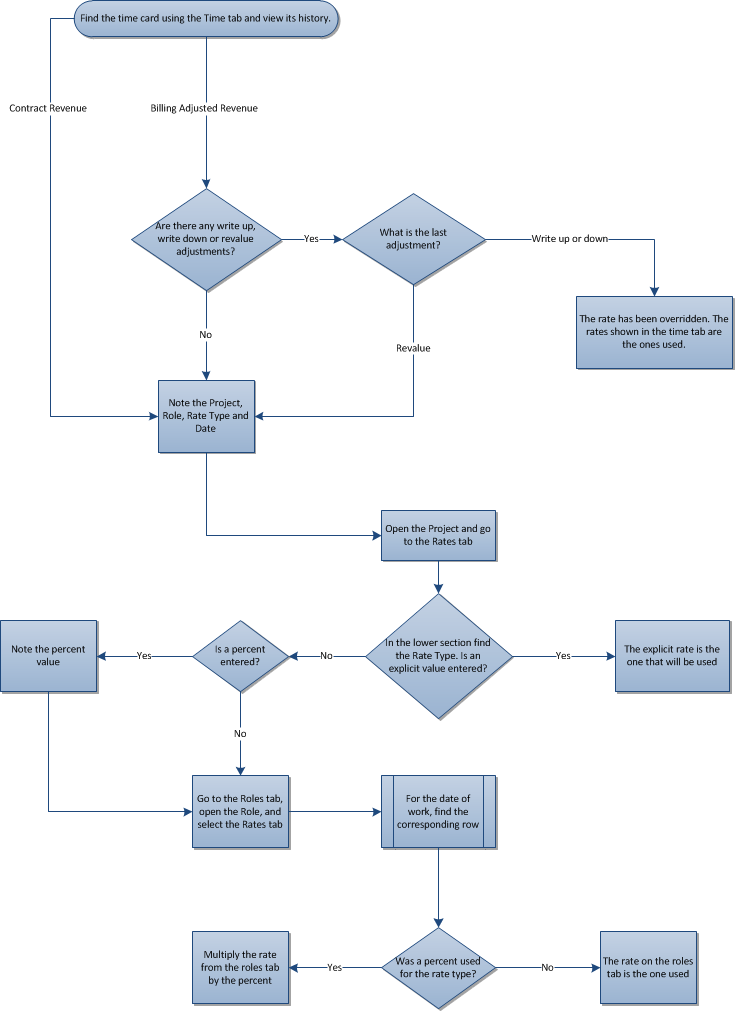
You have a specific time card and you would like to know how it got its rate. Click on the image below to enlarge. Follow the flowchart to find where the time card's rate came from.
