How am I billed for users and resources
This help document walks you through inactivating an employee so that they do not appear on your Projector invoices going forward. Before you jump ahead though, when you inactivate an employee we highly recommend that you do some virtual house cleaning so that your project planning and reports are accurate going forward. If you terminate Charlie then he is not going to be working on any projects. If he has any future scheduled hours you'll probably want to clean those up by either deleting them or reassigning them.
If you recall, a user is anyone who can log into Projector. A resource is someone who can enter time, expenses, or be scheduled. In order to ensure that you are not billed, you must inactivate both an employee's user and resource profiles.
If you have any questions about how to remove users/resources, or the billing implications associated with users/resources, please contact Projector Support and we would be happy to answer them.
What triggers billing?
The following actions trigger billing activity in Projector:
- User is active for any portion of the month
- Resource is active for any portion of the month
- A time or cost card is submitted. The billing month is based on the date of submission. Not the actual time or cost card date. For example, an admin fills in Jim's timesheet for last month and submits it - generates billing activity for the current month
Subsequent actions do not trigger billing. For example, approving, invoicing, or adjusting cards. Re-submitting existing cards or submitting new cards does generate new billing activity.
Inactivate an Employee
The fastest way to terminate an employee is to use our Terminate feature. Follow these steps:
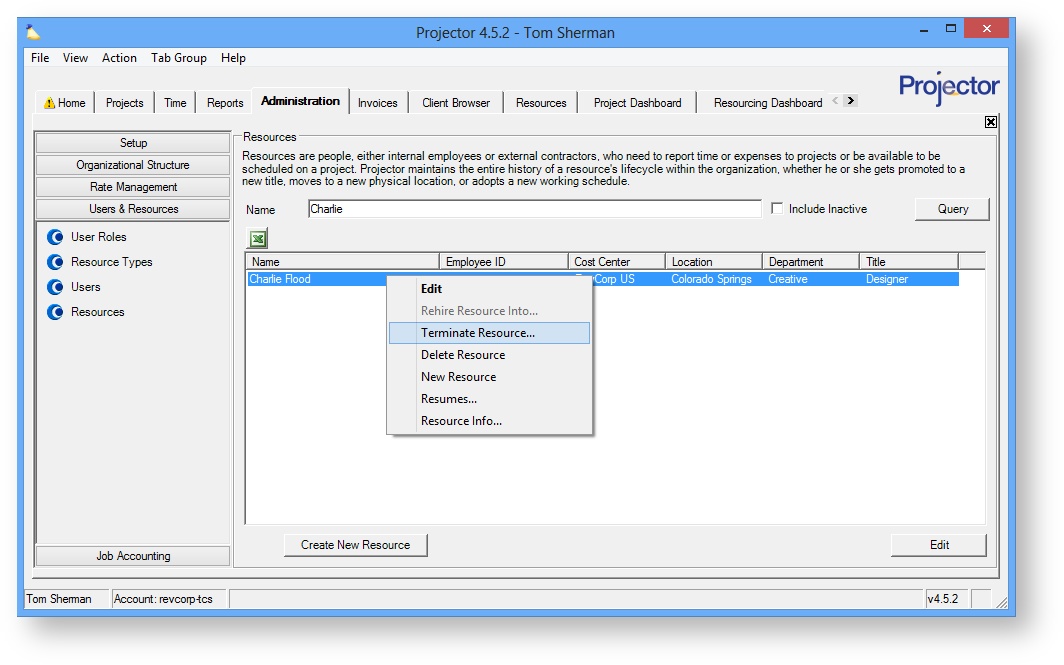
- Go to Administration Tab | Users & Resources subsection | Resources
- Query for the resource who will be terminated
- Right click the resource and choose Terminate Resource...
Specify the termination date and click OK
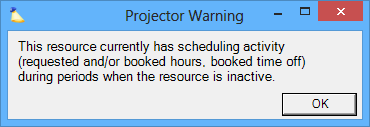
STOP - if you see the following dialog that warns of scheduling data, you may want to take further action before finalizing the termination.
As mentioned at the introduction of this page, this resource still has hours scheduled in the system. The hours can affect project profitability, whether a project can be completed on time, whether tasks can be completed on time, etc. Projector recommends that you
- Remove or transfer all future booked hours
- Reassign tasks associated with this resource
- Clear scheduled time off
Scheduling Data
If you see the following dialog then there is scheduling data for this resource. You probably want to remove that scheduling data or transfer it to another resource. This will keep all your projections accurate and your projects staffed with people who actually work for you.
Booked Hours
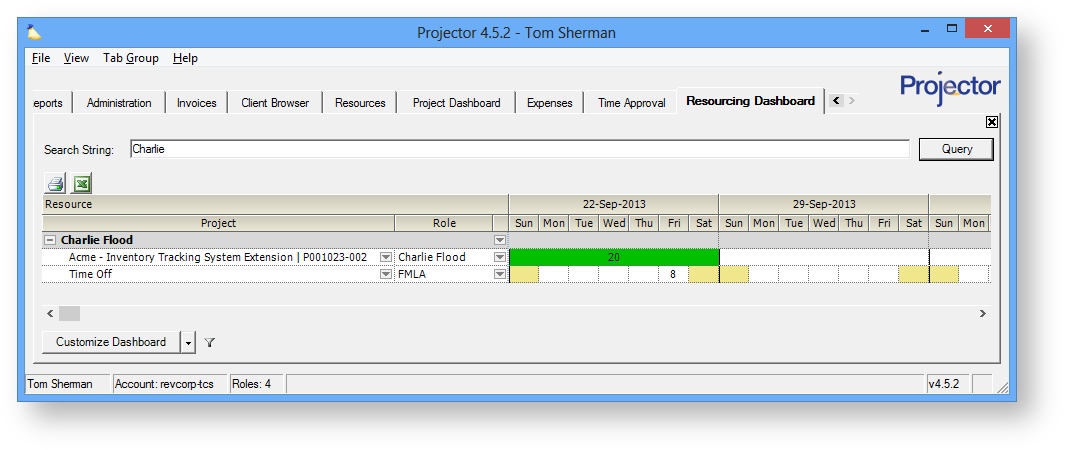
The best place to view future booked hours is the Resourcing Dashboard. The dashboard is reached by choosing View | Scheduling | Resourcing Dashboard. In the screenshot below you can see that I have searched for hours booked to Charlie. By bringing in project and role I can either notify the PM that they need to swap Charlie out or jump into the role editor and delete/move hours as I see fit.
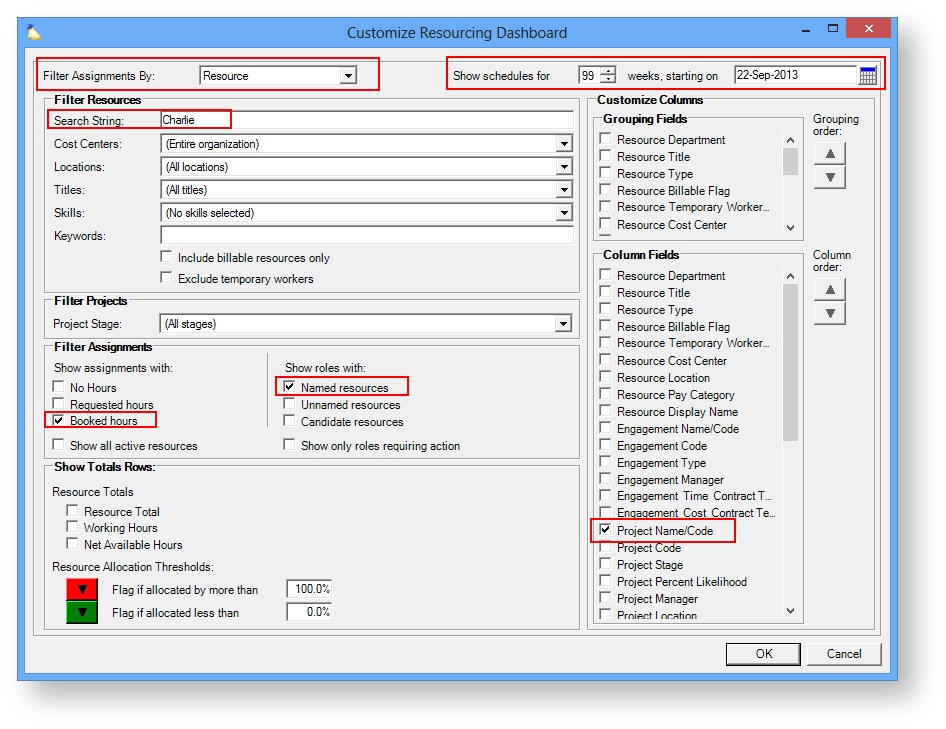
To construct a query targeted at Charlie, click the Customize Dashboard button. Then follow the example screenshot below.
Assigned Tasks
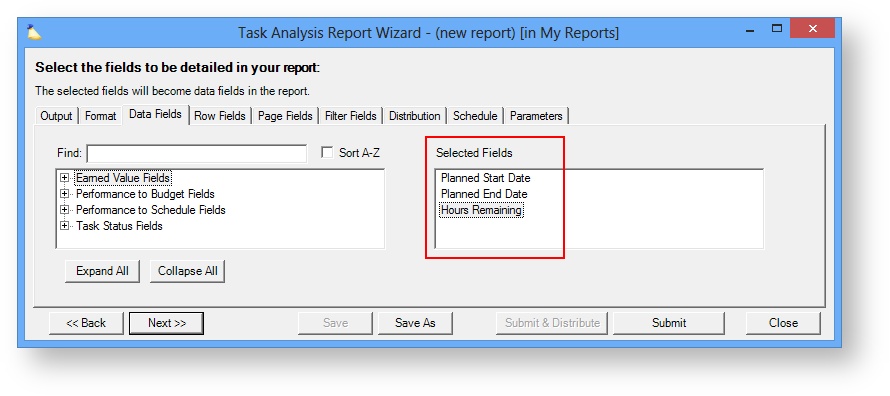
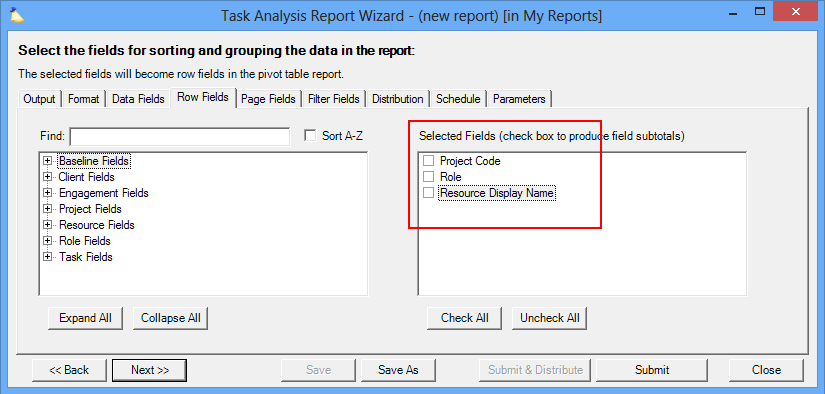
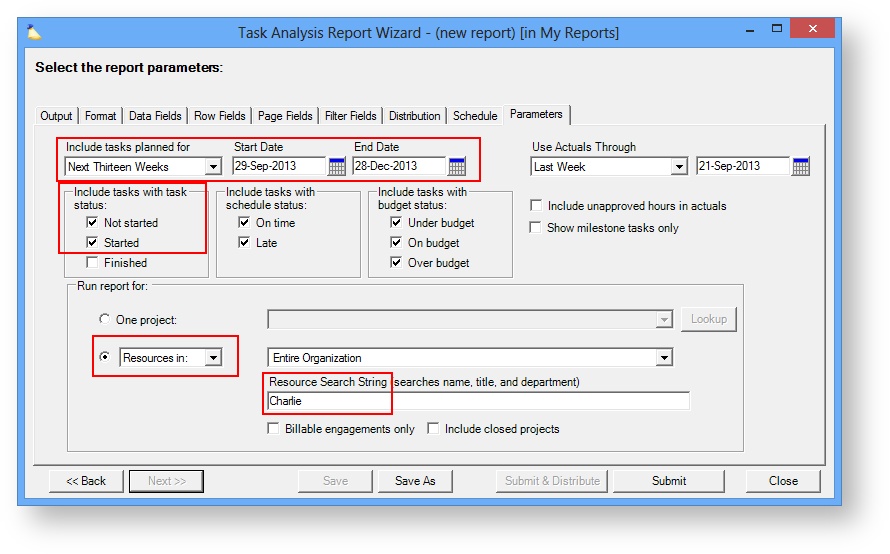
You are only assigned a task if you have a role on a project with Detailed Task Management enabled. Run a Task Analysis report to find all the project's your resource has a task on. See the below screenshots for an example of the report you would use.
On Data Fields tab find the tasks planned start/end dates and how many hours are left until it is complete.
Then on Row fields bring in the Project, Role, and Resource Display Name.
Then on the Parameters tab specify the date range, That you want tasks that aren't done yet, and who the target resource is.
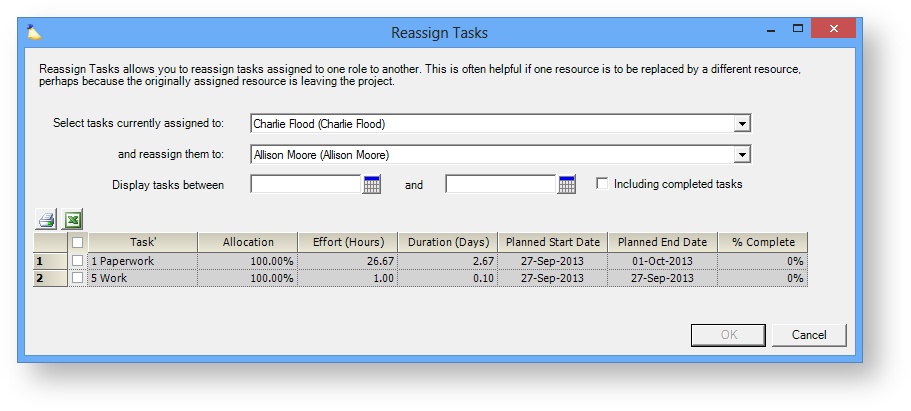
In the resulting report you can see where Charlie has incomplete tasks.
Open those projects and either remove Charlie from the task, or use the Task Reassignment Wizard to substitute someone else in.
Time Off
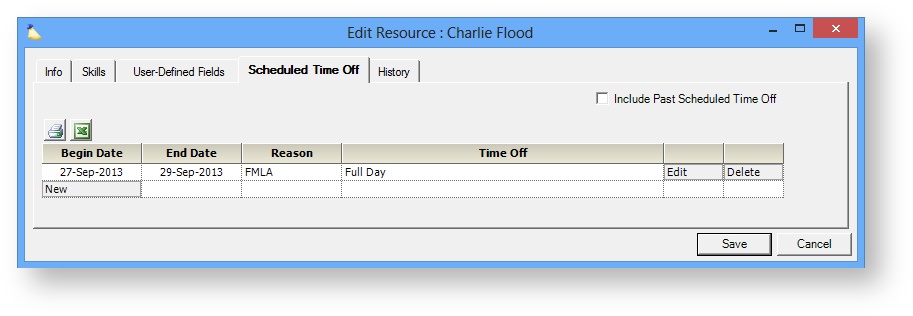
The last bit to clean up is any scheduled time off. This is accessed by editing the Resource profile.Once the profile is open, find the Scheduled Time Off tab and delete each row for dates in the future.
