Template Editor
- Thomas Sherman (Deactivated)
- Shivam (Deactivated)
The invoice template editor is where you will go to fully customize your templates. This article will serve as a brief introduction to the basics of using the DevExpress Report Editor with Projector. This article will only touch on the highlights of all the features available. For a full introduction into the capabilities of the report engine please see the Third Party Help Documents section.
Additional Resources
The Topic of the Day: Invoice Templates Customization webinar provides a general overview of Projector’s invoice template editor, as well as guidance on common customizations.
The template editor can be launched from the Invoice Template Manager or the Email Template Editor.
Permissions and Settings
You must have the global permission Invoice Templates set to update to edit an invoice template.
You must have the global permission Email Templates set to update to edit an email template.
OSX - the template editor is a third party Microsoft Windows application. Because of this, you cannot use it on a Mac unless you leverage Bootcamp or a virtual environment like Parallels.
Template Editor User Interface
This section provides a brief introduction into each section of the template editor and what they are used for.
The designer window is where you construct your report. The idea is to create bands. Each band holds information related to the layout of the template. For example, you can have a band that represents the first page of your report, one that contains information about what is being billed and finally a band that is the last page of your report.
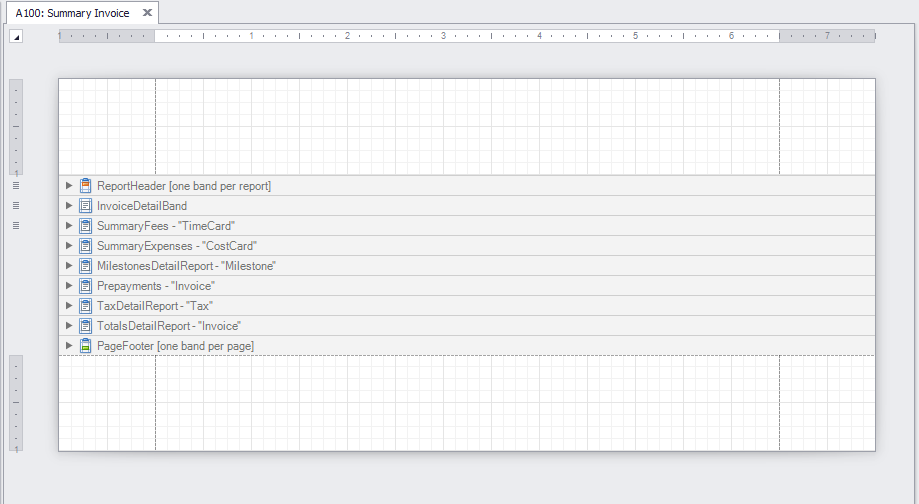
Inside each band you can then add a number of different controls linked to the Projector database to pull in invoice information. For instance, the name of your billable client, information on the time and cost cards being invoiced or your company logo.
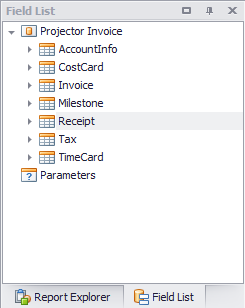
Field List
The information you will link to is contained in the field list. For a full list of the available fields and additional notes see the Template Field Lists page. These fields can be dragged and dropped into the designer window.
Template Controls
On the lefthand side of your template editor window you will see the different controls available for constructing templates. The following table lists the controls you are most likely to use. For detailed information about how each of them work see the full DevExpress documentation.

Tool | Description |
|---|---|
Label | A textbox that contains user entered text or binds to a field list item |
Checkbox | A simple checkbox that can be on or off |
Rich Text | A rich text area that can contain custom formatting. |
Picture Box | Use this to display your company logo or other graphics |
Panel | Group controls together. When you move the panel, all the controls inside move with it |
Table | Tables consist of rows and cells of information, much like Microsoft Excel. They are best for displaying tabular data. |
Line | Typically for styling, use lines to visually separate sections of your invoice |
Shape | Typically for styling, draw shapes in your report |
Page Info | Display information like current page number |
Page Break | Insert a page break |
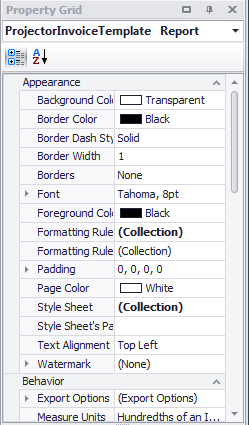
Property Manager
Once you have added a control to the template editor window you can use the property manager to specify additional settings like appearance, positioning, behavior and data bindings.
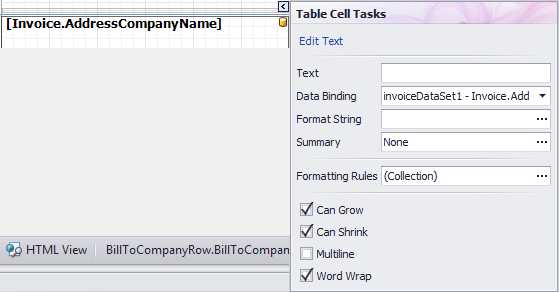
In addition you should become familiar with the properties quick list. When you click on a control the  icon will appear. You can then click on it to gain access to frequently used property settings.
The following controls are the ones you will most likely use while editing templates.
Property | Description |
|---|---|
Background Color | You can enter rgb values or pick from a list of default colors. |
Foreground Color | Text or line color. You can enter rgb values or pick from a list of default colors. |
Borders | Choose which borders you want to show. All, none, or any combination of top, bottom, left or right. In the popup click on the gray edges to toggle individual borders on or off. |
Border Width | How thick to draw borders |
Border Color | You can enter rgb values or pick from a list of default colors. |
Font | Choose font style, size and weight |
Padding | Creating padding on any side |
Text Alignment | Nine positions are offered as well as text justification |
Can Shrink | This is an important feature. This tells a label or table cell that it can collapse. If there is no content to be displayed then the control will not display at all |
Height | Sets the height of the control. You cannot set heights of cells, you must do it on their parent rows instead. |
Width | Sets the width of a control. |
Navigating Your Template
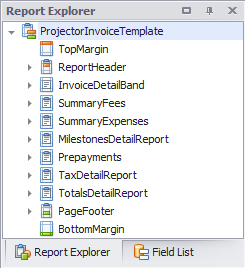
As you add bands and controls to your template they will automatically be added to the Report Explorer. Use the report explorer to quickly navigate the hierarchy of your report and change settings.
Grouping and Sorting Information
Grouping and sorting is how you organize tabular data. For example you may want to group your time cards by project and then sort them by date. A group is the same as a sort, except that a group includes a header or a footer. Groups are also how you will create subtotals.

Previewing your template
At the bottom of the design window you will find the Designer and Preview buttons. It is useful to toggle between these as you develop your invoice. You will see the preview rendered using your actual invoice data, making it much easier to see how design changes are reflected in a real invoice.

Additional Notes
You may find the following notes useful when designing your own invoice templates
Nominal Rates
We frequently find that users find themselves in a quandary around displaying time card rates on invoice templates. The problem arises when the rate displayed for a time card is off by a penny or two. Your clients may balk at this "incorrect" rate. This issue arises because of rounding. In order to get a mathematically correct rate, Projector back calculates it from the subtotal and hours worked.
//half hour of work
.5 hour * 133.33 = $66.67

//displayed on invoice as
.5 hour | 133.34 | $66.67
The solution to this problem is to use a Nominal Rate instead. A nominal rate is not back-calculated, but stored in our database. It reflects the actual rate used when the time card approved. Please note that this can still lead to "incorrect" math.
//ten resources work half hour
.5 hour * 133.33 = $66.67 * 10 resources = $666.70

//displayed on invoice as
5 hours | 133.33 | $666.70

//But if you do the math out
5 hours * 133.33 = $666.65 (off by five cents)
The nominal rates and subtotals are off because penny rounding on time cards aggregated into a larger discrepancy. To learn more about this effect see Three oranges for a dollar.
Emailed Images
When including images in your templates only PNG and JPEG images can be embedded
Paper Sizing
When designing templates you need to account for the fact that the US and the rest of the world have different standard paper sizes. They are US Letter and A4. If you are sending PDF's then Adobe Acrobat does its best to automatically fit the invoice to the printed paper. You may not need to make any changes to your paper size in this case. Print out a sample to verify this for yourself.
Typically the length of the page does not matter in a template because the invoice editor treats the print out like a roll of paper which is cut up at the end. Therefore you really only need to worry about width. Projector's default templates are designed based on US Letter, which is wider than A4. When printing on A4 you may find that the right margin is smaller than expected. If you design for A4 instead, then the printable content will also fit on a US Letter, but the right margin will appear a bit bigger.
The default templates use 1in (25.4mm) margins. This is very close to the standard A4 margin size of 25mm.
If you switch the paper type of a standard Projector template from US Letter to A4 then you also want to make the following changes:
- Change the page measurements from Hundredths of an Inch to Tenths of a Millimeter
- Set the left and right margins to 250
- Set the top and bottom margins to 125
- Resize all the elements to fit width-wise on the page. If you do not then extra pages may be printed.
Did you know that A4 paper has a width to height ratio of 1:√2? This is special because if you fold the paper in half it is the exact same ratio as the original paper. So you can scale from A4 to A3 to A2 in perfect proportions. US Letter size cannot accomplish this feat!