Time Card Import (for multiple resources)
Projector allows you to bulk import time cards for multiple resources. Time cards can be imported from files in these formats, CSV, QIF, QFX, OFX, QBO.
Permissions and Settings
To upload time cards you must have one of the following:
- Be a resource
- Have the cost center permission Maintain Time
There is a 500 card limit for imports. If you have more then five hundred cards you'll need to import in batches.
Time Card Fields
The below table contains all the fields you can map to a time card on import.
| Field | Description | Expected Format |
|---|---|---|
| Description | Specify text up to 1000 characters long. Anything longer will be truncated. | String |
| Location | The location for this time card. If your company does not use locations, this field will not be shown. The text needs to match exactly what is in the Location Editor. | String |
| Handy Info | This data doesn't get imported, it is simply for reference during. For example, you might have work notes in here. Or you might have a note to yourself that the time should not be entered until next month. | String |
| Project | This can contain either a project code or a project name. It is preferable to use a project code in this field as Projector will automatically map to the appropriate project. If you choose to use a name instead, it will not be mapped to a project with the same name. Instead, we'll provide a picklist of projects with this name. Why not choose projects based on name? Two projects can have the same name. | String |
| Rate Type | If your organization allows multiple rate types, for example Regular, Overtime, or Travel - then specify the appropriate rate type here. If your organization does not use rate types, leave this blank. | String |
| Task | The name of the task you worked on. | String |
| Role | Most people only have one role on a project and you can leave this blank. If you have multiple roles, specify the one this time is for. | String |
| Resource | The resource to be associated with the time card. The value is mapped to a Projector resource as follows:
| String |
| Work Date | The date you worked. | We support multiple date formats:
|
| Work Hours | The number of hours and minutes you worked. | We support multiple time formats. Below are three different ways to write "three and a half hours."
|
| Other (User Defined Fields) | Your installation may have fields listed that are not in this table. They are special fields defined by your administrator. For instance, you might see "Ticket #" as a field and you are expected to enter a number. Please contact your administrator if you are unclear what to enter in these fields. | The expected format depends on the type of UDF.
|
In Practice
Here is a simple walkthrough of a time card import.
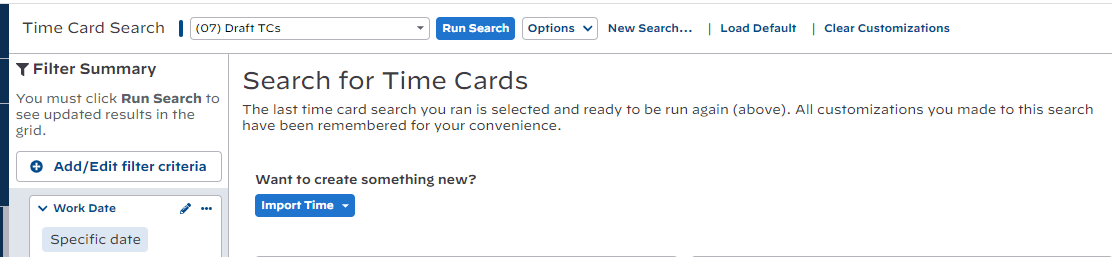
Start an Import
To start an import, go to Time Card search and click Import Time button. Upload a file in an accepted format such as CSV, QIF, QFX, OFX, QBO.
Map Fields
This is where you specify how the information from your import file.
On the left is a list of fields that you can import data into. All fields are optional.
On the right is a series of dropdown boxes that map to the fields in the file.
Your job is to match the columns on the left with the appropriate choice from the dropdown boxes. If there is no clear choice, don't choose anything. You'll have the opportunity to manually specify the correct values later on.
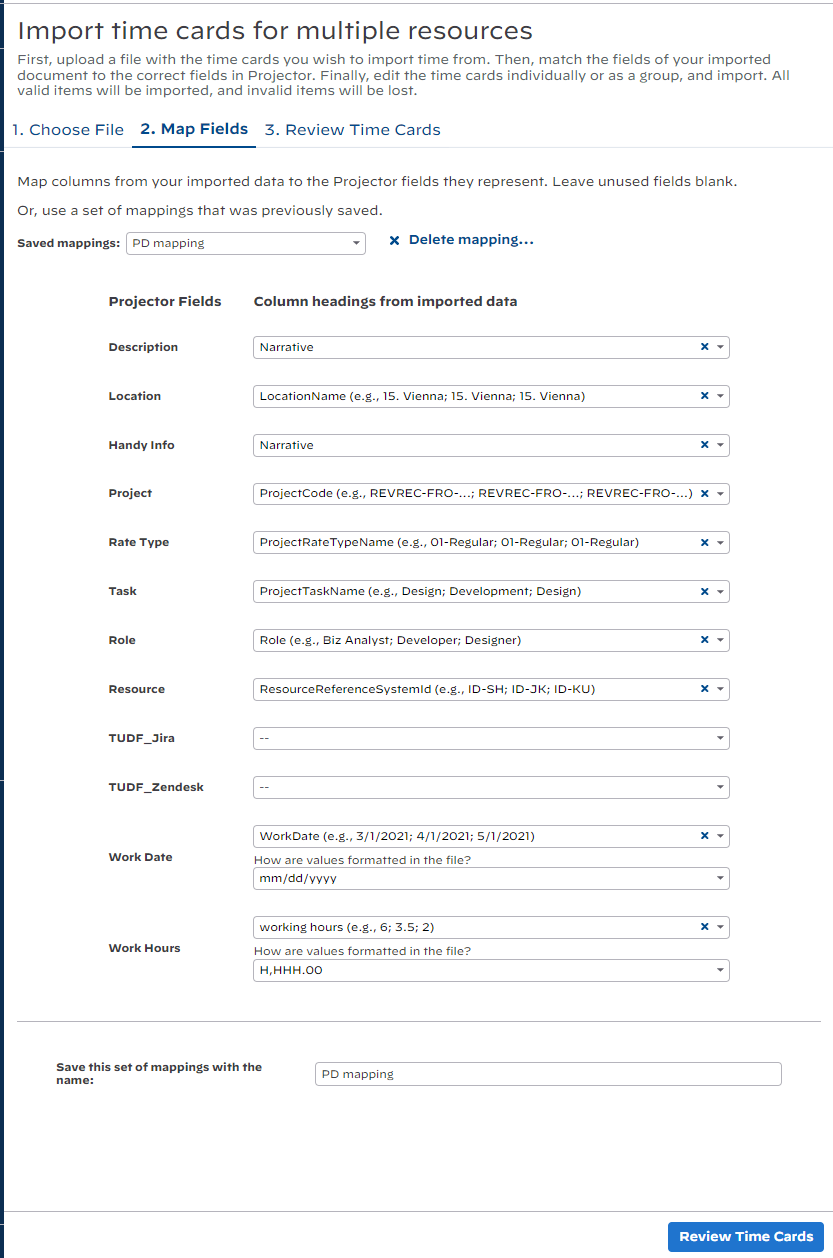
Saved Mappings
If you frequently upload a file in the same format, then you can optionally save your import settings for reuse later on.
- Save new mapping - scroll to bottom of step 2 and enter a nme
- Apply saved mapping - choose mapping from dropdown list at top of step 2

Review Time Cards
Once you have completed your mapping, move onto step 3 - Review. Here you make corrections, determine which of the time cards you wish to import, and time cards expenses that you are not interested in. Information about the card or cards is shown in the right hand pane.
Review time cards in the import pool individually, update them one-by-one or as a group, and delete items you do not want to include in the import. The system will import time cards in batches of 100 items at a time. Your changes on this screen may be lost if you click on a different tab.
To begin, click a time card in the left hand column. You can multi-select by holding the ctrl key and clicking individual expenses or by holding the shift key to select a range of expenses.
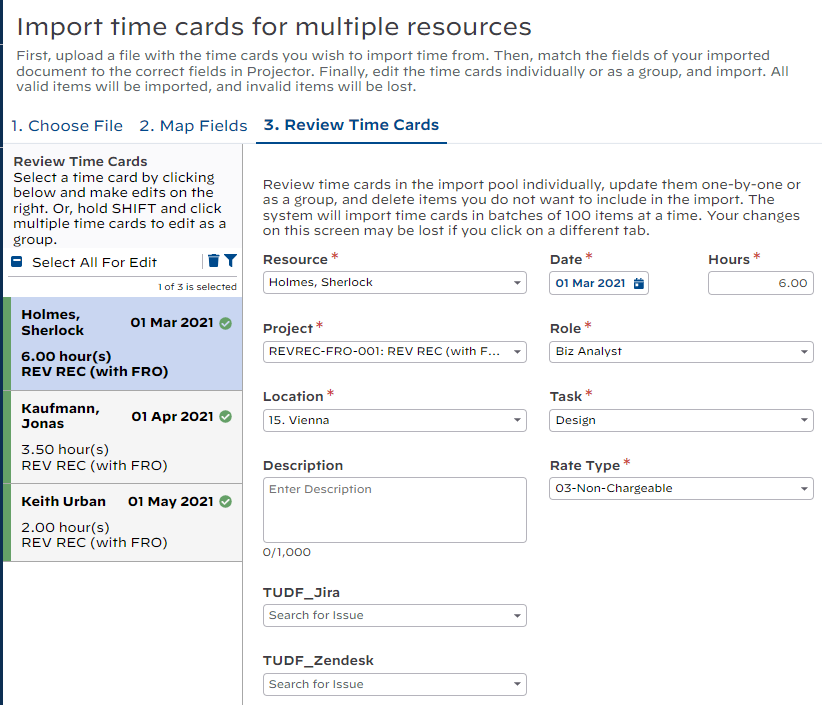
Make changes as you deem necessary. Anything with a red asterix is required for import. For example, if the imported project could not be found in Projector, you will need to pick a valid project from the dropdown list. If you have selected multiple cards at once, then all of them will change.

Once you are satisfied with all the cards click the Import button and they will be added to your time sheet. The importd time cards will appear as a list on the Time Card search page.