...
...
...
...
| Excerpt | ||
|---|---|---|
| ||
how to configure QB QuickBooks Online Edition to work with Projector |
...
| Info |
|---|
Projector offers a pre-built integration for sending information from Projector to QuickBooks Online Edition. This page will help you install the necessary software to connect the two applications. Once configured, you'll be able to transmit AR. AP, GL, Clients, and Vendors from Projector to QuickBooks Online Edition. If you use the Desktop Edition of QuickBooks, please reference this help page instead. This document only helps you connect the two pieces of software. If you need assistance mapping Projector fields to QuickBooks fields then you should be working with one of our accounting consultants. |
| Info | ||
|---|---|---|
| ||
Note starting Aug. 1, 2020, Intuit will no longer support the Internet Explorer 11 (IE 11) browser for QuickBooks Online and/or QuickBooks Authorization screens. |
This form is reached from your Integration tab | QuickBooks subsection | Synchronize AccountingAccounting Systems | Quickbooks Online.
Permissions and Settings
...
- The QuickBooks module enabled
- The global permission Accounting System Interface set to Update
Connect QuickBooks with Projector
If you have not synchronized your computer with Projector previously, then you will need to follow these steps to connect the two applications.
Install Request Processor
The Request Processor is a program provided by Intuit that sends information back and forth between Projector and QuickBooks. You can download it from this link.
http://www.projectorpsa.com/Support/Downloads/QBXMLRP2Installer.exe
Install QuickBooks Web Connector
The QuickBooks Web Connector is a program provided by Intuit that enables specially designed web-based applications to exchange data with QuickBooks Online.
http://www.projectorpsa.com/Support/Downloads/QBOEConnectorInstaller.exe
Install Projector Configuration Utility
This program is released by Projector and sets a registry key that Intuit checks for authorization purposes.
http://www.projectorpsa.com/Support/Downloads/OpsProjectorQBOESetup.exe
Install Projector 32 Bit
This part can be confusing if you don't know a lot about computers, but the non-technical version is that QuickBooks Online Edition is only available as a 32 bit program. Most computers these days are 64 bit. In order for Projector to talk to QuickBooks you have to install a special version of Projector. Please install the special version from this link.
https://secure2.projectorpsa.com/ProjectorUI32/OpsProjectorUI32.application
Once installed you should have a program called Projector 32 in your start menu.
When syncing with QuickBooks you should always run Projector 32. You can check the version of Projector by looking at the Help | About menu. The "bitness" of Projector is displayed in the upper right.
Start Projector 32
Run Projector 32 from your Start Menu and go to your Integration tab. If you don't have an Integration tab then choose View | Integration from the menu bar.
Select QuickBooks Version
Choose Online Edition from the dropdown box.
| Tip | ||
|---|---|---|
| ||
If you are using QuickBooks desktop then you should be reading this page instead. |
Verify Connector is Working
From the integration tab go to the QuickBooks subsection | Synchronize Accounting.
Click Show Connector Info. The following dialog should be shown if everything is configured properly.
Create Connection Ticket
A connection ticket identifies this computer as one that is allowed to communicate with QuickBooks Online. The connection ticket contains information about which users are allowed to access QBO and what kinds of data they are allowed to sync. This information is stored in your computer's registry. If you need to use a different connection, then see the troubleshooting section to learn how to clear it.
First, make sure you have Online Edition selected from the QuickBooks Version dropdown box. Then click Synchronize Wizard.
Because a connection ticket has not yet been created, the Synchronize Wizard button presents the following screen. If you are not presented with this screen it is because you already have a connection established. If you need to establish a new connection, see the troubleshooting section on deleting a connection ticket so that a new one can be created.
Set up a company!
Skip the Set up a company! button. As you almost certainly already have a QuickBooks company defined, you don't need to do this.
Set up connection!
When you click the Set up connection button, Internet Explorer will open to the following page. Check your taskbar if it looks like nothing happened after clicking the button. You should see a new IE window. Enter the QuickBooks credentials of a QBO administrator and Sign In.
Select Company
You will only see this step if you have multiple companies associated with your login. Choose the QuickBooks company you want to sync with.
Verify Company Information
Check that your company name looks correct. If it is wrong, switch the company.
Choose New or Existing Connection
You should either choose an existing connection from the dropdown list and click Use Selected Connection or click Create New Connection. If you are unsure what a connection is and why you would choose one vs. another, jump down to the Connections section at the bottom of this page, familiarize yourself, and then return here.
Copy Connection Ticket
Click the Copy to Clipboard button to save the session ticket string. You'll need to paste it into Projector in a couple more steps. If you lose or forget to copy the ticket it is not a big deal. You can generate a new one by clicking Synchronize Accounting from Projector again. This time you'll skip most of the steps we just covered. You also don't need to save this ticket number anywhere. You will generate a new one each time you sync with QuickBooks.
Connection Complete
Congratulations, you did it! Click Finished.
Enter Connection Ticket
Return to Projector and paste your connection ticket into this window and click OK. Your connection information is written to the registry and you will not be prompted with this dialog again.
Create Session Ticket
A session ticket determines whether a specific user can send information to QBO and what kind of information is allowed to be synced. This is different than the connection ticket we just created. This dialog is not shown if you chose to create a connection ticket with permissions for Anyone. Most people don't do that though.
Login to Quickbooks
Click the Login to QuickBooks button.
Enter User Credentials
You are presented with a second authorization screen. This time enter the username and password for the specific user that will be integrating with QuickBooks. For example, Jim or Jane, rather than the admin account used to create the connection ticket.
Optionally Pick Company
If you have more than one company defined for your QBO installation, choose the one you set up with the connection ticket.
Copy Session Ticket
Copy the session ticket that is shown to you.
Paste Session Ticket
Paste it into the Projector dialog
Finally, Projector will display a message indicating it has connected to your QuickBooks company file. Click Yes.
If everything worked you are presented with the QuickBooks synchronization wizard. See the QuickBooks Sync Wizard page to learn how to use it.
Connections
In order for Projector to talk to QuickBooks, it must operate through a Connection. The connection determines who is allowed to make changes in QuickBooks and what changes they are allowed to make. You can also view audit logs on a per connection basis through the QuickBooks Online website. Although you can manage existing connections through the QBO website, you can only create new connections through Projector. Connections must be created by a QBO user with administrator access rights. The following sections describe the components of a connection and show screenshots for when you use the Make New Connection option in Projector.
Who has access
Before we get too far into connections, let's cover what they define. First, a connection defines who has access. Your choices are:
| User Category | Description |
|---|---|
| Anyone | Anyone, even someone who does not have permissions to log in or user QBO, can run Projector on this computer and sync accounting data into QuickBooks. |
Any user in your QBO installation | Any user with a QBO account can sync. View your users by logging into the QBO website and going to the Manage Users section. |
A specific user or users in your QBO installation | You are presented a list of each QBO user account. Choose which users are allowed to sync. |
If you are thinking ahead, you may be wondering how Projector knows which account is trying to sync data. Well, each time you sync Projector with QBO you are asked to log into the QBO website. The website will give you a special ticket. Cut and paste this into Projector to identify whether John vs. Jane vs. Fido. One last note, these logins have absolutely nothing to do with Projector logins. If you log into Projector as nancy@mycompany.com, you can log into QBO as qboAdmin@mycompany.com to sync transactions.
Access Rights
Next you need to define what kind of data these users can access. The table below explains the different levels of access you can define. These govern access to syncing GL, AR, AP, Client, Vendor, and Resource data.
| Access | GL | AR | AP | Client | Vendor | Resource |
|---|---|---|---|---|---|---|
| All Accounting | x | x | x | x | x | x |
Customers and Sales | x | x | ||||
Vendors and Purchases | x | x | x | |||
Customers, Sales, Vendors, and Purchases | x | x | x | x | x |
Connection Names
I've put this section last, despite the fact that it is the first thing QBO asks you for. I did this because naming is important and you need to have knowledge of the preceding sections before you choose an appropriate name. You should pick a name that describes the connection type, who has access, and what the access rights are. When you setup a computer in the future, this will make choosing the correct connection far easier. If you just call your connection "Projector" it is unlikely you'll remember any of the details when you need to use it again. However, if you name it "Projector - Tom - All Accounting" you'll know exactly what that means.
If you do forget your connection details you can look them up by logging into your QBO account and navigating to Company | Lists. Click on Connection List.
Troubleshooting
Below are some issues that users have had while synchronizing with QB online edition.
Projector on a 64-bit Operating system
If you see the following error - Failed to locate QuickBooks. Please ensure that a supported version of QuickBooks is installed on this computer. If you are running Projector on a 64-bit Operating system, please contact Projector support for a QuickBooks connector that is compatible with your operating system.
| Tip |
|---|
You most likely are not running Projector 32. Please install and use Projector 32 to synchronize with QuickBooks. |
Redirect Failed
When trying to create a connection ticket, you may encounter a redirection error in the popup window.
| Tip |
|---|
This is caused when your browser is already logged into QBO. You should log out of QBO and try clicking the New Connection button again. |
Unable to Create Session Ticket
When trying to generate a session ticket, a warning informs the user that the page is hiding insecure content. Occasionally we have found that this makes it impossible for someone to generate a session ticket. Instead of a ticket they are logged into their QuickBooks company file.
| Tip |
|---|
To fix this, add Intuit as a trusted website:
|
Destroy Connection Ticket
If you need to destroy a connection ticket because it was incorrectly configured or because the user of the computer has changed, then delete the registry folder and all subfolders/keys from HKEY_CURRENT_USER\Software\Intuit\QBOEQBXMLRP
...
Connection Tokens
QuickBooks Online uses an OAuth authentication system. This works by giving you an authentication token that grants you access to QuickBooks Online. With access you can push/pull information from QuickBooks Online. That sounds simple, but things quickly get more complicated because QuickBooks Online only allows a single QuickBooks Online User to have a token at one time. What does this mean for you? It means that you may have to "steal" the token from one of your fellow Projector users, or it means you may get locked out of QuickBooks Online by one of your fellow Projector users.
This can get confusing, so if you need help understanding the following scenarios, feel free to call Projector support. It gets confusing because several items come into play. These items are:
- Projector User - the account you log into Projector with
- Projector Company - the company file in Projector you are trying to send information to QuickBooks Online from. Most organizations have just one, but you might have multiple if you keep separate sets of books.
- QuickBooks User - the account you log into QuickBooks Online with
- QuickBooks Realm - the QuickBooks company file you are sending data to
Steal Token
You will need to steal a token if you share QuickBooks Online credentials with another Projector user for the same realm.
| Projector User | Projector Company File | QuickBooks Login | QuickBooks Realm | Token |
|---|---|---|---|---|
| Tom | US Company | accounting@revcorp.com | US Company | Has token currently |
| Jim | US Company | accounting@revcorp.com | US Company | When Jim logs in he'll get a message that he doesn't have an active token. If he chooses to generate one, he is stealing that token from Tom |
Locked Token
You will find yourself locked out of an account if somebody with a different QuickBooks Online login has already taken the token for the same realm.
| Projector User | Projector Company File | QuickBooks Login | QuickBooks Realm | Token |
|---|---|---|---|---|
| Tom | US Company | tom@revcorp.com | US Company | Has token currently |
| Jim | US Company | jimmy@revcorp.com | US Company | When Jim logs in he'll get a message that someone else has the token. Jim needs to ask Tom to release it before he can proceed. Tom releases the token by clicking the Clear QuickBooks Online Connections button in Projector. How do you see who has the token? There isn't a definitive way to do this, but you can infer who has it by logging into QuickBooks Online. Go to your Users section (under gear icon in upper right) and view activity for each user. Whichever user was last sending transactions from Projector likely has the token. |
Connect to QuickBooks Online
To connect to QuickBooks Online, click either the Import Wizard or Synchronize Wizard buttons.
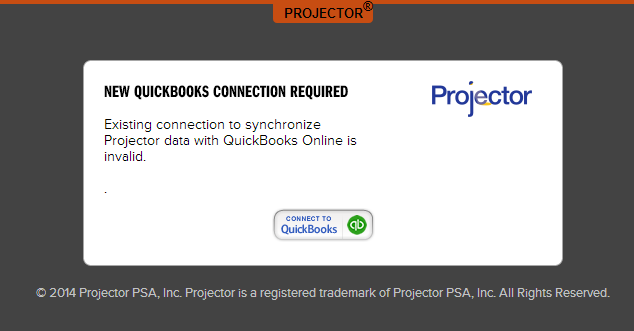
You'll be taken to the following website. Click the Connect to QuickBooks button.
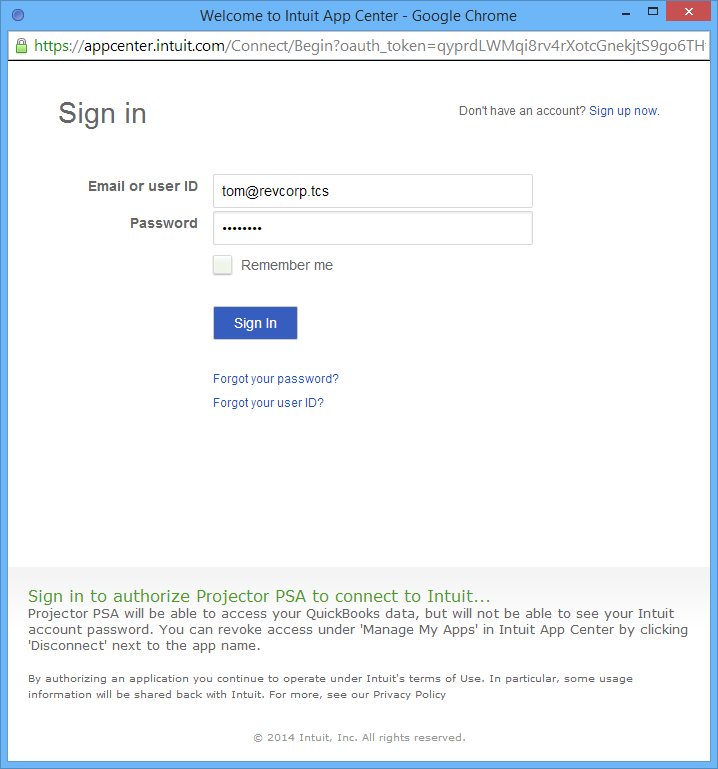
A pop up window will ask you to log into QuickBooks Online. Do so.
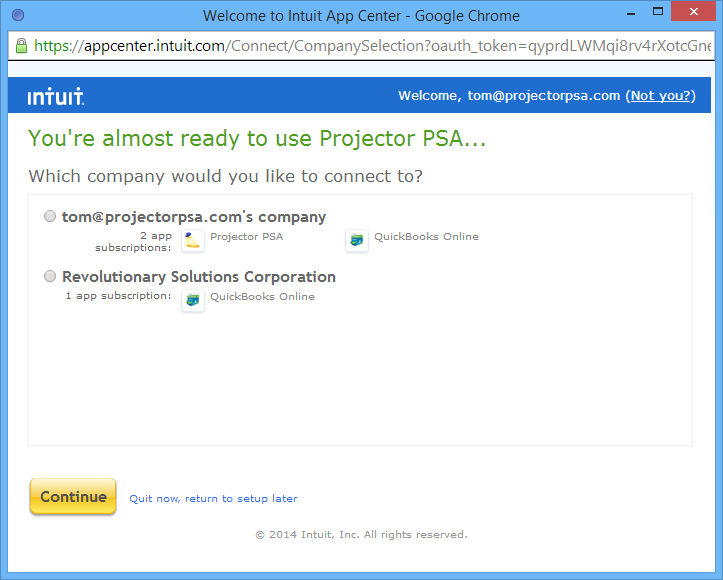
If you have multiple companies associated with QuickBooks Online, you'll need to pick which one you are authorizing. After making your choice, click Continue.
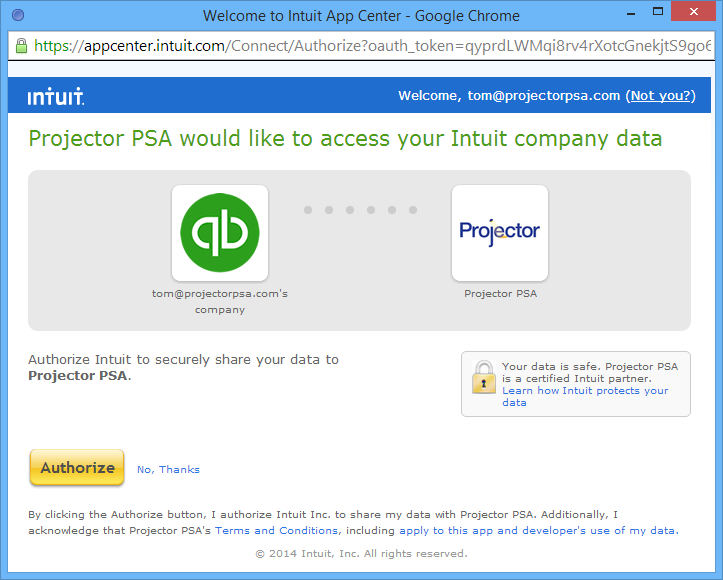
Then click the Authorize button to complete the process.
You can close any popup windows and click the Import Wizard or Synchronize Wizard buttons to start sending data to QuickBooks Online.
Configure QuickBooks Online
When transmitting data to QuickBooks Online, you will receive the following error if duplicate AR and AP transactions are not allowed.
400 : ValidationException was thrown. BadRequest - 6140: Duplicate Document Number Error [: Duplicate Document Number Error : You must specify a different number. This number has already been used.]
This occurs in two situations.
- When voiding an invoice
- When voiding a payment voucher
Please modify your QuickBooks settings to prevent these error messages.
AR Transactions
To fix AR transactions, turn OFF Custom transaction numbers. This is available from Gear Icon | Company Settings | Sales.
AP Transactions
To fix AP transactions, turn OFF Warn if duplicate bill number is used. This is available from Gear Icon | Company Settings | Advanced.
Troubleshooting
Common problems when using QuickBooks Online.
You can manage your Projector access by appending /app/sdkapplist to your URL. (sorry these directions stink, will update later).
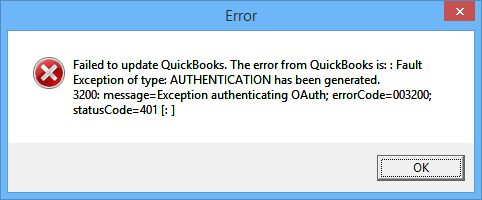
Fault Exception of type AUTHENTICATION
When attempting to sync with QuickBooks Online, you may receive an error like the following: Failed to update QuickBooks. The error from QuickBooks is : Fault Exception of type: AUTHENTICATION has been generated. 3200: message=Exception authenticating OAuth; errorCode=003200; statusCode=401 [:]
This occurs when another of your QuickBooks Online users has stolen your authorization ticket. Only one person can be authorized to sync Projector to QuickBooks Online at any given time. You will need to steal the ticket back in order to proceed. However, you might want to make sure anyone else who is currently using the system
App_Already_Purchased
When attempting to create a connection, you may receive the following error message - The application has already been subscribed to by another user for this company. Please contact xxx to make changes to this subscription.
| Tip |
|---|
We solved this by clearing the QuickBooks Online connection on the Projector side for another user. Then a new QuickBooks Online connection could be created for a different user. In the interim the user also added themselves to the authorized app list. So not sure if this is a two part fix or a one part fix. Add more explicit steps if we encounter this again. |
| Tip |
|---|
Based on client feedback, access to your connectors via the new QuickBooks Online UI isn't possible. You have to know the secret link which is https://qbo.intuit.com/app/sdkapplist Once you go there, edit the connection. You should then be able to add people that require access. If you have multiple connections (is this possible?) you may need to delete obsolete ones. |
| Info |
|---|
This solution was found online, but didn't end up working. QuickBooks Online has changed their UI significantly in the last two weeks or so. I don't think these steps apply anymore. I am leaving this here for temporary reference though. Once we get a clear case of reproducing this issue, we'll get this section cleaned up. QuickBooks Online uses a "company" model rather than an "individual" model for signing-on, meaning that only one person can authenticate on behalf of their entire company. This means that only one person should create and authenticate the QuickBooks Online connector. From then on that one person may share the connector with other users. If you receive this error, you should take the following steps to gain access to the company QuickBooks Online data connector:
|


