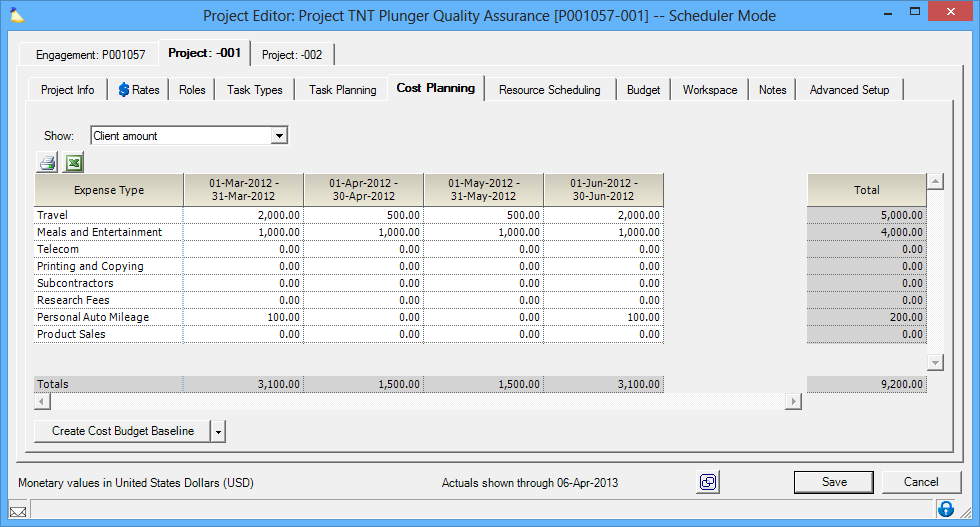
The cost planning tab is for planning out your expected expenses. You can then create budgets based on the plan and receive notifications when budgets are near consumed, or fully consumed. Budget by client amount, disbursed amount, and expense amount.
Cost plans can be entered against Client amount, Disbursed amount, or Expense amount. You cannot define a separate amount for each one. They are tied together mathematically. If you update Client amount, then both disbursed and expense amounts will change. More details on how this works are available in this help document.
This tab is reached by opening a project and selecting the Cost Planning tab.
Permissions and Settings
The following people can make changes on this tab:
- Anyone with the cost center permission Maintain Projects and Engagements
- Engagement/Project Managers can edit all fields, but can only create/delete roles if they have the stage permission Edit Cost Plans
In addition to the Engagement Manager and the Project Manager, additional users can be elevated to the status of Project Manager and make changes via the Can Act as PM option.
Cost Plan
When you visit the cost planning tab you are presented with a grid showing one row per expense type defined in your installation. There is also a dropdown box that allows you to switch between Client Amount, Disbursed Amount, and Expense Amount. Switching between the three options changes the grid. This next part is very important to understanding this tab - all three of these grids are mathematically tied together. So entering a Client amount of $100 in a cell causes the corresponding cells in the other two tables to change too.This is important to know because you can inadvertently modify/overwrite data you have entered in a different cell. Typically we see someone choosing to enter their planned expenses for just one of the three types and letting the other two auto-calculate. The table below explains the the three types.
| Type | Description |
|---|---|
| Client Amount | The amount that you intend to charge the client. |
| Disbursed Amount | The amount paid out-of-pocket, regardless of whether the company or the client is responsible for it |
| Expense Amount | The amount that the company intends to cover. |
The following is a gross simplification, but bear with me.
Disbursed - Client = Expense
Which makes sense because anything the client doesn't cover has to be paid by the company. The actual relationship is more complicated than this and is explained below, but keep this in mind as a reference.
DMUP and TCAF
In order to understand how the calculations are done you also have to understand DMUP and TCAF. These define the relationship between Client Amount, Disbursed Amount, and Expense Amount. DMUP is the most likely you'll encounter, and so we start there.
Default Markup Percentage (DMUP)
Each expense type has a Default Markup Percentage. This is a positive or negative percentage. For example, you may have a markup of -50% for travel. This indicates that clients only pay half the costs of travel. Or you may have a +20% markup for subcontracted work, indicating the client pays a 20% premium. You can also have a 0% DMUP so that the client always pays the actual cost.
The relationship between disbursed amount and client amount in this case should be pretty clear. Just multiply the disbursed amount by the DMUP and you get the client amount. The difference is the expense amount. The table below visualizes the calculations.
| DMUP | Disbursed Amount | Client Amount | Expense Amount |
|---|---|---|---|
| +50% | $100 | $150 | $0 |
| -50% | $100 | $50 | $50 |
| 0% | $100 | $100 | $0 |
The table above is based on specifying the disbursed amount first. But what if you specified the client amount instead? In this case we have to back calculate the disbursed amount.
| DMUP | Client Amount | Disbursed Amount | Expense Amount |
|---|---|---|---|
| +50% | $100 | $66.67 | $0 |
| -50% | $100 | $200 | $100 |
| 0% | $100 | $100 | $0 |
Still following? Great. Let's tackle a special case for DMUP and client amount. Default markup percentages of 0%, 100%, and negative 100% cause some special things to occur.
- If you have an expense type with a default markup percentage of positive 100%, and you enter a client amount of $100, then the disbursed and expense amounts are impossible to back calculate. In this case Projector leaves them at zero. This behavior allows you to plan costs which result in 100% revenue. You can use this same setup to model costs that are all expense. By entering an expense amount, it will be written down to zero client amount. There is of course a caveat to this. If you have Treat Costs as Fees enabled, then we can indeed back calculate from client amount to disbursed and expense amount. In that case all three have the same value.
- If you have an expense type with a default markup percentage of negative 100%, and you enter an expense amount of $100, then the disbursed and client amounts are impossible to back calculate. In this case Projector leaves them at zero. Although this behavior is analagous to the negative markup example, this behavior of creating zero disbursed and client amounts does not seem useful. I can't imagine a scenario where you would want zero disbursed amount, but an actual expense amount.
- If you have an expense type with a default markup percentage of 0%, and you enter an expense amount of $100, then the disbursed and client amounts are impossible to back calculate. I can't imagine a scenario where you would want zero disbursed amount, but an actual expense amount.
| DMUP | Disbursed Amount | Expense Amount | Client Amount |
|---|---|---|---|
| 0% | 0 | $100 | 0 |
| 100% | 0 | $100 | 0 |
| -100% | 0 | 0 | $100 |
Treat Costs As Fees (TCAF)
So now you know how DMUP affects calculations, but how does TCAF affect it? TCAF is an on/off switch. When 'on' it tells Projector to treat all expenses as revenue. This in turn changes the way expense is calculated. The short way to remember this is:
If TCAF is on, expense amount = disbursed amount
This is because TCAF causes the amount of reported revenue to increase. However, you still need your balance sheets to add up. So the opposite side of the equation, expense, also increases.
Create a Cost Plan
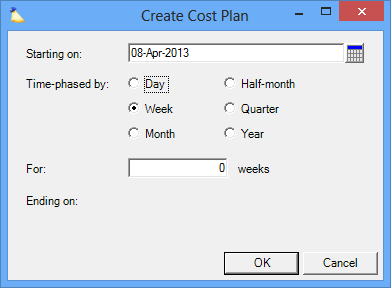
From the multi-select dropdown in the lower left choose Create Cost Plan. The following dialog is displayed. Choose a start date, how you want to time-phase the cost plan, and for how long you want it phased. Then click Okay. Cost Plans can be created for a maximum of 208 weeks (4 Years).
The grid is automatically filled in with zeroes. Fill in the grid with your cost plan.
Extend Existing Cost Plan
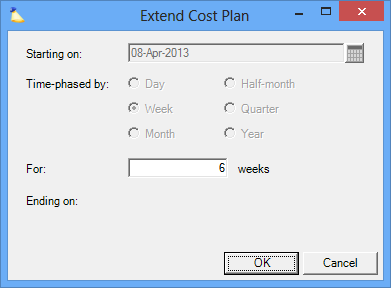
If you need to extend the cost plan then click Extend Cost Plan from the multi-select dropdown list in the lower left. The start date cannot be modified. If your start date is incorrect then you will need to create a new cost plan instead. So you don't lose your work you should highlight the existing cost plan and ctrl-c to copy it to your clipboard. You can paste it into Excel for safe keeping. Then create your new cost plan and paste the saved values back in.
Create Budget Based on Cost Plan
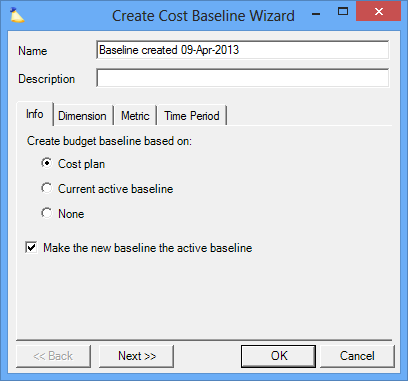
Click Create Cost Budget Baseline from the multi-select dropdown button. This opens the cost budget creation wizard. See the Create a Cost Baseline help for instructions on stepping through this wizard and the Project Budget Tab for help understanding budgets.


