This document outlines the steps required to download a copy of a Power BI report and also uploading a Power BI pbix file back up to the workspace
To Download the .pbix File from the Power BI Workspace for Editing
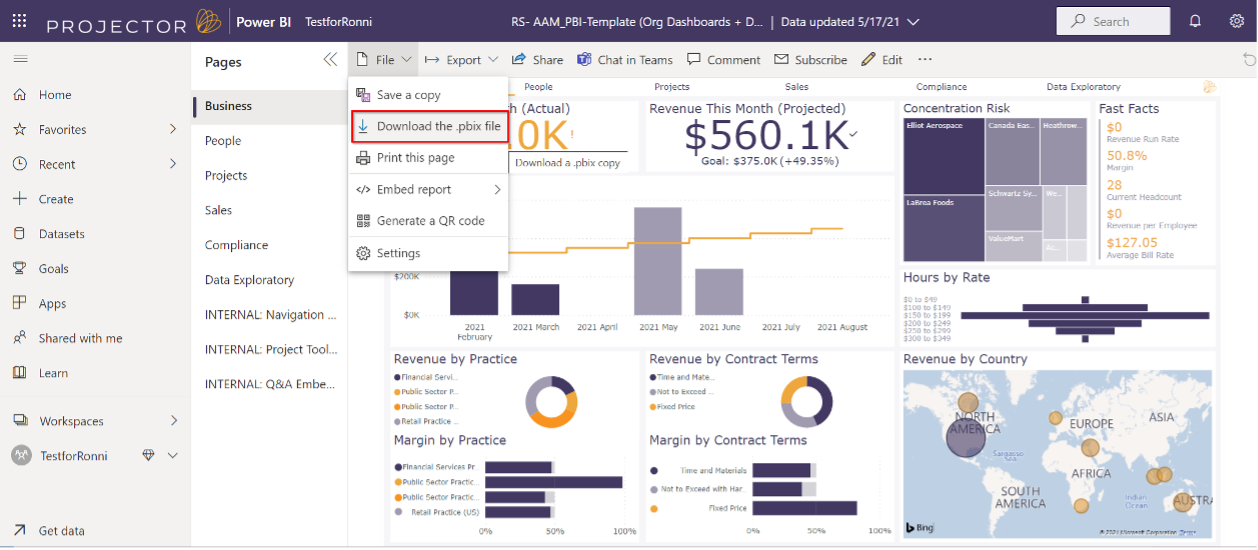
From within the power BI report in the workspace, choose the option to download the pbix file.
This message indicates that the file is being downloaded:
Once downloaded, the file can be modified in Power BI desktop. It’s important to keep the file name the same (for re-uploading), but Projector recommends keeping dated backup copies to ensure that the latest version is uploaded to the workspace.
To Upload the pbix file to the Power BI Workspace
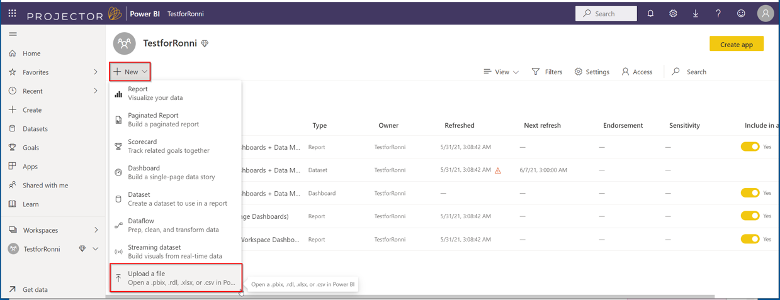
From the workspace main page, choose the option to “Upload a File”.
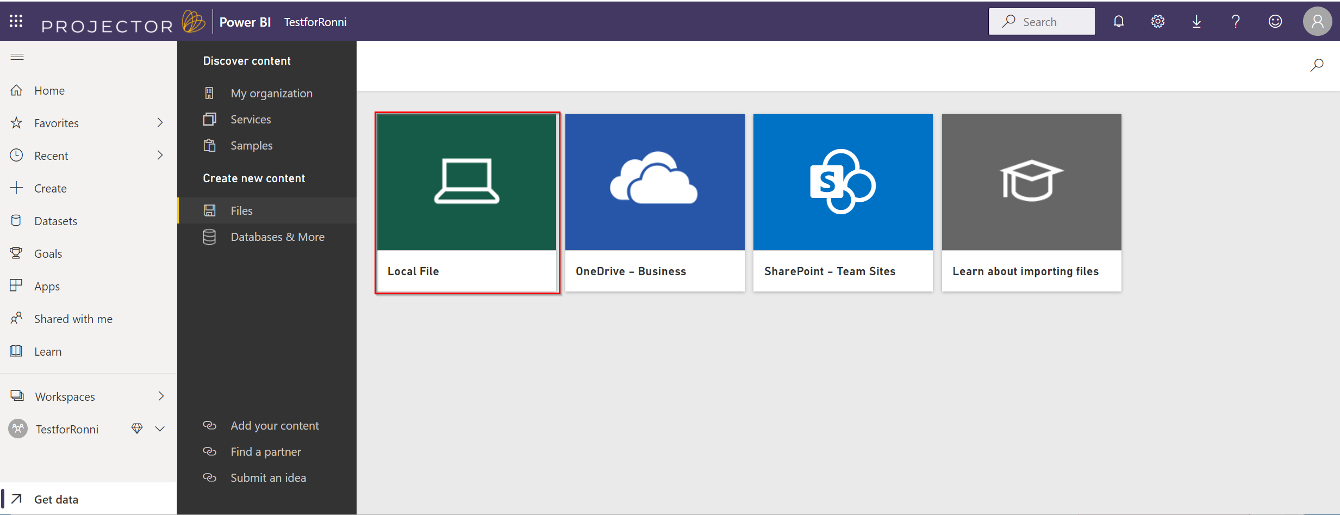
Since the file is stored locally, choose this option:
Select the file and make sure to keep the same file name, so that the file is replaced and not added.
You will get this warning message:
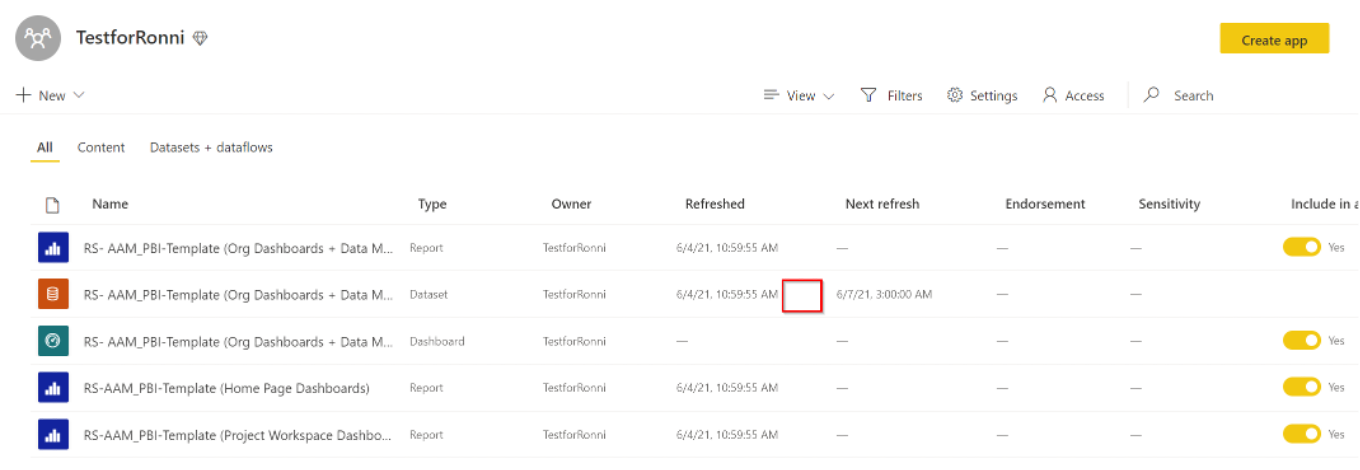
Once the file is uploaded, the data will attempt to refresh. Be sure to check that the refresh was successful. If there is an error with the refresh, it will appear as an icon here (indicated in the red box region).
Adding Fields to ProjectorBI Datasets
You may find you need additional fields in your ProjectorBI environment. To do so you’ll first need to add them to the underlying Projector Reports.
Do this from the Projector reporting interface. You’ll need to sign in as whatever user owns the scheduled reports. PPSA recommends this be a generic user.
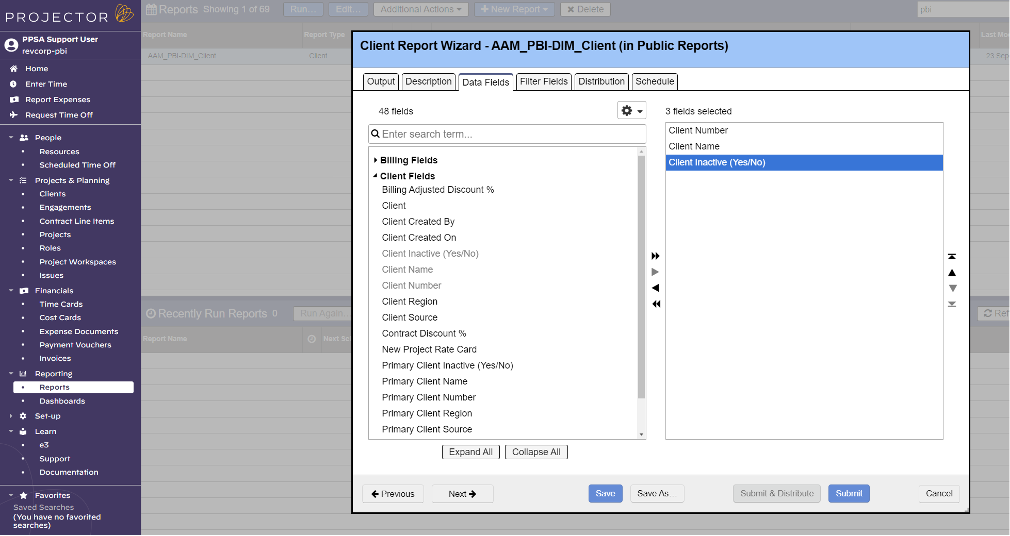
Open the report that needs additional fields and add the fields:
The trick here is to remember how many fields you added. In this case I added one field.
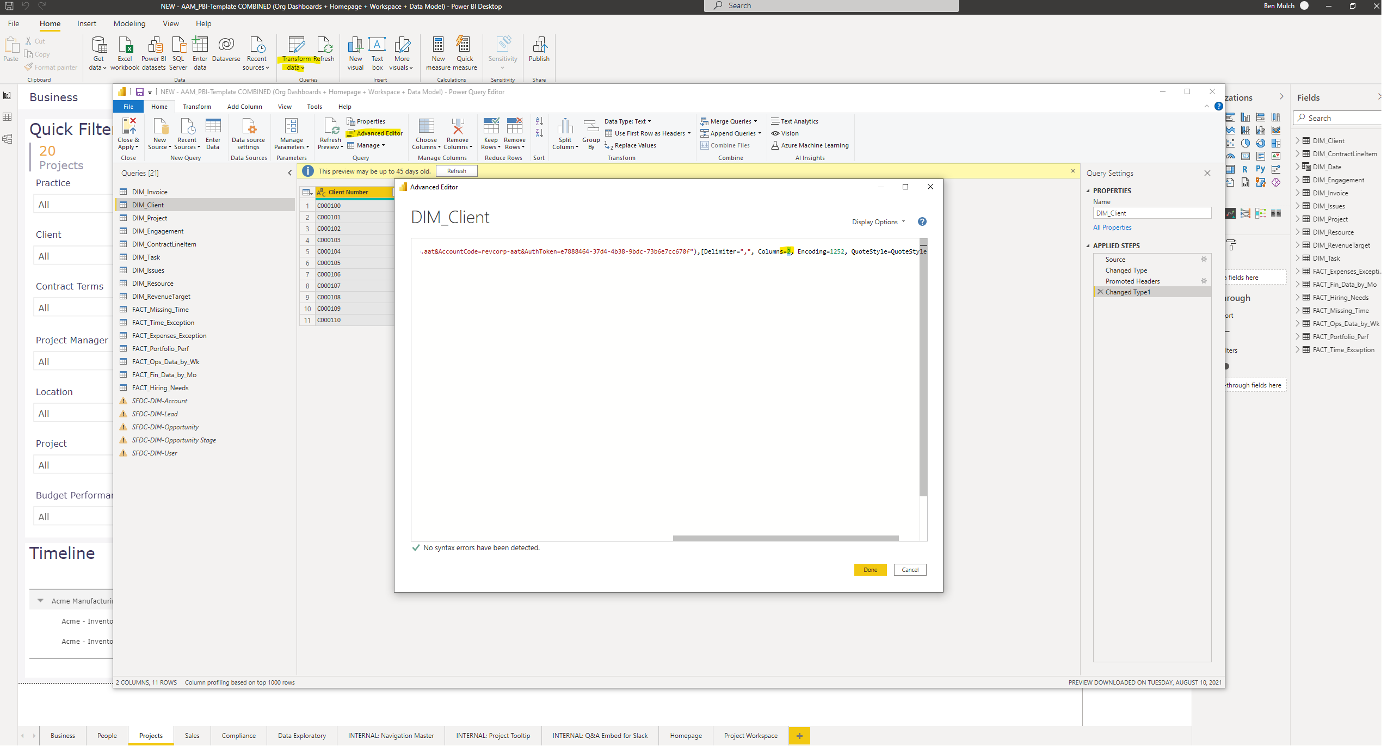
Now go to PBI Desktop and Transform the data. Transform will open Power Query. Select your query or dataset and select Advanced Editor.
From the Advanced Editor you need to tell PBI to expect additional columns. Overwrite the hardcoded column count here by adding the fields you’ve just added with the existing fields. In this case my query has gone from 2 columns to 3 columns.
Save and Apply your changes. This method can be used to add data fields or row fields to any Projector report.
Adding Additional Reports to ProjectorBI
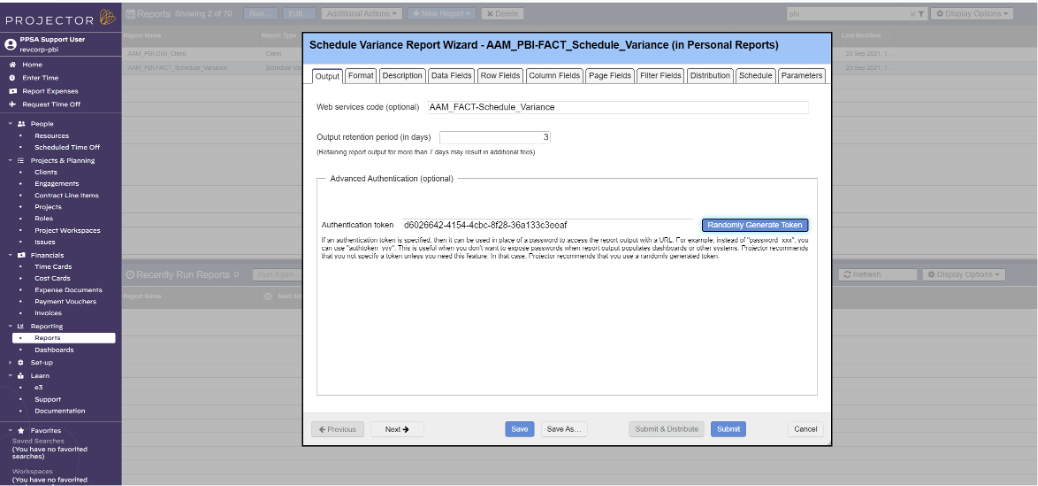
You may also find that you need entirely new reports added to your dataset. To do this create the new report in Projector:
Be sure to give the report a useful name and copy the authentication token from the other reports. You’ll also want to set up a schedule for this report that makes sense with your other ProjectorBI reports.
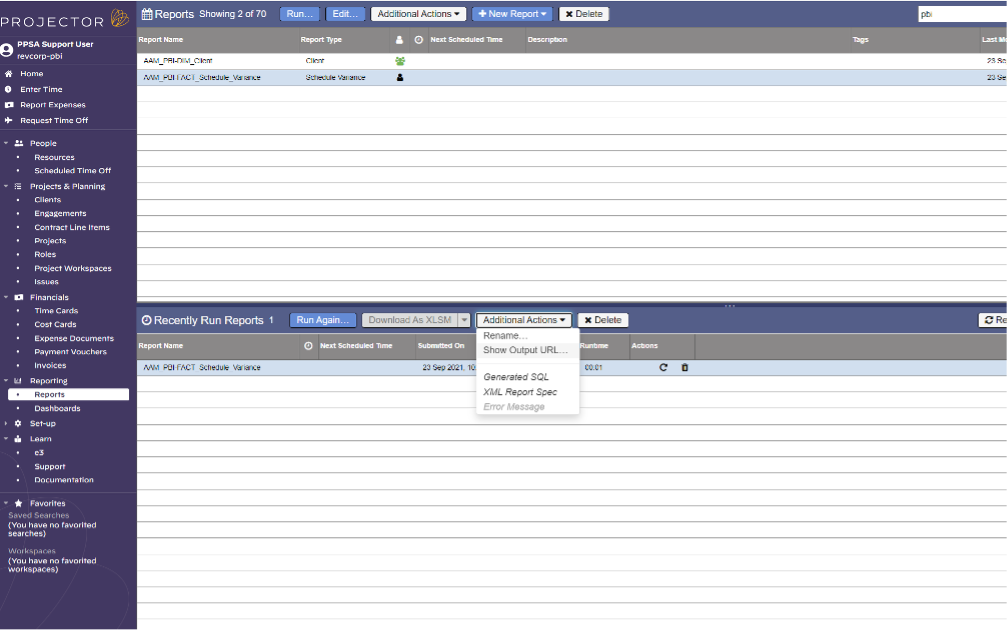
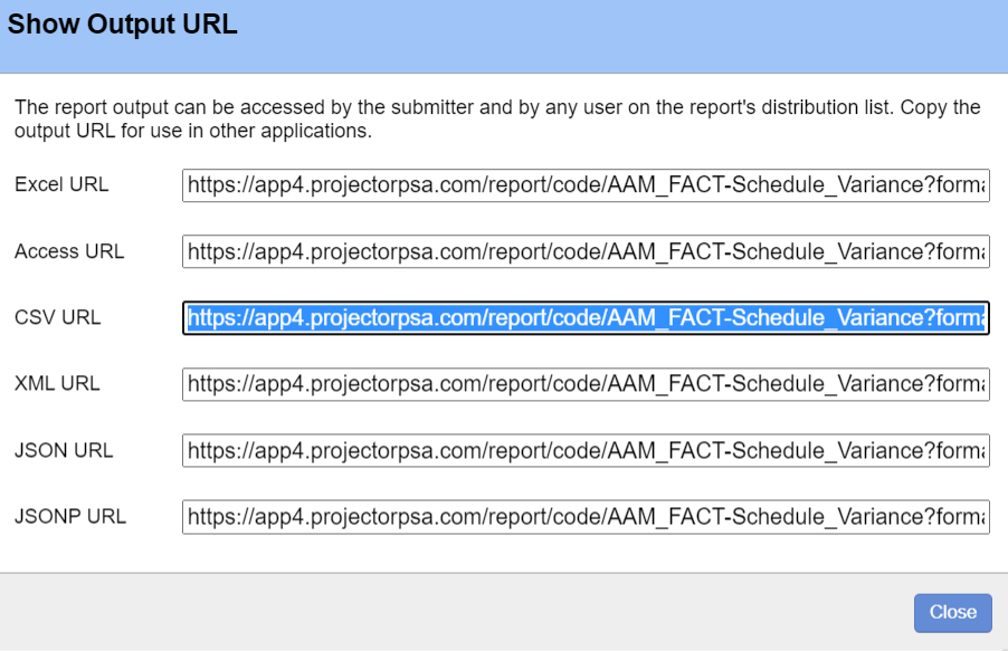
Once your is ready submit the report. On the completed report select “Show Output URL…”.
From here copy the csv output url. This is the url that will point PowerBI to Projector’s web services to retrieve the report.
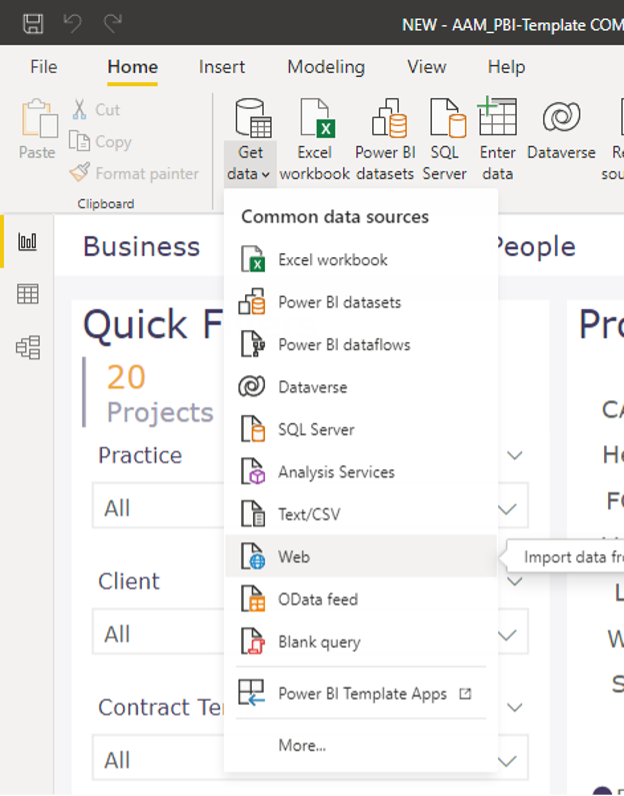
Now in your PBI Desktop file select “Get Data” > “Web”:
Drop the CSV URL in the following popup. Add the suffix "&IncludeEmpty=yes" to any reports that could hypothetically come back empty.
PowerBI will show you a sample of your data. From here you’ll likely want to “Transform Data” to finish building out this dataset.
Common Troubleshooting
Commas in Project Descriptions
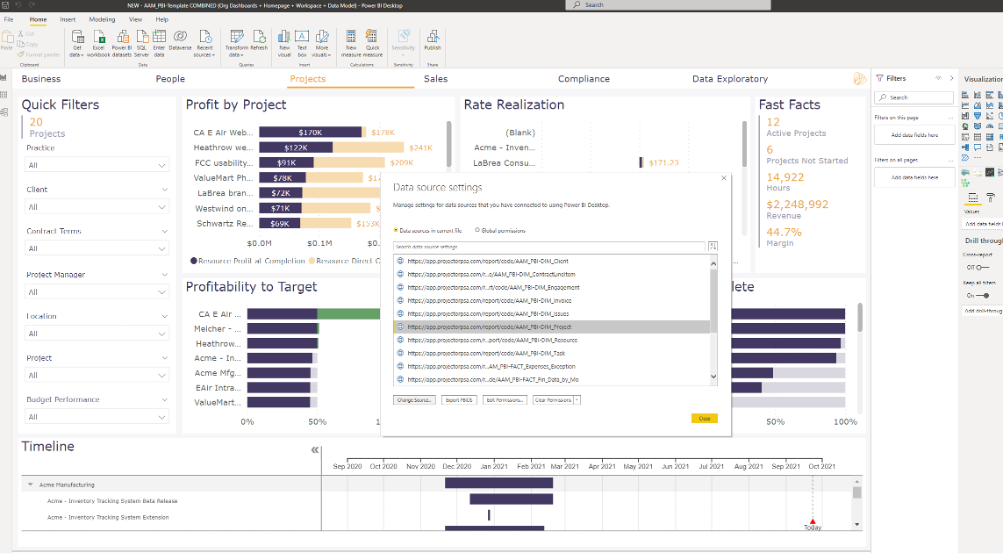
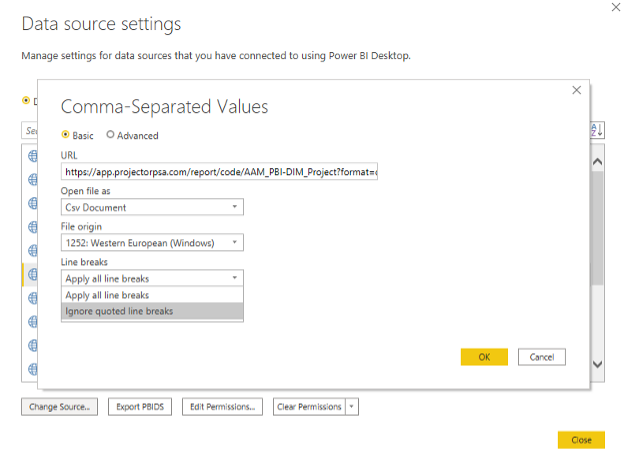
Sometimes a report will break because of duplicates in an unexpected data set (generally DIM_Project). This is caused by comma’s in the Project Description field. The simple fix here is to open the Data Source Settings, navigate to your report, and select “Change Source”:
In the setting change the “Line Breaks” drop down to “Ignore quoted line breaks”.
Save and apply.
