Mobile Time Entry
- Thomas Sherman (Deactivated)
- Former user (Deleted)
With Mobile Time Entry you can accomplish basic time entry functions like finding projects, reporting hours, adding descriptions and providing feedback on task completion.
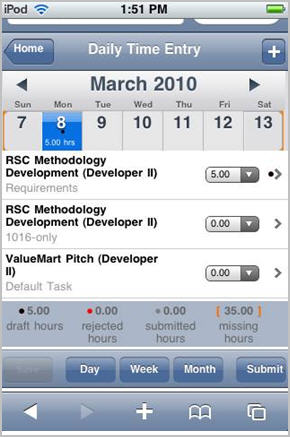
Time Entry Screen
The Time Entry screen will display a weekly set of seven time cards (one cell for each day of the week). Projects and tasks are listed in the horizontal rows of the Time Entry screen below the time card cells. A row will appear for each project on which you are scheduled, any project using detailed task management where you have been assigned a task, any project you may have already reported time to for that week, or if you have pinned that project.
Below the project list is a summary of time for the displayed week. This display shows the total Draft, Rejected and Submitted hours. Missing hours are also displayed and calculated based on your normal working hours. If in Projector your regular work schedule is for 40 hours per week, then this amount is the number of hours needing entry to equal 40 hours. Missing time is not related to how many hours that you were requested or booked for. In weeks that include company holidays, your regular working hours could be reduced, lowering the amount of time that is expected for you to report.
The bottom row of the Time Entry screen contains buttons that, if enabled, will allow you to Save or Submit your time along with options to show your submitted time in a Daily, Weekly or Monthly format.
Once a day and project is selected add hours by clicking on the down arrow next to the Time cell: 
This will open a scrollable window where the desired hours may be selected:
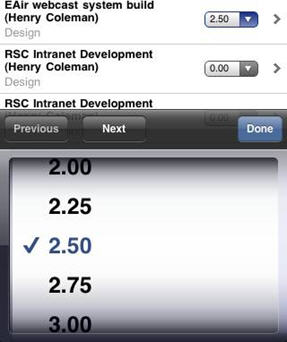
When the desired amount is found press the value to select, then press Done. You can use the Previous and Next buttons to move to other projects/tasks in the list.
Selecting Projects
To select a new project press on the 
sign in the upper right hand corner of the form to display a new screen where you can search and select other projects.
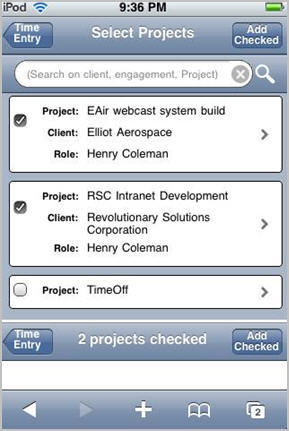
Click on the search window to enable the keyboard to enter a search string. When done click on the magnifying glass icon to search for projects. Review the list of returned projects and touch the button to the left of a project to check it. Touch the Add Checked button to add the selected project and return to the Time Entry screen. Your selected project will now be available for time entry.
Time Details
The Time Details screen is accessed from the Time Entry screen by tapping the > right arrow between the project name and the hours cell. This screen allows you enter details, some of which may be required, pertaining to the project task you are entering time against. In the upper right corner of the form the current status of the time card will be displayed. The top part of the screen will display the work date, project, client and your role in the project. Other details may be entered and are described below.
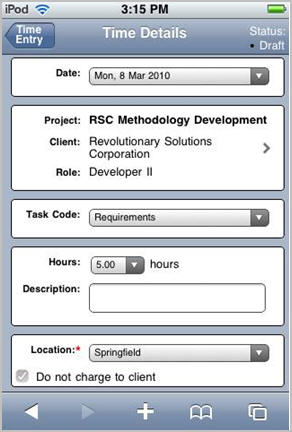
Task Code: You may select a task using the down arrow which will open a scrollable list of tasks to choose form. If this project uses detailed task management this will displays Tasks.
Hours: You can modify the hours on this task using the down arrow button.
% Comp: If the project uses detailed task management you may also enter a percent complete value for the task you are entering time against.
Description: Touch here to enable the keyboard and enter a description of the work performed
Location: Use the drop down arrow to view and select a loction where the work was performed.
Do not charge to client: Touch the check mark next to this item to indicate this is non-billable work that should not be charged to the client.
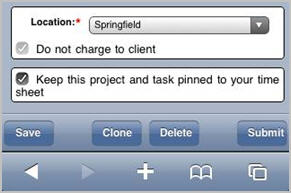
Keep this project and task pinned to your time sheet: Touch the check mark to pin this project/task to your time sheet. Be sure to touch the Save button to properly pin the project.
Save: Touch the Save button to save changes and entries made on this screen. This will display a Saving Time in Draft Mode confirmation screen.
Clone: Touch the Clone button to create a duplicate of this timecard. This will display a Clone confirmation screen.
Delete: Touch the Delete button to delete the timecard. This will display a Delete confirmation screen.
Submit: Touch the Submit button submit your time for approval. This will display a Submitting Time confirmation screen.
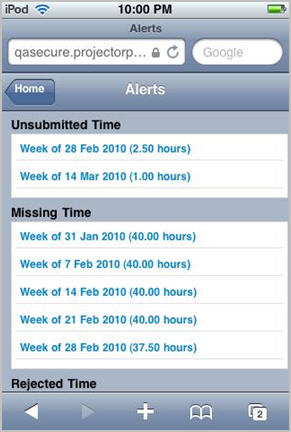
Alerts Screen
The Alerts screen will display any weeks where there are time cards that need your attention. The weeks are categorized in Unsubmitted Time, Rejected Time or Missing Time headings. Unsubmitted time would be draft time that hasn't been submitted, Missing time is determined by comparing the number of submitted hours in a week against the hours expected based on the working schedule in your resource profile. To view a specific week, press the link under the heading, and you will jump to that week in Time Entry.
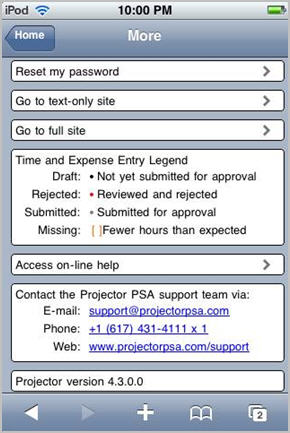
More Screen
The More screen is accessed from the Home screen. From here you can reset your password, access the Employee Portal or Projector's online help. Other information includes a Time and Expense Entry Legend, Projector Support contact information and the running version of Projector.