| Info |
|---|
Some basic help in getting Okta configured to work with Projector's Single Sign On implementation. |
Use Pre-Built Okta Connector
Projector has pre-built application in Okta. You can quickly and easily configure Okta using this. If you want to manually configure Okta, see the next section, Manually Configure Okta.
- Log into Okta and go to the Administration area
- Click Applications
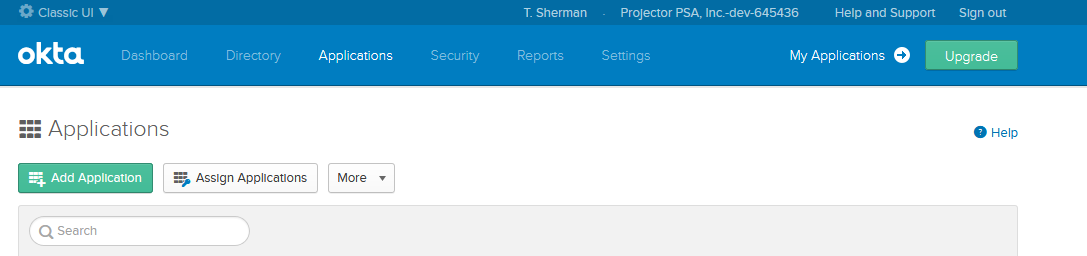
- Click Add Application

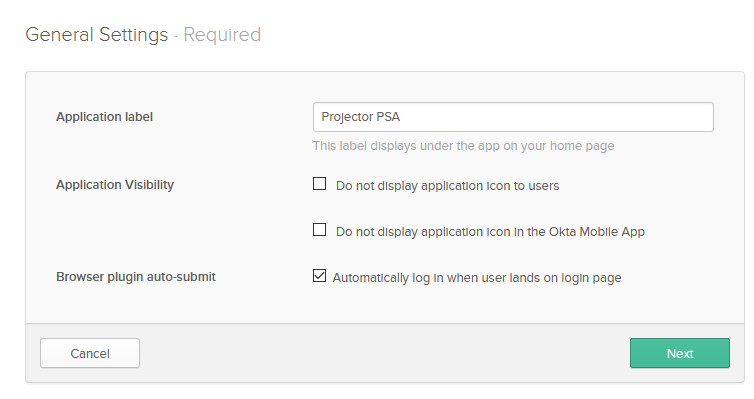
- Search for "Projector" and click Add

- Click Next
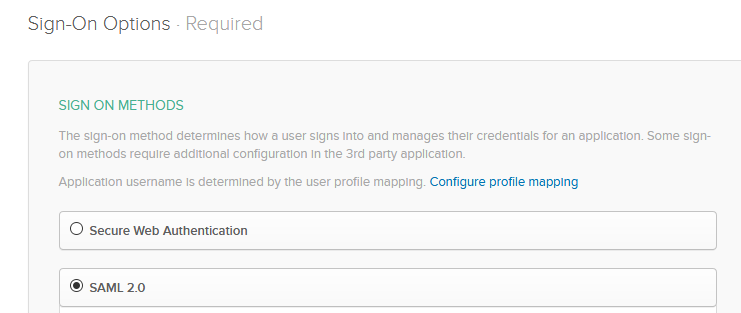
- Choose the SAML 2.0 radio button
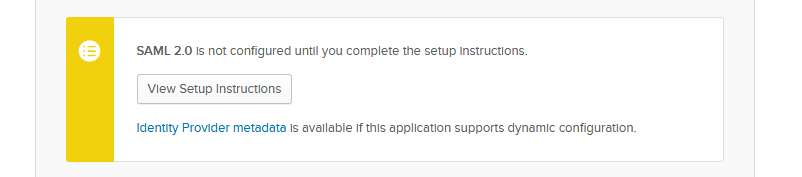
- Click View Setup Instructions. This opens a new web page.
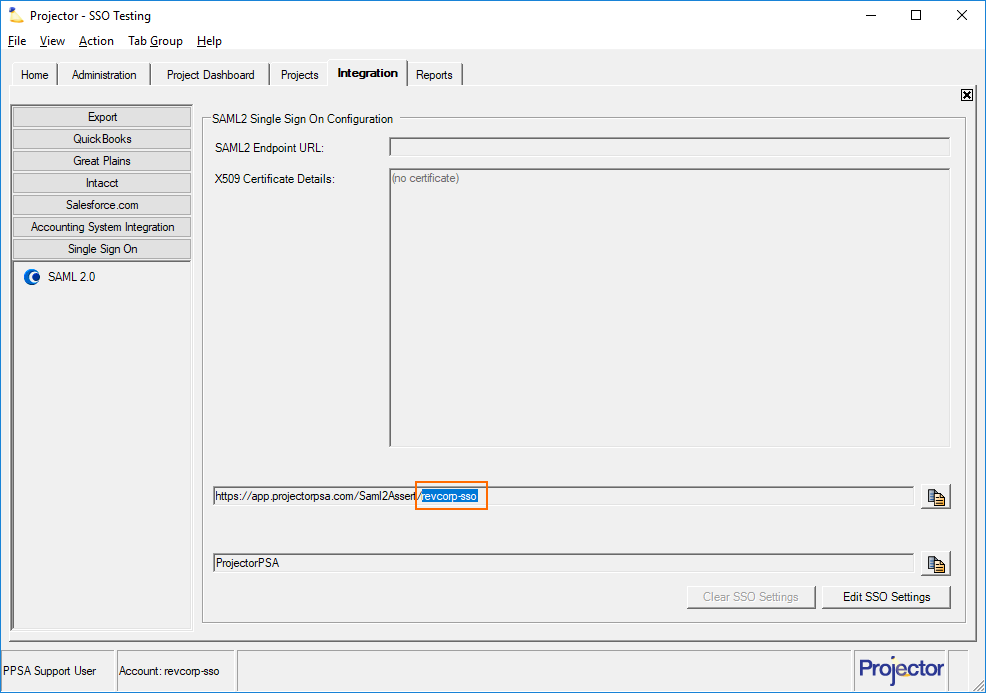
- Open Management Portal. Go to Integration tab | SSO Settings subsection | SAML 2.0 blue dot. Copy the account code from the end of the URL.
- Paste it into the Account Code field in Okta
- From step 3 on the setup instructions, copy the SAML2 Endpoint URL and download the okta.cert file
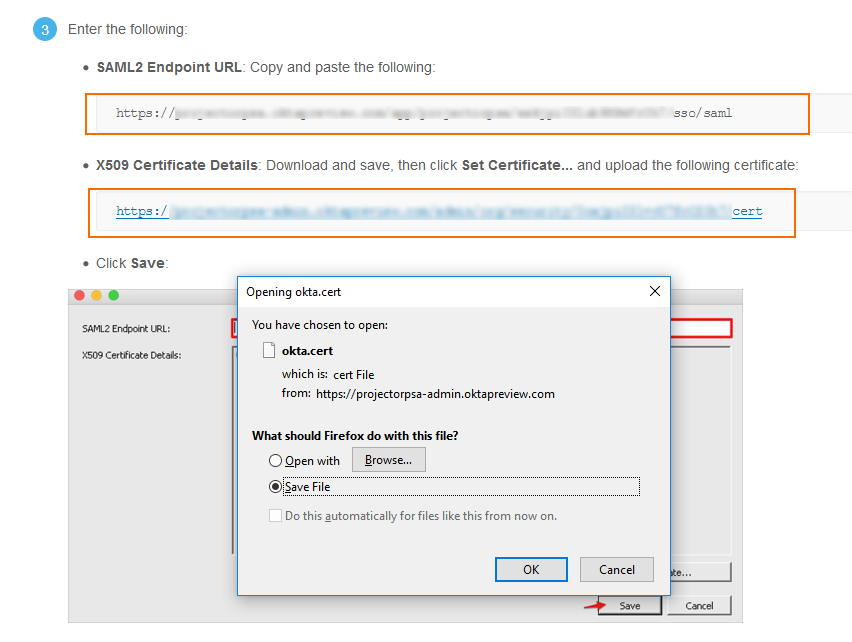
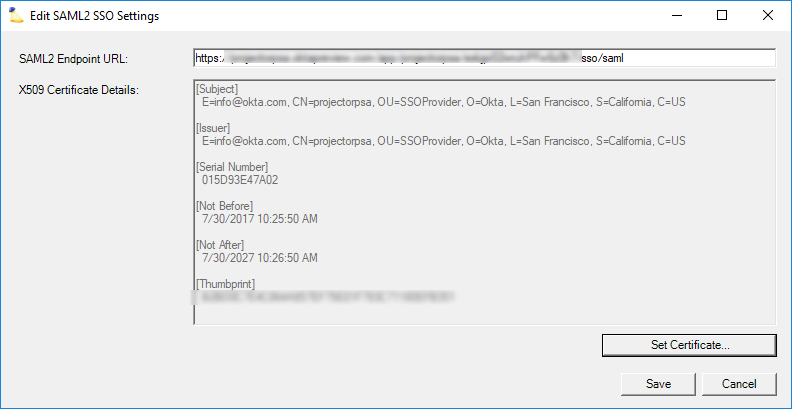
- In Management Portal click Edit SSO Settings. Paste the URL into SAML2 Endpoint URL. Click Set Certificate and upload your okta.cert file. Click Save.
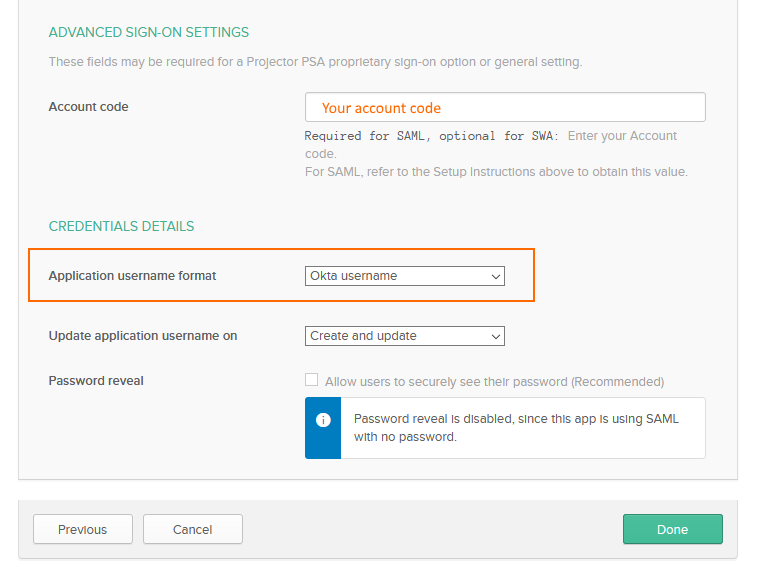
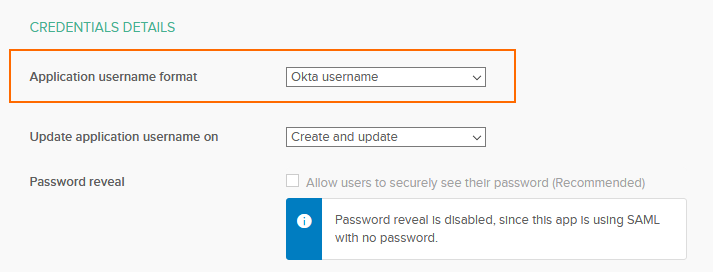
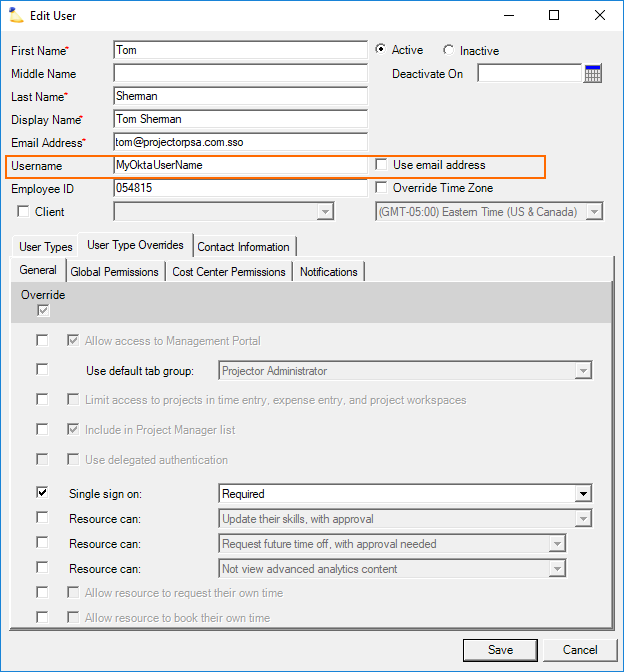
- Set your Application username format. By default Projector expects Okta to send us an email address. The email should be the same as the user's Projector email address. If you don't want to use email addresses, you can edit users in Projector and specify the value we will receive from Okta.
Manually Configure Okta
Basic steps:
- Log into Okta as administrator
- Applications menu
- Add Application
- Click Create New App
- Configure the application to assert your email address to Projector
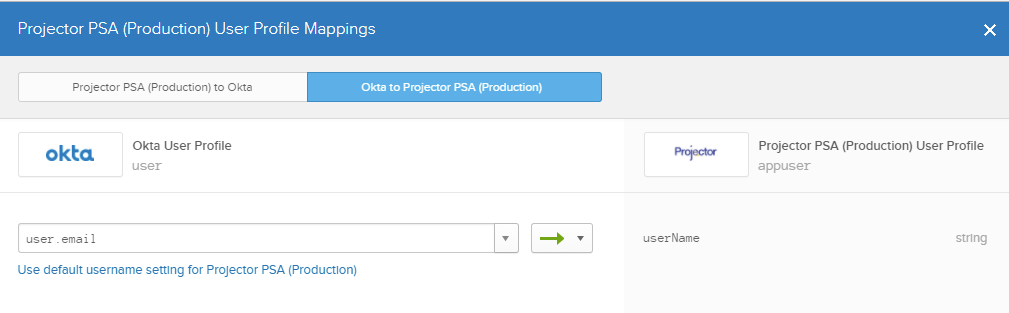
If your Okta username is not your email address, you'll need to create a mapping that sends your email instead of your username to Projector. This can be done from Directory | Profile Editor. See screenshot below.
...