Single Sign On (SSO) for ADFS
It is possible to configure ADFS to work with Projector's Single Sign On feature. This page will walk you through a general configuration.
This page assumes that the AD FS 2.0 snap-in is already installed and configured for your organization.
Requirements
To use ADFS with Projector, you need the following components.
- An Active Directory instance where all users have an email address attribute
- A server running Microsoft Server 2012 or 2008. This guide uses screenshots from Server 2012R2.
- An SSL certificate to sign your ADFS login page
- Base64 encoded x.509 certificate
- Your endpoint URL
- An ACS URL
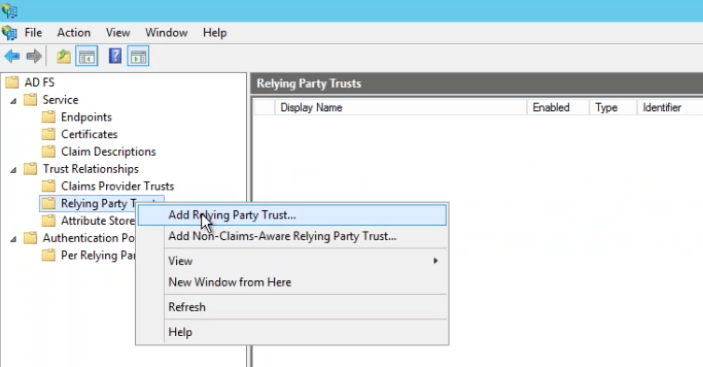
Relying Party Trusts
Steps to add Projector as a relying party trust.
Go to ADFS | Trust Relationships | Relying Party Trust, Choose Add Relying Party Trust.
Welcome
This starts the configuration wizard. Click Start.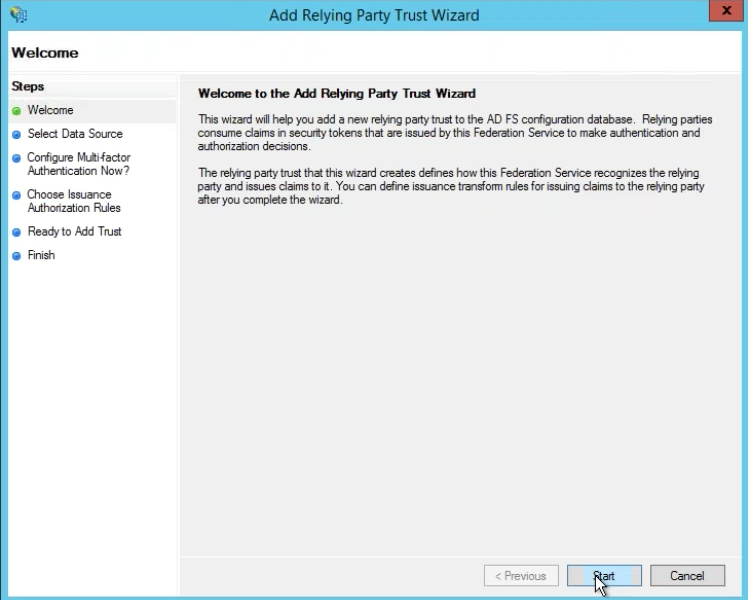
Select Data Source
Choose Enter data about the relying party manually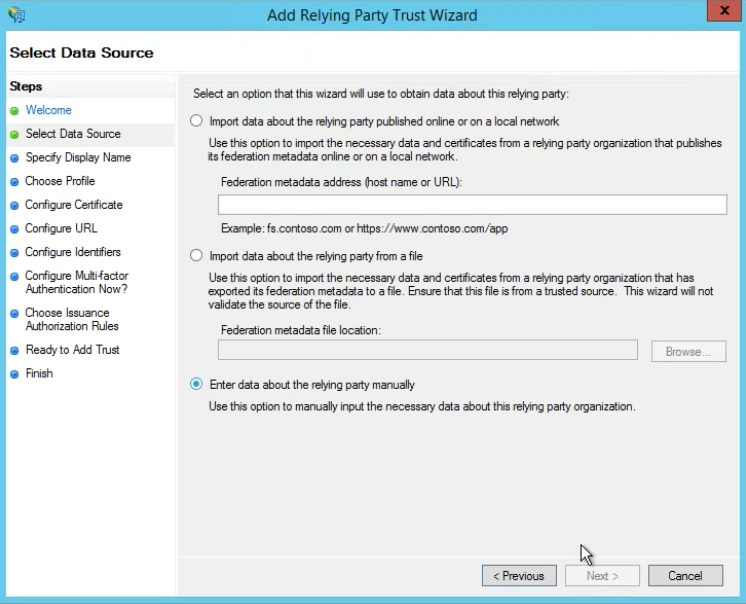
Specify Display Name
Set Display Name to ProjectorPSA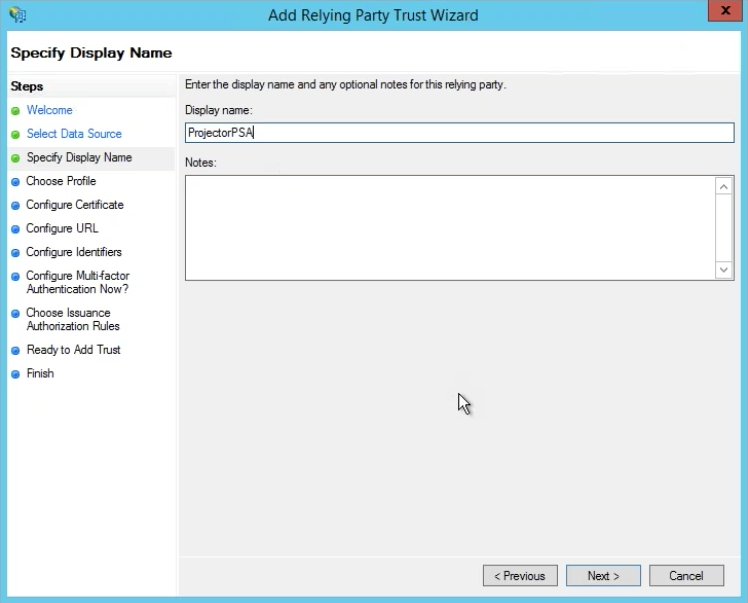
Choose Profile
Choose the radio button for AD FS profile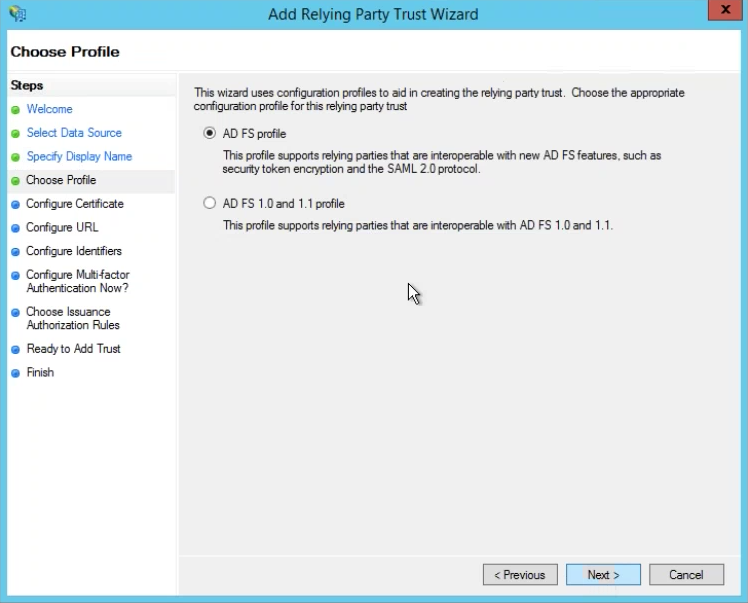
Configure Certificate
Click Next

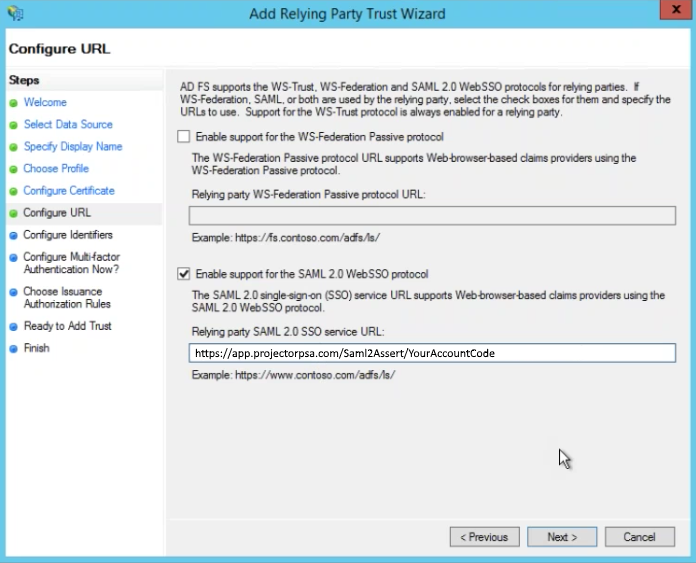
Configure URL
Tick the checkbox for Enable support for the SAML 2.0 WebSSO protocol. In the URL field enter your ACS URL. It will be in the format:
https://app.projectorpsa.com/Saml2Assert/YourAccountCode
Your account code is visible by logging into Management Portal and looking at the lower left of corner of the application. Or, you can ask Projector support for your ACS URL.
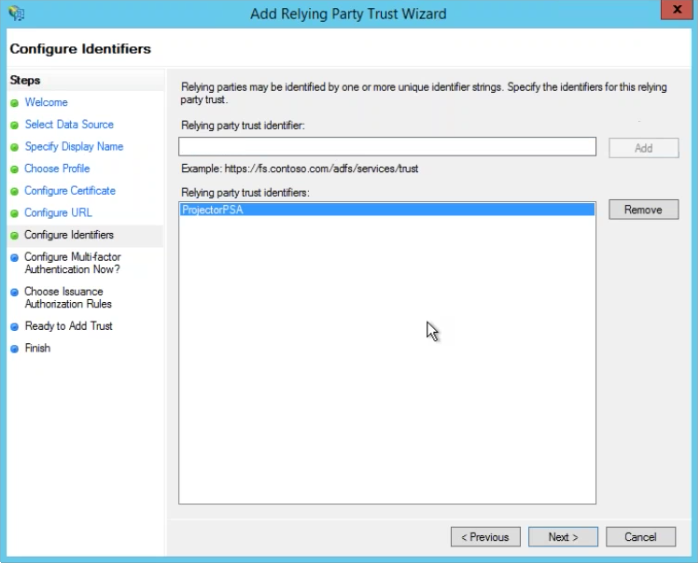
Configure Identifiers
Enter ProjectorPSA. Click Add.
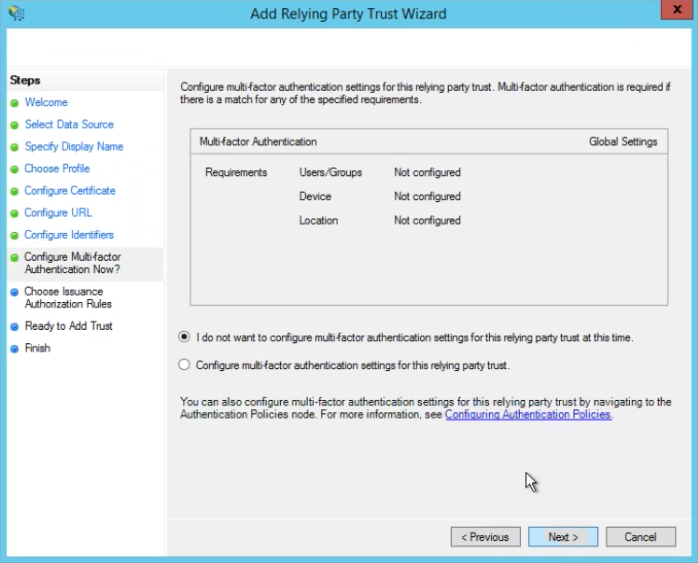
Configure Multi-factor Authentication Now?
Choose radio button for I do not want to configure multi-factor authentication settings for this relyign party trust at this time
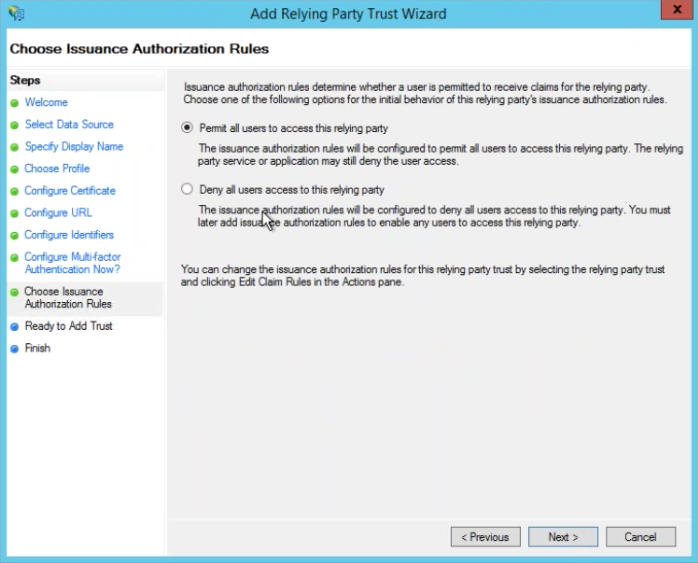
Choose Issuance Authorization Rules
Choose radio button Permit all users to access this relying party
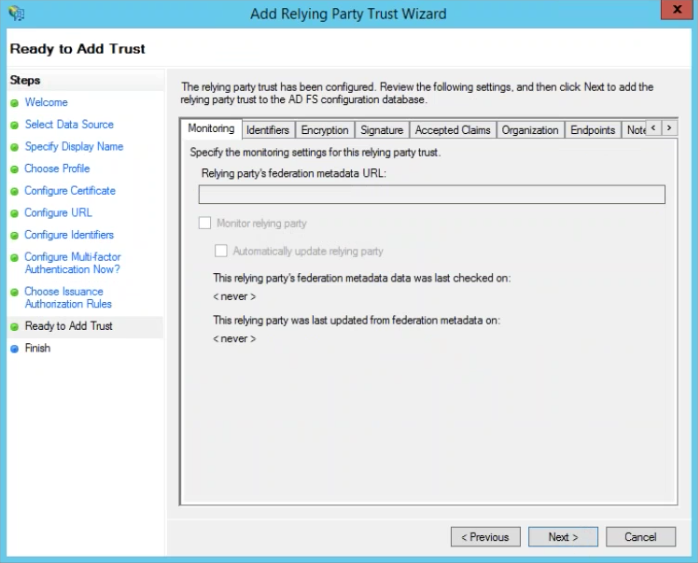
Ready to Add Trust
No changes are necessary here. Click tabs to review your settings.
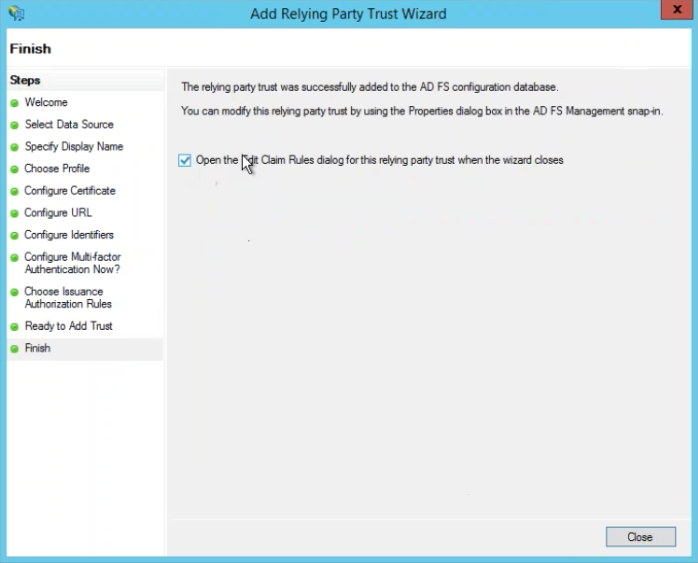
Finish
Tick the checkbox Open the Edit Claim Rules dialog for this relying party trust when the wizard closes
Claim Rules
After completing the wizard for adding a relying party trust, you'll end up here to create your claim rules. You can also reach this editor by going to the AD FS snap-in | Trust Relationships | Claims Provider Trusts.
You'll need to set up two claim rules to process incoming and outgoing requests.
LDAP Query
Follow these steps to create your first claim rule.
- Click Add Rule
- Choose Send LDAP Attributes as Claims
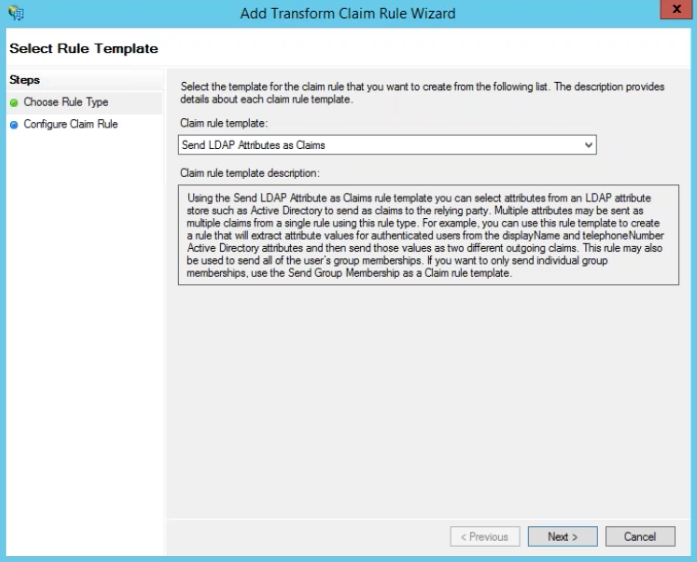
- Claim Rule Name: Email LDAP query
- Attribute Store: Active Directory
- LDAP Attribute: E-mail Address
- Outgoing Claim Type: E-mail Address
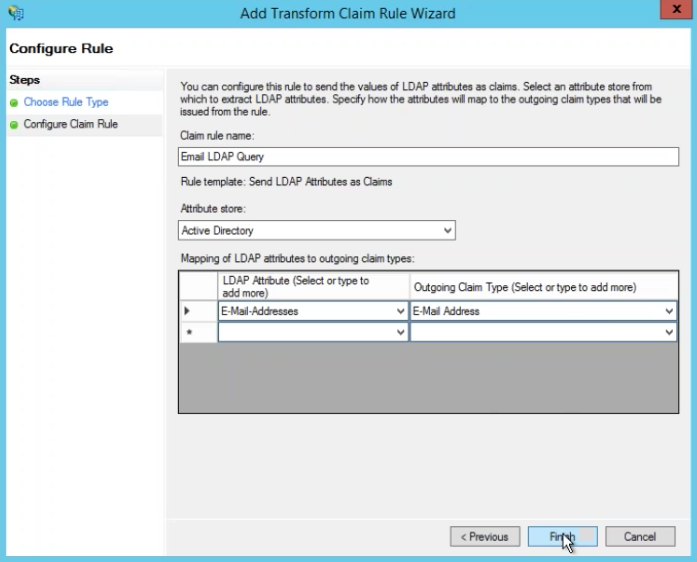
- Click Finish
Transform Claim
Follow these steps to create your second claim rule.
- Click Add Rule
- Choose Transform an Incoming Claim
- Claim Rule Name: Transform email as NameID
- Incoming claim type: E-Mail Address
- Outgoing claim type: Name ID
- Outgoing name ID format: Email
- Choose radio button Pass through all claim values
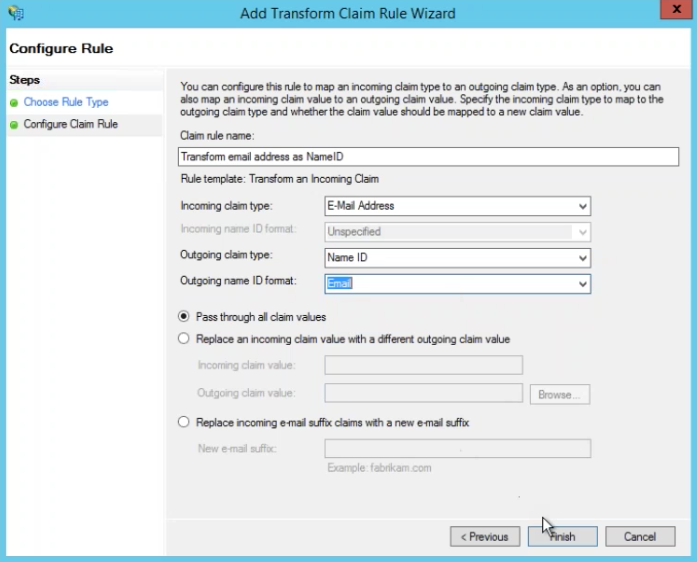
- Click Finish
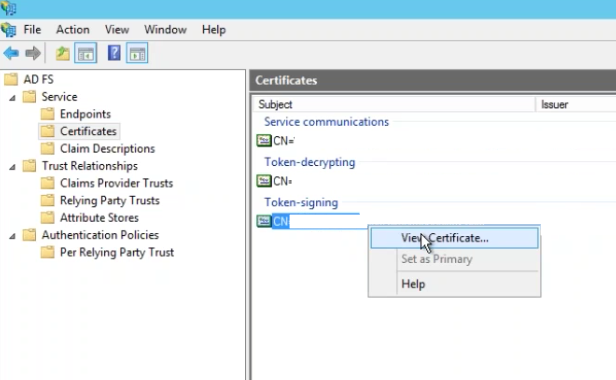
Export x.509 Certificate
Save your x.509 certificate to file.
- Go to AD FS | Service | Certificates
- Under Token-signing, right click and choose View Certificate
- Go to the Details tab and choose Copy to File
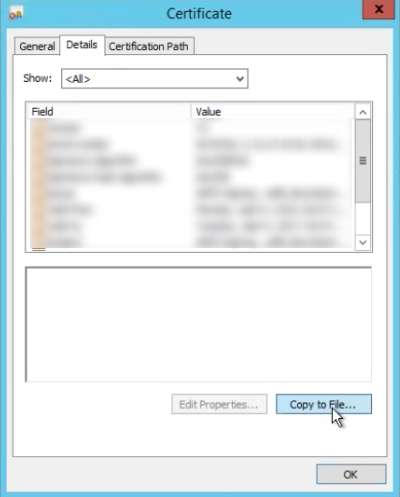
- Click Next
- Choose radio button for Base-64 encoded x.509 (.CER)
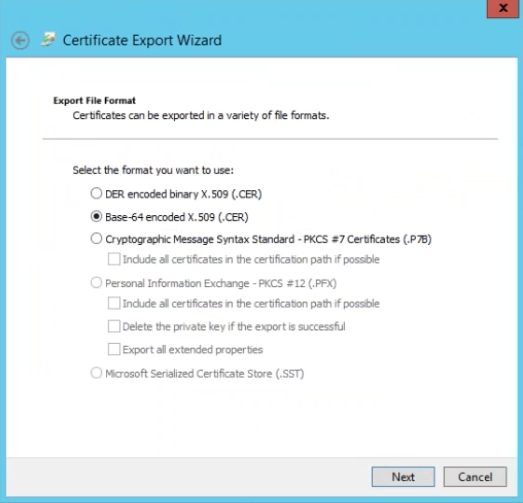
- Save to your computer
Endpoint URL
Go to AD FS | Service | Endpoints. Copy the SAML 2.0/W-Federation URL. If you chose the defaults for the installation, this will be your doman, ending in /adfs/ls/.
Add Endpoint and X.509 Certificate
Log into /wiki/spaces/dev/pages/10028249 and on the Integration tab enter your endpoint URL and upload your x.509 certificate. You'll likely need your Projector Administrator to do this for you.

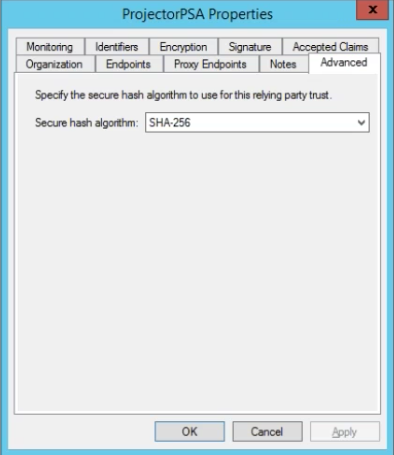
Secure Hash Algorithm
As SHA-1 has known security vulnerabilities, Projector recommends using SHA-256. You can check your algorithm by going to AD FS | Trust Relationships | Relying Party Trusts | ProjectorPSA and going to the Advanced subtab.
Test Configuration
See the Users section of this help page for instructions on configuring test users.
Single Sign On (SSO) Implementation Guide#ConfigureUsers
Troubleshooting
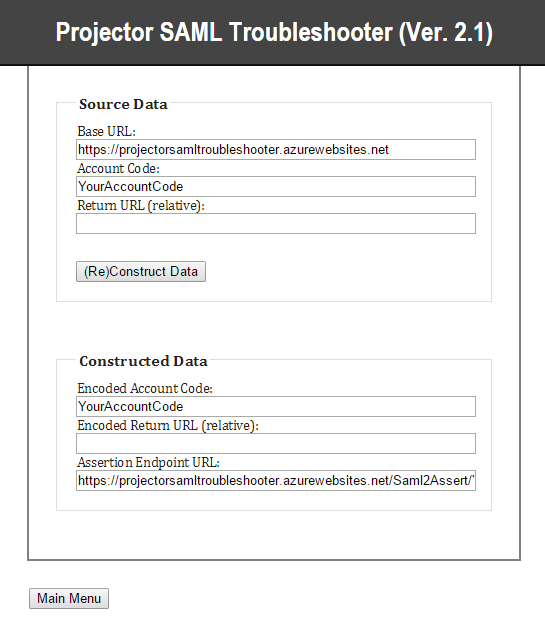
In the event that your ADFS configuration is not working, you can use our troubleshooting tool to view the SAML request and response. This will likely identify any outstanding issues.
- Visit https://projector-saml-troubleshooter.azurewebsites.net/Home/Menu
- Click Get Assertion Endpoint URL
- Enter your Account Code
- Click (Re)Construct Data
- Copy the Assertion Endpoint URL
- Go to AD FS | Trust Relationships | Relying Party Trusts | Edit ProjectorPSA
- Go to the Endpoints tab
- Update your end endpoint to be the URL you copied in step 5
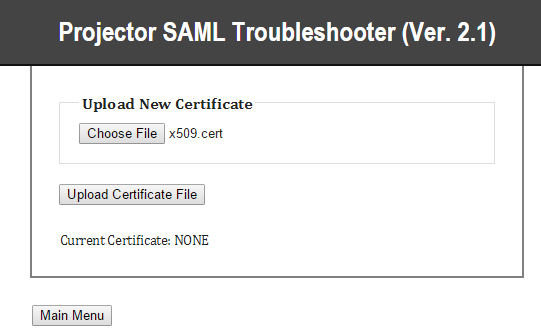
- Click Main Menu
- Click Upload Certificate
- Upload the x.509 certificate you sent to Projector support
- Click Main Menu
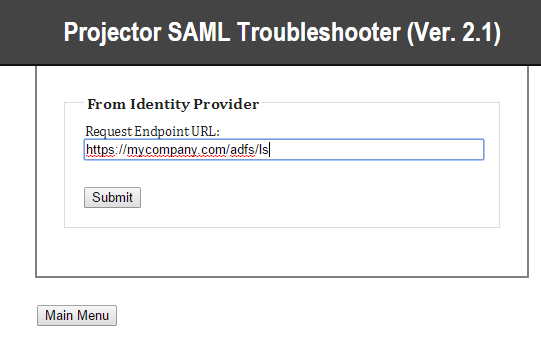
- Click Set Request Endpoint URL
- End your endpoint URL. It typically ends in /adfs/ls
- Click Main Menu
- Click Set Message Level
- Choose Debug from dropdown box
- Click Submit
- Click Main Menu

- Click Mock SAML Request
- You'll be prompted to enter your username. Enter your email address.
- Submit
- Copy the output and send it to Projector support